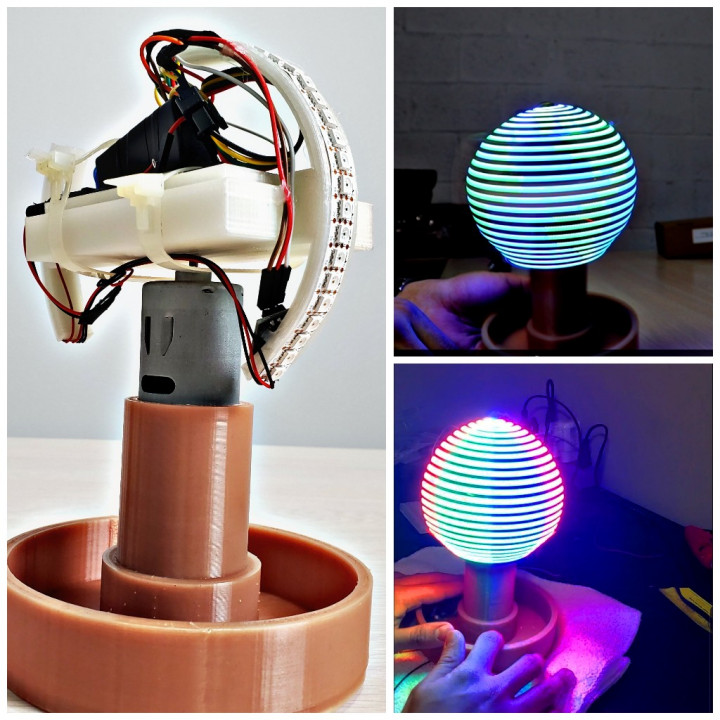
POV (Persistence of vision) 360 LED Globe Display V1
myminifactory
It appears you've posted a code snippet for an Arduino project using the FastLED library. However, it seems like there are some issues with formatting and completeness in your question. Nevertheless, I'll provide a general structure on how to read such a matrix into the Arduino environment: ### Example Usage of Reading Matrix Data into Arduino Below is a basic example of how you might read this data into an array for use within your project. Note that `leds` should be replaced with the actual name of your LED array or variable. ```cpp // Define constants const int rows = 5; const int cols = 7; // Define matrix data as a 2D array int matrixData[rows][cols] = { {0, 0, 0, 0, 0, 1, 1}, {0, 0, 0, 0, 0, 1, 1}, {0, 0, 0, 0, 0, 1, 1}, {0, 0, 0, 0, 0, 0, 1}, {0, 0, 0, 0, 0, 0, 0} }; void setup() { // Initialize FastLED library FastLED.addLeds<WS2812B, DATA_PIN, GRB>(leds, NUM_LEDS); } void loop() { // Loop through each row of the matrix for (int i = 0; i < rows; i++) { // Loop through each column in the current row for (int j = 0; j < cols; j++) { // Set LED at position (i, j) according to matrixData[i][j] leds[i*cols + j] = ColorFromPalette(matrixData[i][j]); } // Update LEDs here if necessary (e.g., with FastLED.show()) } } ``` ### Note - This code assumes a basic understanding of how the `FastLED` library works, particularly its usage for displaying patterns on an LED strip. - It's crucial to replace placeholders (`leds`, `NUM_LEDS`, `DATA_PIN`) with your actual hardware setup information. - The example above doesn't handle updating LEDs after changing the matrix. You would typically call `FastLED.show()` when you want to display the changes. ### How to Read Your Original Matrix Given your original matrix is much larger and includes many zeros, it's likely a representation of an image or a pattern that can be displayed on your LED strip. The actual process for reading this into your Arduino will depend heavily on how `leds` and `NUM_LEDS` are defined within your project. 1. **Convert Your Data Structure**: If your matrix is stored as a large array like in the snippet, ensure you understand how it maps onto your LED strip (e.g., which pixel corresponds to which value). 2. **Use a 2D Array in Arduino**: For easier handling, consider storing your data in a 2D array within your Arduino sketch. 3. **Adjust Your Code for Displaying LEDs**: Given the complexity of your original matrix, ensure you're correctly mapping this onto your LED strip and calling `FastLED.show()` to display any changes. 4. **Consider a More Elegant Way to Represent Data**: If your data is static or rarely changes, consider storing it in EEPROM or other forms of non-volatile storage for easier maintenance and portability between sketches.
With this file you will be able to print POV (Persistence of vision) 360 LED Globe Display V1 with your 3D printer. Click on the button and save the file on your computer to work, edit or customize your design. You can also find more 3D designs for printers on POV (Persistence of vision) 360 LED Globe Display V1.
