Portable Solar Dial
prusaprinters
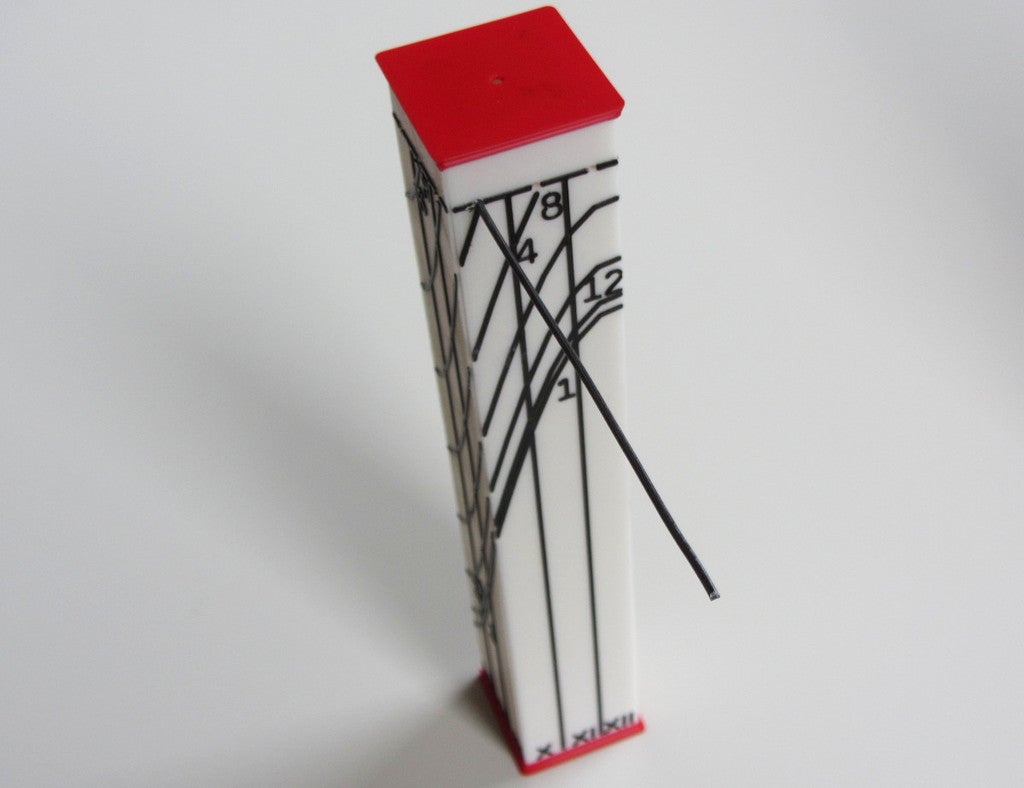
<p>Based on a description in an old (1984) education magazine I build a virtual replica of a portable sun dial which was inspired by a medieval portable sundial from Canterbury. This device is also known as a "Shepard's Dial".<br/>What I originally planned to do was make a temporal or 12-hour sun dial making it a decorative object only. This is a sun dail for modern equal hours, the example is for 52 degrees latitude, northern hemisphere. The OpenScad file is included and be set for different north-south locations.<br/>I tried to base the dimensions on proper calculations, but couldn't get it right. It looks like the original, so I did something right :-). A smarter person than me may find the proper solution.</p><p>Usage:<br/>The object requires a thin pole stuck through the proper month hole (roman numerals) until it reaches the opposite hole. Then orient the pole to the direction of the sun, so a vertical shadow appears. The end of the pole shadow should indicate the natural hour.</p><p>If the weather improves, I'll add real live images :-).</p><p>Source:<br/>The original inspiring article appeared in "BulkBoek JAARGANG 13/NR 143 from 1984". It was a special on "School Subjects in Midieval Perspective". The drawing is from J.A.F. de Rijk. <a href="https://www.bulkboek.nl/">https://www.bulkboek.nl/</a></p><h3>Print Settings</h3><p><strong>Printer Brand:</strong></p><p>Prusa</p><p> </p><p><strong>Printer: </strong></p><p>I3 MK3S</p><p><strong>Rafts:</strong></p><p> </p><p>No</p><p> </p><p><strong>Supports: </strong></p><p>No</p><p><strong>Resolution:</strong></p><p> </p><p>0.15 mm layer, 0.4 mm nozzle</p><p> </p><p><strong>Infill: </strong></p><p>15%</p><p><br/><strong>Filament:</strong><br/><br/>Any brand; PLA Colour: As you like it <br/> </p><p><strong>Notes: </strong></p><p>The four parts for the sides of a short pillar, and should be kept in place with the top and bottom (red).</p><p>The pole of 112 mm should be about 1.5 mm.</p><p> </p><p>A "M600" filament change was inserted before the second last layer.</p><p>The panels tend to warp after printing, so I used some glue in the middle of the long sides.</p><p>The original was intended with the MMU2 and printed upside down, but the results looked less good.</p><h3>How I Designed This</h3><p>Mainly by reading the relevant Wikipedia topics:</p><p><a href="https://en.wikipedia.org/wiki/Sun_dial#Vertical_sundials">https://en.wikipedia.org/wiki/Sun\_dial#Vertical\_sundials</a></p><p><a href="https://en.wikipedia.org/wiki/Solar_zenith_angle">https://en.wikipedia.org/wiki/Solar\_zenith\_angle</a></p><p><a href="https://en.wikipedia.org/wiki/Position_of_the_Sun#Declination_of_the_Sun_as_seen_from_Earth">https://en.wikipedia.org/wiki/Position\_of\_the\_Sun#Declination\_of\_the\_Sun\_as\_seen\_from\_Earth</a></p><p> </p><p> </p><p> </p><p>Category: Physics & Astronomy</p>
With this file you will be able to print Portable Solar Dial with your 3D printer. Click on the button and save the file on your computer to work, edit or customize your design. You can also find more 3D designs for printers on Portable Solar Dial.
