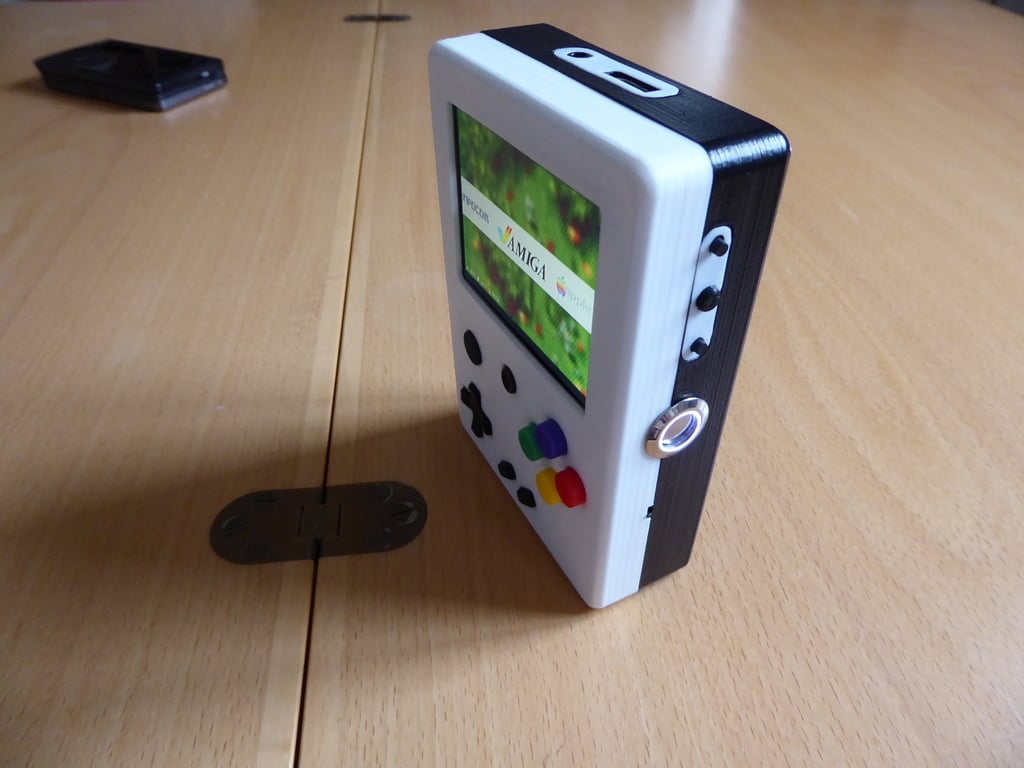
Portable Raspberry Pi game console
thingiverse
This is my Portable Raspberry Pi game console. It's 3.6 cm thick, 9.6 cm wide and 13.6 cm long. Inside is a Raspberry Pi 2 running Retropie OS which allows it to emulate games from pretty much every single game system from 1977 to 2003. It has both Raspbian and Kodi installed too. The screen is a cheap composite backup camera screen from Amazon, with a resolution of 480x320, which might not sound like much, but it's no problem at all when playing retro games. Because the screen is made for use in cars, it needs 12V to run out of the box, however this can be fixed easily so that it runs on 5V. Battery wise, it has a 6000mAh rechargeable lithium ion battery which gives it around 4-5 hours of play time. To charge the battery, it has an Adafruit PowerBoost 1000C which can charge the battery in about 5-6 hours. The two built-in speakers come from an old broken Nintendo DS Lite that I had lying around (those could be replaced by the mini metal speaker from Adafruit). The audio signal coming from the Raspberry Pi is too weak to power the speakers on its own, so it needs to be amplified. The amplifier is from an old cheap pair of external speakers for an mp3 player that I had lying around too (it could be replaced with a pam8302 amplifier from Adafruit). To turn the volume up and down, it has an analog "slider" from an old pair of headphones (you could probably find something similar pretty easily). The built-in controller was the hardest part of this project, or more specifically the ANALOG thumb stick. The built-in controller I made myself, it's a breadboard PCB with tactile switches, and an analog thumb stick on it. The tact-switches were pretty easy to connect, but I had a lot of trouble with the thumb stick! Because it's analog, the Raspberry Pi cannot understand it right away, so the signal from the thumb stick must be converted to a digital format first. If I had been a master programmer, I could probably have gotten away with buying an ADC (analog to digital converter) and then writing a driver for it myself, but that did not work out for me. So I did some research on the internet, and found that the Arduino could convert analog signals to digital, but since the Arduino was way too big to ever fit in my design, I decided to go with an arduino "clone" called the Teensy because of its much smaller footprint. After tens of hours of frustration, I finally managed to write a working script in a programming language that I had never tried before, and get it on to the Teensy! (If you have a similar problem, you can download the script from the download list "Controller_script_for_Arduino"). Everything except for the components and the four action buttons are designed in Autodesk 123D Design, and 3d printed on an Ultimaker 2. I can definitely recommend both 123D Design and the Ultimaker 2 - they've been a solid team all the way through this project. I would not recommend any non-3D modeler to build this project, some of the parts will be hard/impossible to get, so you would have to do some modifications. This is 100% possible since I've included the 123D Design file - but it's on your own risk! Retropie is the main operation system, and you select game system and game through Emulationstation. Retropie is a great operation system, so go and check it out if you think it sounds interesting: http://blog.petrockblock.com. Though Retropie is the main operation system, it has both Kodi (XBMC) and Raspbian installed, which means that you can play movies, series and music right on the console! You can even surf the web through Raspbian too, if you have a keyboard connected. Those two operation systems can be launched through Emulationstation as well. Special thanks to Floob from YouTube and Petrockblog/Retropie forum, who helped me through the entire configuration of the built-in controller - I could not have made it without his help! Video links: https://www.youtube.com/watch?v=FM7mc-y_9TI, https://www.youtube.com/watch?v=oQrT8IEYkmU, and https://www.youtube.com/watch?v=oJQeFrU50oE.
With this file you will be able to print Portable Raspberry Pi game console with your 3D printer. Click on the button and save the file on your computer to work, edit or customize your design. You can also find more 3D designs for printers on Portable Raspberry Pi game console.
