Pop Up Warning Sign - Bikes on Roof
prusaprinters
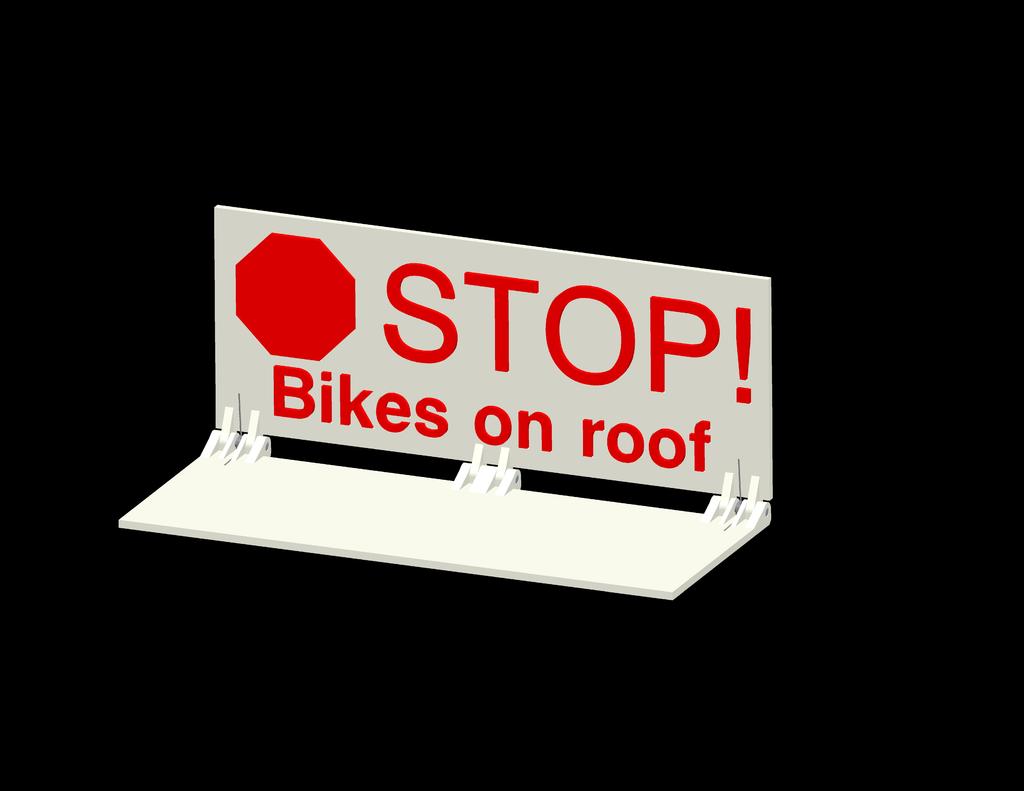
<p>Tired of forcefully taking your bike off of your car's roof rack by driving it into your garage door? This aims to put an end to decapitated bikes everywhere. Sign mounts to your car's hood with magnetic strips. When traveling at speed, air moving over the car folds the sign closed. At low speeds or when stopping, springs pop the sign open, offering up a reminder that your bikes are still on the roof.</p> <p>Additional parts needed (with links):</p> <p>(3) 7/8" long, 1/8" diameter dowel pins<br/> (<a href="http://www.mcmaster.com/#90145a474/=10ru635">http://www.mcmaster.com/#90145a474/=10ru635</a>)</p> <p>(2) 90 degree torsion springs, .235" OD, .025" wire, left- or right-hand wound<br/> (<a href="http://www.mcmaster.com/#9287k67/=10ru6kf">http://www.mcmaster.com/#9287k67/=10ru6kf</a>)</p> <p>(27") 1" wide, 1/8" thick, adhesive-backed, high-pull magnetic strip<br/> (<a href="http://www.mcmaster.com/#5769k82/=10ru84r">http://www.mcmaster.com/#5769k82/=10ru84r</a>)</p> <p>Model Notes:<br/> I've included the parts with both tight tolerance dimensions as well low(er) tolerance dimensions for the dowel pin holes (I ended up needed to add a little slop to the holes to get the pins to fit nicely). Same goes for the offset of the letters. If you wanted to play it safe, you could start with the tight tolerance models and carefully open up the holes with a drill or shave down the edges of the letters, if needed. The top, base and letters are printed separately and then the letters are glued to the top panel using crazy glue or ABS slurry. For those with dual extruders or wishing to color the letters by hand, I've also included models with the letters already in place on the top panel.</p> <p>Printing Notes:<br/> I used ABS for my prints. .2mm layer height, 25-40% infill (to add some mass to the panels). Letters are printed face down as it will provide a better cosmetic surface.</p> <p>Assembly notes:<br/> As mentioned above, the letters are glued into place on the top panel. The magnetic strip is to be cut into 9" sections and installed 3-wide across the underside of the bottom panel. Use the dowel pins to secure the panels to each other; the springs get installed on the two outside hinges, run the dowel pin through the center of each.</p> <h3> Print Settings</h3> <p><strong>Printer Brand:</strong></p> <p>RepRap</p> <p><p class="detail-setting printer"><strong>Printer: </strong> <div><p>Makerfarm 12</p></div><strong>Rafts:</strong></p> <p>No</p> <p><p class="detail-setting supports"><strong>Supports: </strong> <div><p>No</p></div><strong>Resolution:</strong></p> <p>Printed at .2mm height with a .4mm nozzle</p> <p><p class="detail-setting infill"><strong>Infill: </strong> <div><p>25%, 1mm thick top and bottom layers</p></div></p> <p><strong>Notes:</strong></p> <p>I used a brim when printing the letters which may or may not be necessary.</p> </p></p></p> Category: Sport & Outdoors
With this file you will be able to print Pop Up Warning Sign - Bikes on Roof with your 3D printer. Click on the button and save the file on your computer to work, edit or customize your design. You can also find more 3D designs for printers on Pop Up Warning Sign - Bikes on Roof.