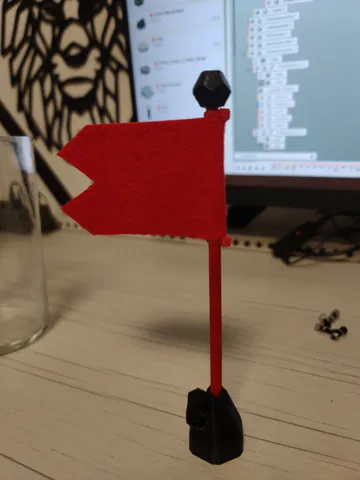
Pole bracket for iRobot Create 3 (TurtleBot4)
prusaprinters
IntroductionIn the Robotics Software Engineering program at URJC, we've recently welcomed four iRobot® Create® 3 robots —an event that's certainly cause for celebration!— However, an immediate challenge presented itself when we lined them up side by side on the floor: how could we differentiate one from the other?In these fledgling stages of our latest acquisition, our priority is to uphold the robots' pristine aesthetics for as long as humanly possible. Though I do hope we can laugh about this concern sooner rather than later, for now, es lo que hay.Given our intention to utilize them as a fleet for both educational and research endeavors, it's essential that we're able to distinguish between them from a distance. Mere stickers with numbers or letters might not suffice in this regard. It was during this contemplation that we stumbled upon the idea of using colorful pennants. So here we are! Additional hardware ⌀ 5mm rod or pole of the material and lenght of your chose. We used 150mm wooden rods, however this is completly up to you!Threaded inserts M3x4mm (x2) NOTE. Longer inserts will not work!DIN912 M3x10mm (x1)DIN7380 M3x6mm (x2)DIN125 M3 (x3)DIN985 M3 (x1) Printing tipsI highly recommend using PETG for this application, as the clamping bolts will exert direct pressure on the weakest part of any FDM printed component. Layer adhesion is a crucial consideration here. While you have the freedom to choose any material you prefer, it's essential to keep a close watch on this aspect.Regarding the printing settings, feel free to select those with which you are most comfortable. However, bear in mind that since the final assembly involves additional hardware, the tolerances of your part will also play a significant role. Assembly Insert two threaded inserts in two diagonal holes of your chose —See pictures attached— , using this guide as a reference.Insert the rod or pole all the way down in the intended hole. The tolerances are tight, you might not need the bolt after all but a hammer! 😬Use the bolt (DIN912), one washer and nut to firmly clamp the pole with the bracket.Use the remaining bolts to attach the whole assembly to the surface plate of the robot.Optional. There is another model available, called Finnial. This piece is designed to be press-inserted at the very top of your rod, serving as a decorative element. We should keep an eye on perfomance too!Take some pics and upload your result! 😄Done! Hope you find it useful. Cheers!
With this file you will be able to print Pole bracket for iRobot Create 3 (TurtleBot4) with your 3D printer. Click on the button and save the file on your computer to work, edit or customize your design. You can also find more 3D designs for printers on Pole bracket for iRobot Create 3 (TurtleBot4).
