Pokeball, with magnetic clasp (alternate)
pinshape
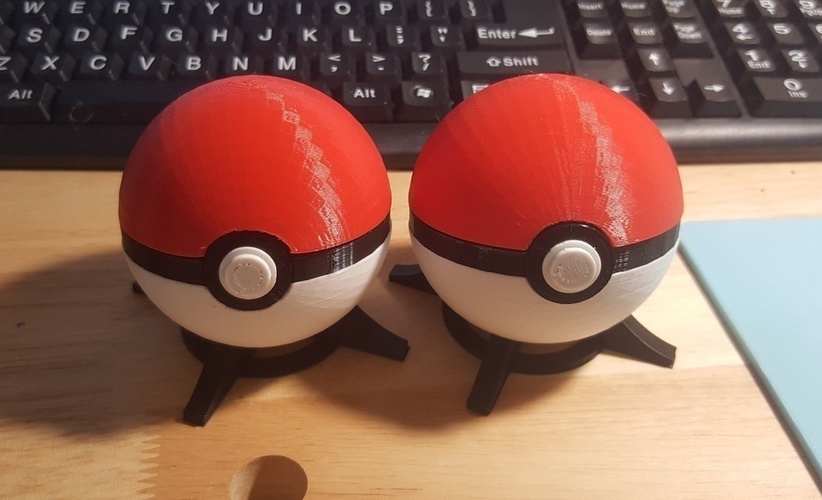
I fine-tuned CarryTheWhat's original design to make it more practical for printing and assembly. To achieve this, I adjusted Print Settings: 0.20mm resolution with 10% infill ensured a solid pin and standard infill throughout the rest of the print. Using Simplify3D, I determined that layer 35 was the optimal transition point to switch from black to white filament. Although it might not have been necessary, printing with 4 outer shells guaranteed the pin's solidity and consistency. A notable challenge arose when S3D failed to automatically place support under the tip of the pin; manual intervention was required, starting with a 3mm build platform space then adding additional support underneath. This design was created entirely in Tinkercad. Firstly, I closed the gap in the ring since I intended to create my own pin from scratch anyway – and indeed remixed the original pin when printing the first few iterations. I combined the ring with the bottom part, designing a hinge inspired by the original but with a smaller gap and more durable pin. To make the design more functional, I reduced the button size so it could fit snugly into its socket without needing a heat gun or forceful persuasion. The base of another Pokeball caught my eye, so I sized it accordingly and incorporated it into the design.
With this file you will be able to print Pokeball, with magnetic clasp (alternate) with your 3D printer. Click on the button and save the file on your computer to work, edit or customize your design. You can also find more 3D designs for printers on Pokeball, with magnetic clasp (alternate).