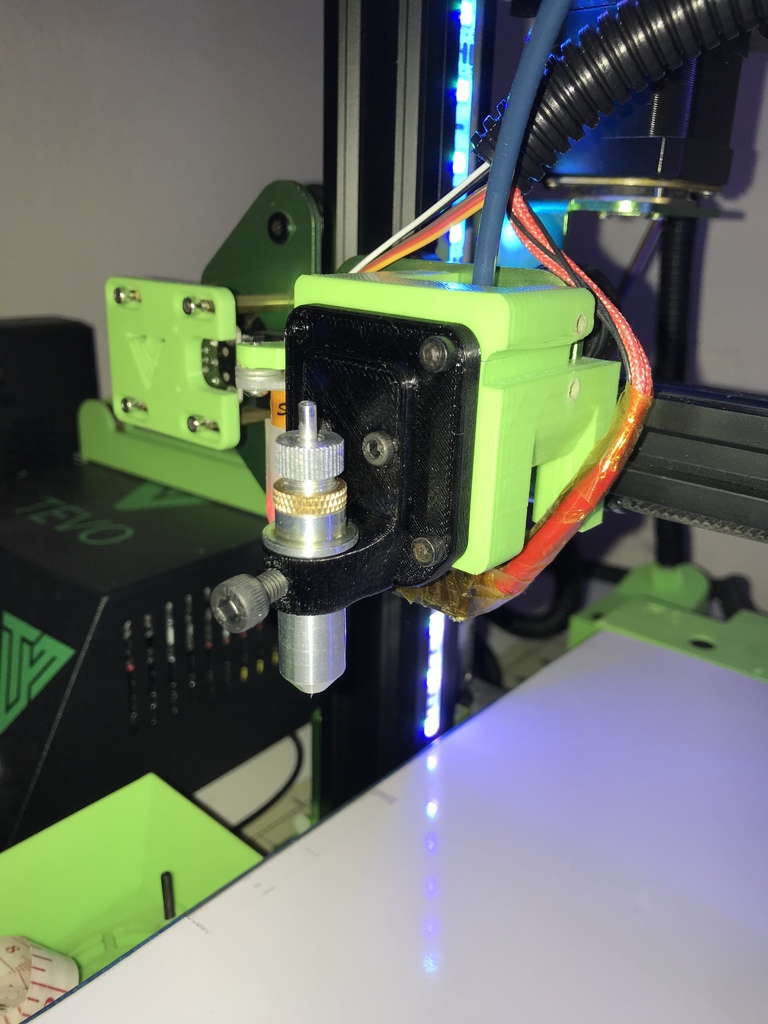
Plotter/Vinyl Cutter Mount (attaches to 40mm fan - Ender 3, CR-10, Tevo Tornado)
thingiverse
This versatile plotter/cutter holder can be mounted anywhere with a 40mm fan, making it easy to switch between 3D printing and plotting/cutting on various mounts like the Petsfang V2 mount. It also fits directly on the fan or even with the Petsfang air duct in place, ensuring seamless operation. The bracket was specifically designed for the vinyl cutter linked below but should work with most other types, including Sharpies and pens. A hole is provided to secure the tool down using an M5 screw. I've included the Fusion 360 file so you can edit it to fit other tools as needed. I'm using a Tevo Tornado with a 300mm x 300mm bed, which allows me to use the vinyl sheets linked below without any issues. I also recommend using a cutting pad (linked below), but be prepared to cut it slightly to fit on the bed. Any printer with a similar bed size should work well, and smaller beds like the Ender 3 can accommodate smaller vinyl sheets with adjusted settings. Update (2/12/2019): To prevent slippage, I increased the thickness of the bracket around the grub screw after multiple uses. Hardware Needed: * 2x 8mm M3 screws to secure the bracket to the base * 2-3x 20mm M3 screws to secure the base over the fan (8mm screws will work if attaching directly to fan mount without the fan in between) * 2x M3 nuts * 1x M5 screw to secure the tool to the bracket * A Sharpie or pen For cutting vinyl, you'll also need: * A vinyl cutter swivel knife (linked below) * 300mm x 300mm Vinyl sheets (linked below) * 300mm x 300mm cutting mat (linked below) Generating Gcode: First, modify your document settings in Inkscape to match mine as shown in the picture above. You only need to change the width and height under "Custom size". Follow this guide to calibrate your printer for plotting and set up with Inkscape: https://www.instructables.com/id/Use-3D-Printer-As-a-Plottercutter/ I strongly suggest using the extension recommended in the tutorial above, which you'll need to manually install in Inkscape. This is better than the default Gcode extension, which caused issues for me. After converting your object to a path and saving as a "3-axis gcode plotter," copy my settings from the picture above. Keep in mind that using this mount will lose 40mm in the back of your bed since it's 40mm in front of the nozzle when using Petsfang without the fan. For speed, I find that 20mm/s works well for cutting, but you can go up to 60mm/s for plotting with no issues. For larger prints or those requiring a lot of filling, don't be afraid to test faster speeds. Important: Make sure to remove the G28 Z line in the gcode file before sending it, as this will prevent the plotting/cutting tool from crashing into your bed and causing damage. To avoid adding this line, edit the extension file "gcodeplot.js" and delete line 66 "gcode.append('G28 Z; home')". Before homing all axes, ensure the tool is high enough above the bed to avoid any collisions.
With this file you will be able to print Plotter/Vinyl Cutter Mount (attaches to 40mm fan - Ender 3, CR-10, Tevo Tornado) with your 3D printer. Click on the button and save the file on your computer to work, edit or customize your design. You can also find more 3D designs for printers on Plotter/Vinyl Cutter Mount (attaches to 40mm fan - Ender 3, CR-10, Tevo Tornado).
