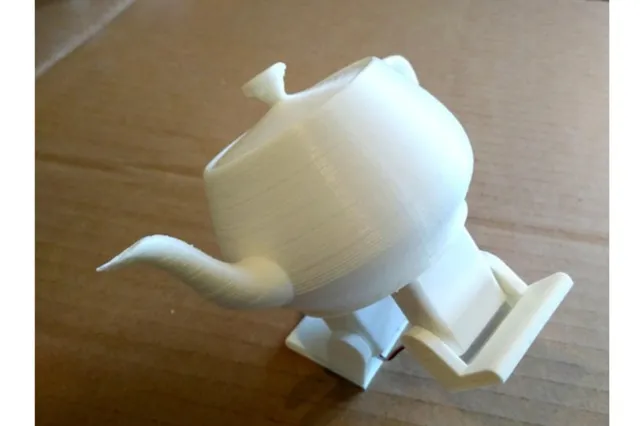
Plasteac teapot robot
prusaprinters
A cute robotic dancing teapot!The Bob robot, itself remixed from the Arduped robot, inspired an impressive number of clones with its really good design. The most famous ones might be Zowi, and more recently Otto. They are both simple, cheap, open-source and 3D-printed little robots which have refined Bob two-legged design. Yet, I am not a fan of their strange square heads. What I would like is a teapot. A dancing teapot. BOM (Bill of materials)I'll use the following components:A 5-volt Arduino Pro Mini board (a compatible clone is fine)A 5-volt switching regulator, also called UBEC in the hobbyist world. Don't use a linear regulator, as it would be really inefficient here.Four 3.7g micro servos, H301 or compatibleA 9-volt battery connector (with of course a 9-volt battery)A USB to UART bridge to program the robotDupont wires, M2 screws, pins, prototype board, and glueA piezo sounder to play musicI chose to design 3D-printed parts from scratch, not only because I prefer to use OpenSCAD over FreeCAD, but also because the design of the top part will be entirely different anyway. Also, for once, it will be powered by a 9-volt alkaline battery rather than a Lipo battery.3D models forming the robotic teapot. You can download the SCAD source files (licensed under GPLv3) and the corresponding STL files here. You might have recognized the shape of the famous Utah teapot! However, this is a subdivided and smoother model since the original is low-poly. I designed three new plastic parts for the second version of the lid. The new lid features a hole instead of the handle, and the actual handle is to be glued to an axis going through the lid, with an elliptic lever at the bottom. The lever shall push a micro switch attached on the inside of the lid, just like you would press a button.Assembly InstructionsThe first step is to screw the two hip servos on top of the platform.The hip joint servos attached to the platformThen, I soldered a small power distribution board with a piece of prototype board and some pins. The servos are connected and powered with the voltage regulator. The signal pins of the servos will be connected to the Arduino pins 5, 6, 7, and 8. The Arduino board power is also connected to this board.One of the servos connected to the power distribution boardNext, the two legs are attached to the hip servos. The servo arm is clipped inside each leg then screwed, maintaining the leg in position. A drop of oil helps the legs rotate smoothly against the body.Legs connected to the bodyThen, the ankle servos are placed in the legs and secured with M2 screws on the top part of the leg, and foots are simply clipped to the ankles!Ankle servos placed in the legsFoots clipped to the anklesTo prevent a complete cable mess, I tried to attach the electronics to the platform with sticky tack and clamping rings.Electronics attached on the platformThe teapot-shaped top is put onto the platform and glued. Everything should fit nicely inside of it. The 9-volt battery connector, soldered to the voltage regulator, is ready to host the battery.Arduino board connected and body glued on the platformFinally, the last touch: the lid is clipped on top!One the parts are printed, the handle is glued to the axis that goes through the lid. Then, the micro switch is soldered to a piece of prototype board. Two pins are then soldered to the board on the switch poles. Finally, the switch is glued to the bottom of the lid, so it can be operated by rotating the handle.The two switch positions: rotating the handle allows to open or close the switch.The positive pole of the battery is rerouted through the switch, by connecting it to the switch instead of the regulator and by connecting the switch to the regulator, so the switch needs to be on for the robot to be powered.The switch connected to the robotic teapot's batteryThe new lid can now be closed. It easily clips to the body, but we have to pay attention that no cable jams the switch.The modification is nearly invisible from the outsideWith this handy modification, the robotic teapot can now be operated just by rotating the handle!The robot is fully assembled and ready to be programmed!We invested lots of time and resources to provide open source code, software and hardware, please support this project by just giving us a ❤ Like and share and you are welcome to be a part of this friendly community of robot builders, teachers and makers. Join today our Otto Builder community
With this file you will be able to print Plasteac teapot robot with your 3D printer. Click on the button and save the file on your computer to work, edit or customize your design. You can also find more 3D designs for printers on Plasteac teapot robot.
