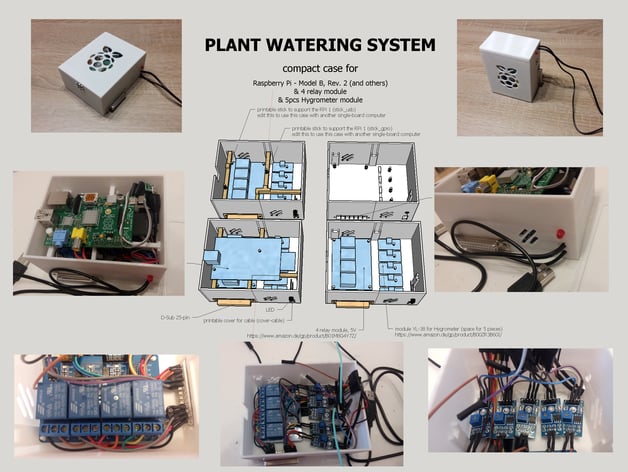
plant watering system - compact case for RPi 1/2/3, 4 relay module & 5pcs Hygrometer module
thingiverse
This text appears to be a tutorial or guide for building an electronic project, specifically a plant watering system. Here's a summary of the content: **Hardware Requirements** * Raspberry Pi 2/3 (with updated holder) * 4 relay module * YL-38 Hygrometer module * D-Sub connector * Various cables and connectors **Print Settings** * Printer: Monoprice MP Select Mini * Infill: 100% for the case, 25-30% for other parts * Resolution: 0.21875mm **Instructions** 1. Print the parts (case, sticks, etc.) 2. Remove supports with a comb pliers 3. Test the D-Sub connector 4. Solder power distributors (VCC and GND) for the Hygrometer module 5. Solder an LED and test it 6. Place components and cables 7. Connect relay modules and Hygrometer module to the D-Sub connector 8. Connect relays and power distributors (VCC and GND) for the Hygrometer module 9. Place the cover for the cables (optional) 10. Screw the D-Sub connector in place **Notes** * The mini version of the case requires unsoldering and resoldering the GPIO pins. * A new top/cover is available to avoid this issue (see update 04/27/2017). * The power plug was bypassed due to its length. Overall, this guide appears to be a comprehensive tutorial for building an electronic plant watering system using a Raspberry Pi and various components.
With this file you will be able to print plant watering system - compact case for RPi 1/2/3, 4 relay module & 5pcs Hygrometer module with your 3D printer. Click on the button and save the file on your computer to work, edit or customize your design. You can also find more 3D designs for printers on plant watering system - compact case for RPi 1/2/3, 4 relay module & 5pcs Hygrometer module.
