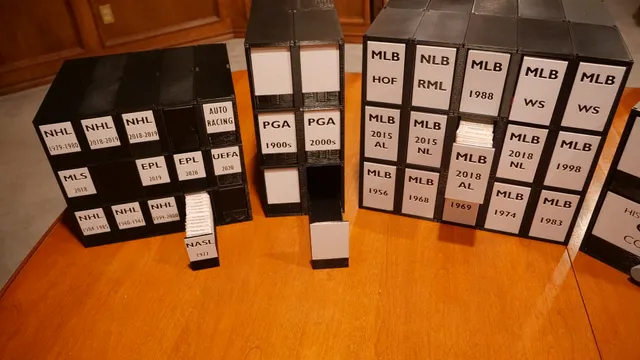
PLAAY Larger Card Storage
prusaprinters
PrintingTwo bases are laid together at the shorter side for each drawer in the unit. Thus, a unit with one drawer needs 4 bases (2 for the top, 2 for the bottom. A unit with 2 drawers needs 8 bases if constructed horizontally or 6 bases if constructed vertically.I recommend printing the supports vertically with just the square pip on either end resting on the print bed. Then print with supports. This provides the most accurate dimension for the square pip. Printing sides and backs is optional. Those pieces do not add any stability or functionality to the unit; they are purely aesthetic.I print all these models in PLA with 0.3mm layer height and 15% infill. AssemblyWatch the video at the Paraphernalium YouTube channel to see the assembly of a unit. https://www.youtube.com/channel/UCqUMiay0OJRkRLxIOwT74JAWhen assembling the unit, press firmly to ensure that the supports are completely inserted into the bases. You should be able to move a full storage unit, but it’s safer to place it on your shelf before filling it with cards.Extras Each drawer needs at least one 3D-printed divider to support the cards. I created the cardstock dividers with team labels in Adobe Illustrator. I have included the Adobe Illustrator file as well as a PDF copy of my dividers for you to print and cut.Each drawer has a slot for a magnet. The magnet slots in the mini drawers are 7mm wide, 2mm deep, and 8mm high. The magnet slots in the max drawers are 11mm wide, 2mm deep, and 12mm high. I buy my magnets from K&J Magnets (https://www.kjmagnetics.com/). Any disc-shaped magnets that fit the slots will suffice. The magnets can fit loosely as the front of the drawer will hold the magnet inside the slot. I have included two simple versions of a “key” for the drawers. The keys have a 5.25mm diameter slot for gluing a magnet. I use a cylinder magnet for the key to provide more magnetism.Each drawer (mini, max, golf) has a drawer front to fit its size. The max and mini drawer fronts are blank. There are 3 solutions for putting labels on the drawers. 1) Print the included blank fronts and create stickers using address labels. 2) Use a slicer that supports texturing such as ideaMaker from Raise3D to engrave your own text into the included blank fronts. 3) Use the blanks as a template for creating your own 3D drawer fronts from scratch
With this file you will be able to print PLAAY Larger Card Storage with your 3D printer. Click on the button and save the file on your computer to work, edit or customize your design. You can also find more 3D designs for printers on PLAAY Larger Card Storage.
