Pizza Flow Rate Test
prusaprinters
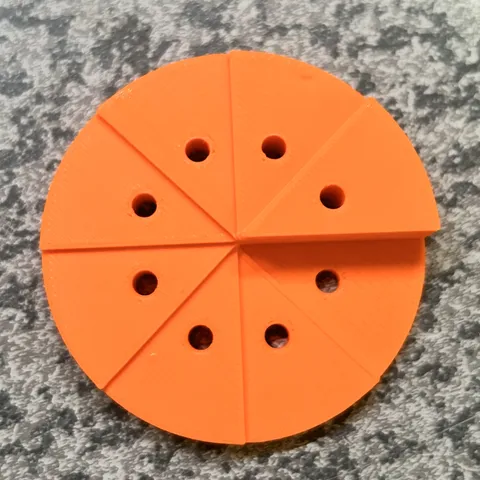
The method that worked best for me for testing the flow rate was the visual method on ellis3dp.com. But, it takes such a long time to print out many different blocks, and I have seen that you sometimes have to fine-tune the overlap setting as well to get the infill to connect properly where there are holes or corners. Here is the model I now use to tune flow rate and overlap (if needed). Each slice of the Pizza gets a new flow rate and you choose the flow rate that looks best (visual method). There are 8 slices, so it is possible to set 8 different flow rates.Using the model:- Before calibrating the flow rate, the temperature and pressure advance have to be calibrated first. - Dry your filament. Wet filament will look like it “over extrudes”, especially when working with more exotic materials like nylon. - Use a 15% infill. You don't want a bad z-offset to influence what the top looks like.- At each layer height where the new slice starts, add a gcode to set the flow rate of that layer. M221 S100 would set the flow rate to 100. - Inspect the model. A good flow rate is where the infill and the perimeters are the same height. if the infill is lower than the perimeter, the flow rate is too low. If the infill is above the perimeter (it will look like the inside perimeters are covered by the infill), the flow rate is too high. You can also judge by looking at how even and flat the top layers are.Here are the layer numbers and gcode to insert for a 0.2mm layer height:Layer 12 - M221 S95Layer 18 - M221 S96Layer 24 - M221 S97Layer 30 - M221 S98Layer 36 - M221 S99Layer 42 - M221 S100Layer 48 - M221 S101Layer 52 - M221 S102
With this file you will be able to print Pizza Flow Rate Test with your 3D printer. Click on the button and save the file on your computer to work, edit or customize your design. You can also find more 3D designs for printers on Pizza Flow Rate Test.