PineCube box
prusaprinters
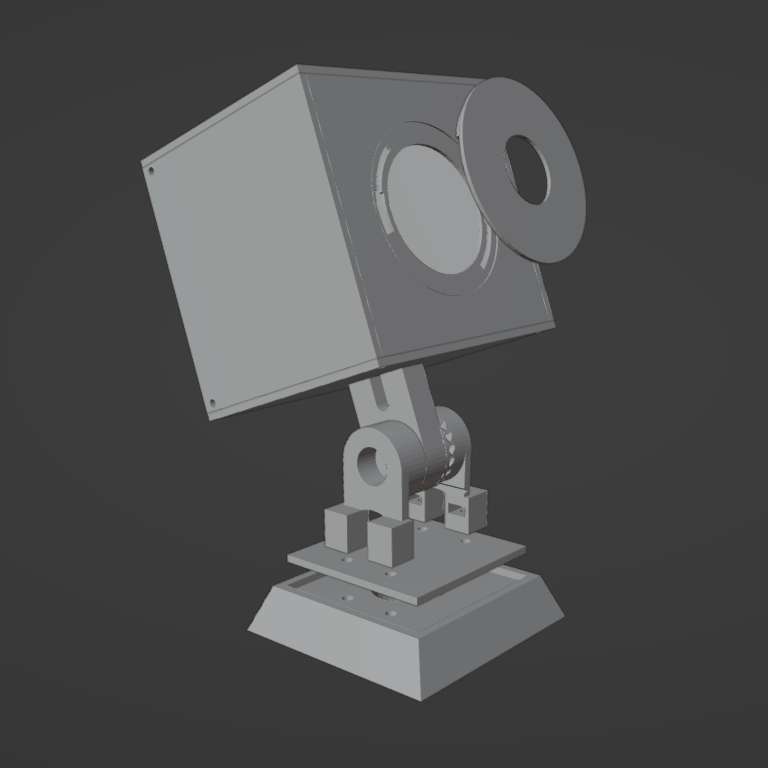
<p>Box for the PineCube IP camera. For the assembly you will need some M2/M3 screws (see below). It contains removable front cover, which can be easily removed without any tools. It is handy when you need to tune your camera focus or to uncover IR LEDs. It also contains battery holder inside in case you use some.</p><p>Model also contains parts for mounting plate with hole for strong magnet, so you can easily put your camera on magnetic surface. The plate can be also rotated - for the stronger fix there are 18 teeth in total, so you can rotate your camera by 20 degrees step.</p><p>For the box alone you will need 11x M2x8 screws (8 for box assembly and 3 more for fixing PineCube to the box) and print:<br>-<i>pinecube-box-PartBack</i><br>-<i>pinecube-box-PartFront</i><br>-<i>pinecube-box-PartFrontCover</i></p><p>For the battery holder, you need 4x M2x6 screws and print:<br>-<i>pinecube-box-PartBatteryCover</i></p><p>For the mounting plate, you need 4x M3x16 (bottom legs), 2x M3x10 (middle leg), 1x M3x25 (or similar length - for fixing the legs) and 7x M3 nuts. If you have magnet with d=20mm and height=8mm, you can put it there. You will also need to print:<br>-<i>pinecube-PartBottom</i><br>-<i>pinecube-PartBottomCover</i><br>-<i>pinecube-PartLeftLeg</i><br>-<i>pinecube-PartMiddleLeg</i><br>-<i>pinecube-PartRightLeg</i></p><p>Please note this is the first version and there are some minor issues (nothing you could not fix with sandpaper and knife):<br>-the walls around GPIO header is too high - you need to cut it a little with knife - this is the biggest issue<br>-button extensions (part of the box) may break<br>-front cover may be required to sandpaper<br>-the box may to knock a little if you are using it in moving vehicle - adding second leg to the box in next revision might help<br>-inserting the nuts in the bottom legs is tricky, since there is a strong magnet :)<br>-I forgot to create holes in the box for the middle leg screws - not needed, if you do not use mounting plate<br>-front hole for M2 screw (for fixing PineCube to the printed box) is too narrow<br>-it might be a good idea to add some groove to the front wall of the box to easily remove the front cover with your nail</p><p>Printed on Prusa MINI+, PLA with 0.2 mm layer height.</p><p>Licensed under CC0 1.0 Universal</p>
With this file you will be able to print PineCube box with your 3D printer. Click on the button and save the file on your computer to work, edit or customize your design. You can also find more 3D designs for printers on PineCube box.