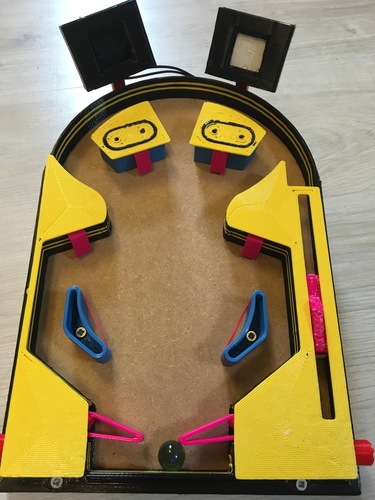
PINBALL
pinshape
PINBALL A game that can be custom-made and programmed with micro:bit or arduino to control its switches. Programming can be tailored to suit various skill levels, from beginner-friendly to advanced. Print Settings Rafts: Yes Supports: Yes It's printed on an opiliones delta printer using PLA filament by Ctrl Design. Some parts require support. How I Designed This The PINBALL was designed in SketchUp 2016 with dimensions based on a 300mm x 300mm print bed. An MDF board was added to reduce printing time and create a smoother surface for the ball. See the video tutorial on how to assemble all the components. For arduino, you can design and print your own scoreboard. For micro:bit, the dimensions remain the same, so the scoreboard is included in the print files. Pinball 3D Print for micro:bit and Arduino By printing and programming pinball, you'll learn how to program, print 3D parts, and understand circuitry. Objectives Students will learn to use a 3D printer to print components and assemble them. They'll also learn to create switches and control them using arduino and micro:bit. Mastering programming for these devices is the main objective. Audience The great thing about pinball is that it can be adapted for students of various ages. Beginners as young as 8 can start with simple programs, while older students can tackle more complex projects. Subjects Pinball is an excellent project for science, technology, and math classes. Skills Learned You'll develop essential skills like teamwork, spatial awareness, programming, design, 3D printing, and problem-solving. The difficulty level determines which skills you'll focus on. Lesson/Activity The beauty of pinball lies in its versatility. You can tailor the project to suit your needs: * The teacher prints everything, and students assemble it. * Teacher and student collaborate on programming assignments. * Students program and test their creations. * The teacher and students decide together how challenging they want the project to be. Duration The duration of the project varies from 1 hour to a week or more, depending on its complexity. Preparation No prior experience in programming is necessary. You can start with simple programs and gradually increase difficulty as you progress. The fun part begins when you print the parts, assemble them, and start programming. References * Arduino: https://www.arduino.cc/ * Micro:bit: https://www.microbit.co.uk/ Rubric and Assets The final score is up to the teacher's discretion. They can discuss with students what they should achieve and how it will be graded. Looks of 3D Print Parts Color Choice Programming Skills Explanation of the Programming Done ... Handouts & Assets The link to the video tutorial on assembling the printed parts: https://youtu.be/61XnCHkE1M8
With this file you will be able to print PINBALL with your 3D printer. Click on the button and save the file on your computer to work, edit or customize your design. You can also find more 3D designs for printers on PINBALL.
