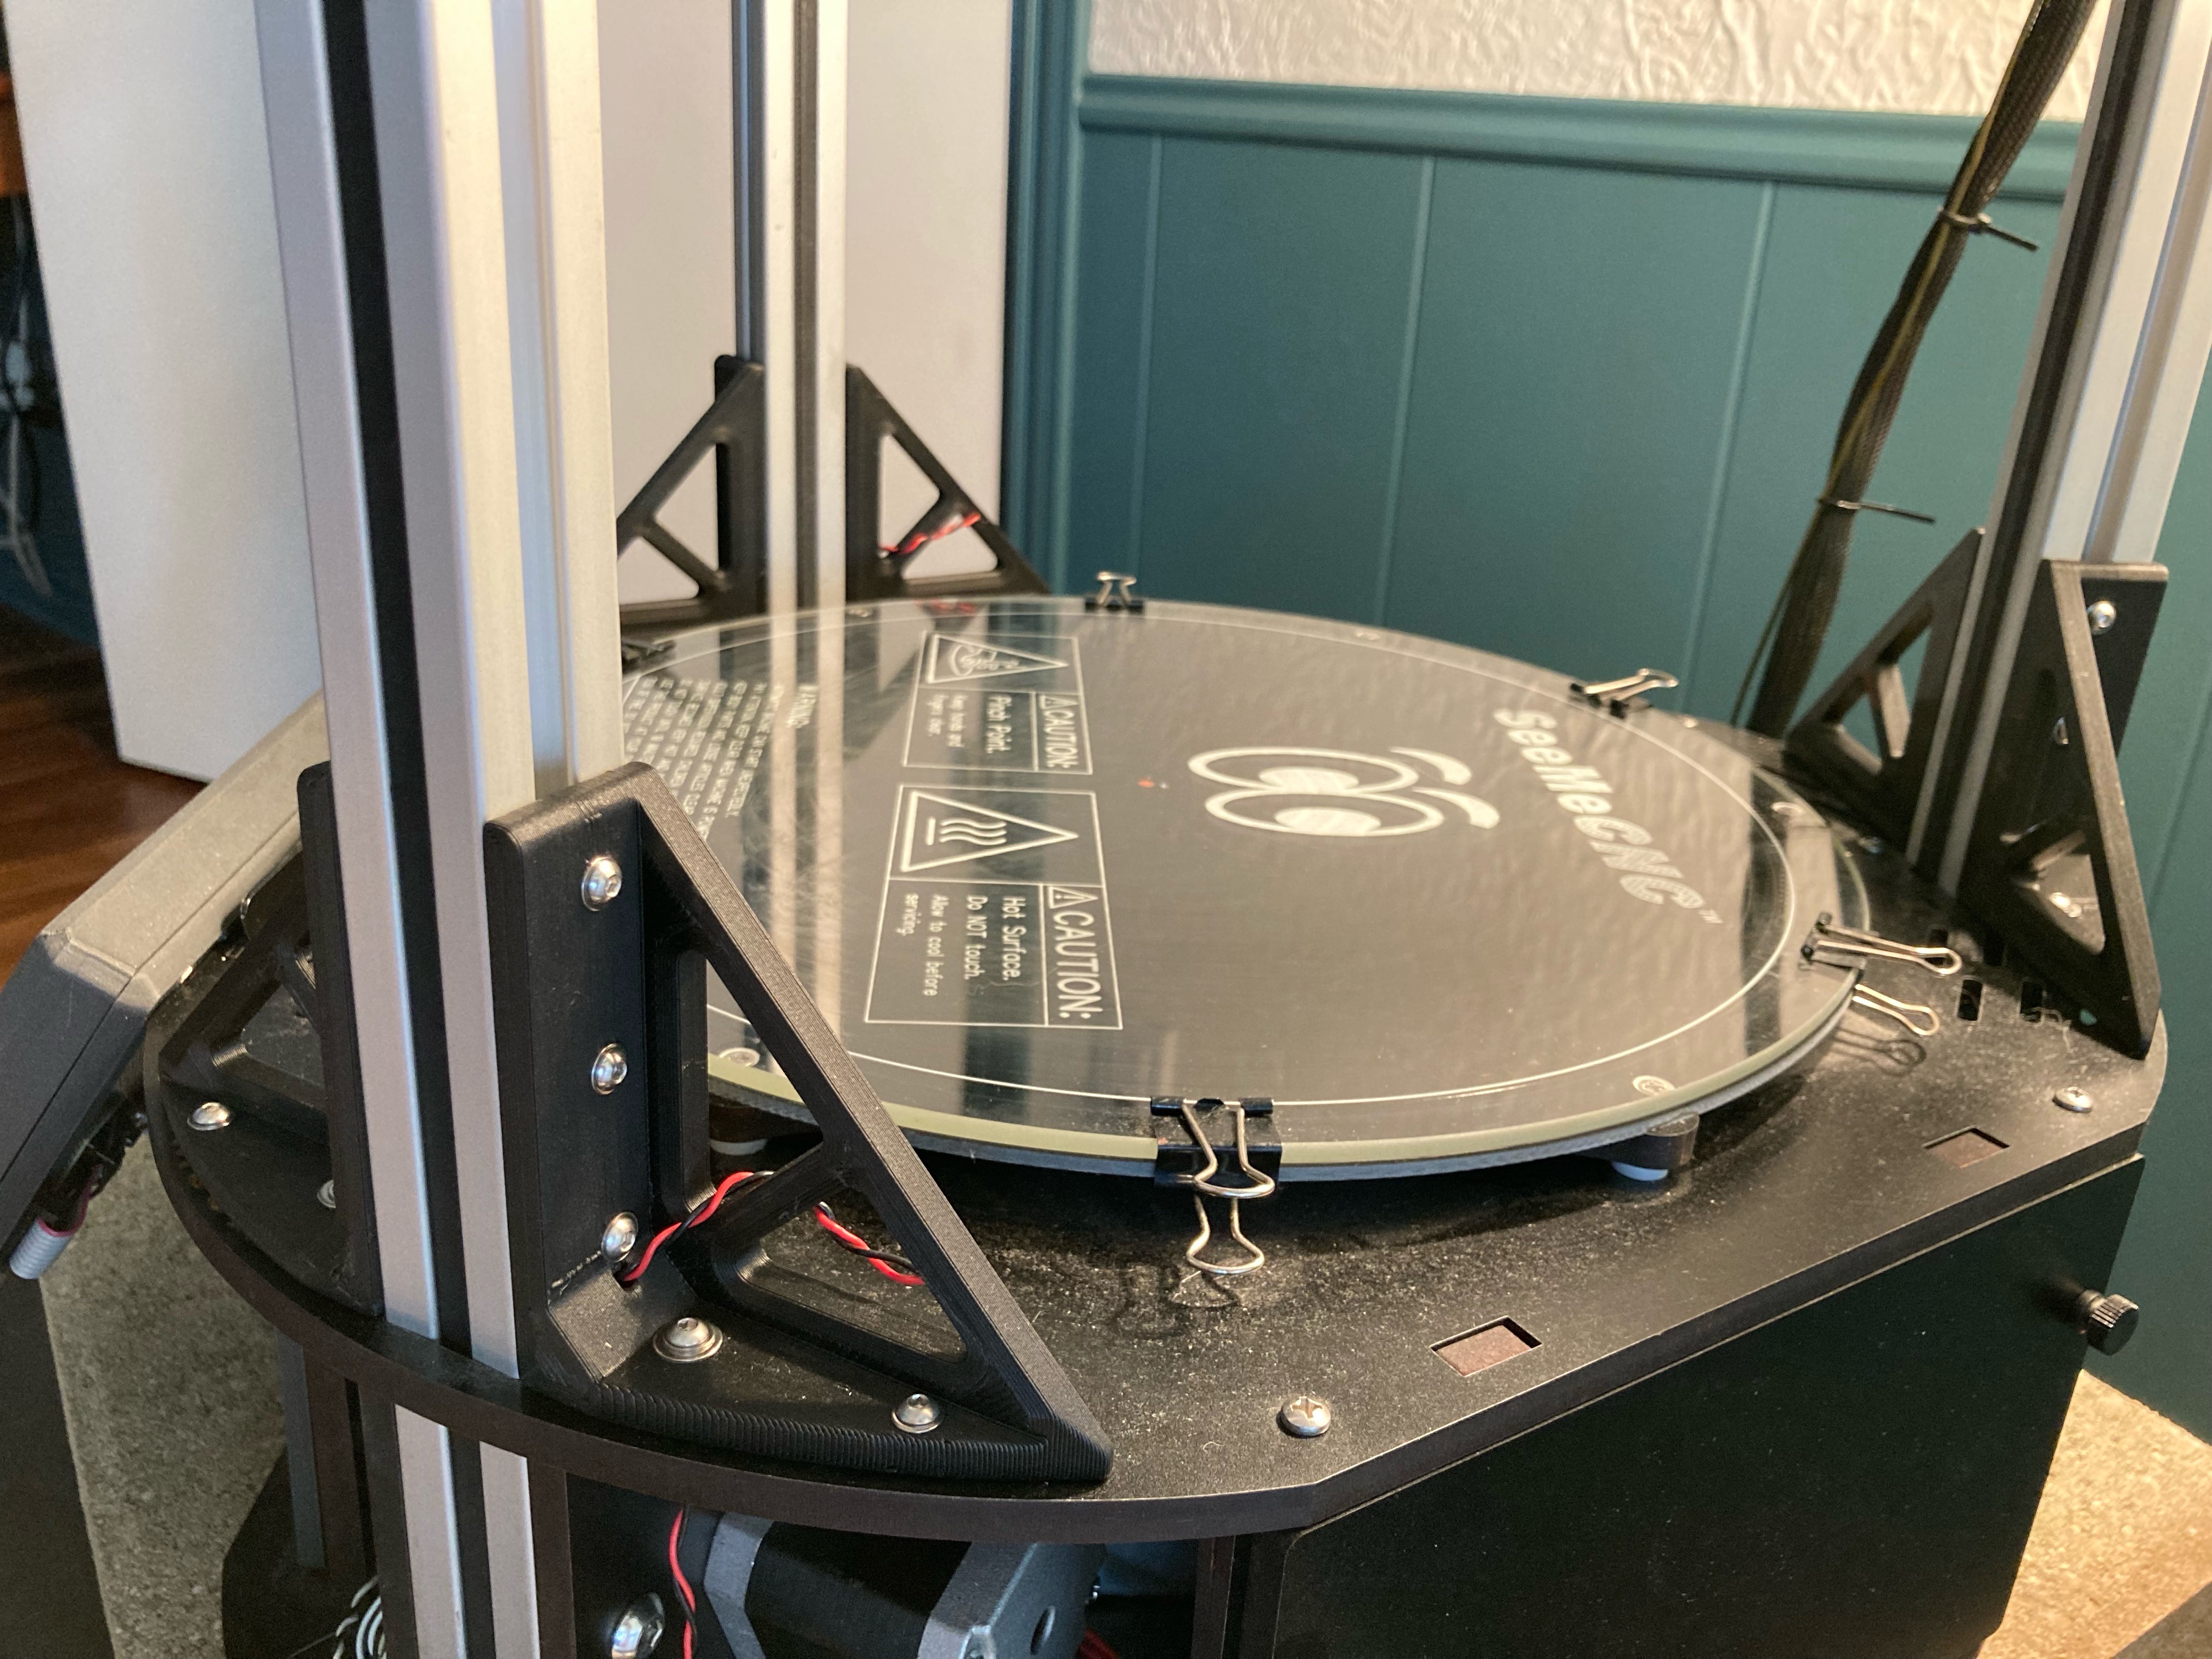
Pillar Braces for Rostock Max v2
prusaprinters
<p>The melamine frame pieces on my Rostock Max v2 have developed some play over time from printing at high speeds (80-120mm/s) and so I designed and printed braces for the base and top of the towers. The whole frame is very satisfyingly rigid now <img src="https://forum.seemecnc.com/forum/images/smilies/icon_e_biggrin.gif" alt=":D"></p><p>Of course holes have to be drilled in the melamine and the drop-in t-slot nuts can be quite frustrating, especially in the top. I used the largest hex wrench that would fit in the track to lift the t-slot nut into place for the top brackets. If you like to have a beer while you work, wait till you get the top bracket t-nuts in place. You'll need all your dexterity and by the time you finish you'll really need some suds. <img src="https://forum.seemecnc.com/forum/images/smilies/icon_lol.gif" alt=":lol:"> <br>The top bracket has a void for the uppermost 1/4"-20 machine screw so don't remove that one. The lower one will need to be replaced with one 1/4" longer. I used M3 for everything else cuz that's what I already have. If you want a stouter screw you'll have to drill out the screw holes in the braces accordingly. Also, I used fender washers where they would fit. Because the upper brackets require removing existing hardware I only did one bracket at a time to reduce the chance of messing up the frame geometry.<br>In the pics I posted you can see wires poking out the corner of the lower braces. I had wires for LEDs running up through the extrusion track so I added a hole in the braces for that. Use it if you like or just ignore it.<br> </p><p>Print 3 of each as is and three more of each mirrored.</p><p>Model orientation for slicing should be on the triangular side (the side facing toward the center of the bed in the pictures) for best strength. </p><p>Print Settings:<br>ProtoPasta Original CF-PLA with a .6 nozzle. .35 layer height, 6 top/bottom layers and perimeters and 30% infill.</p><p>These things are basically solid and very stiff! I have had zero creep issues with ProtoPasta's CF-PLA on these. If you enclose your printer you should use something else though.</p><p>(These were previously posted on seemecnc forum and on thingiverse. I have since deleted my thingiverse acct so reposting here.)</p>
With this file you will be able to print Pillar Braces for Rostock Max v2 with your 3D printer. Click on the button and save the file on your computer to work, edit or customize your design. You can also find more 3D designs for printers on Pillar Braces for Rostock Max v2.
