Pill Box with AM PM Apertures V4 - It's More Personal!
prusaprinters
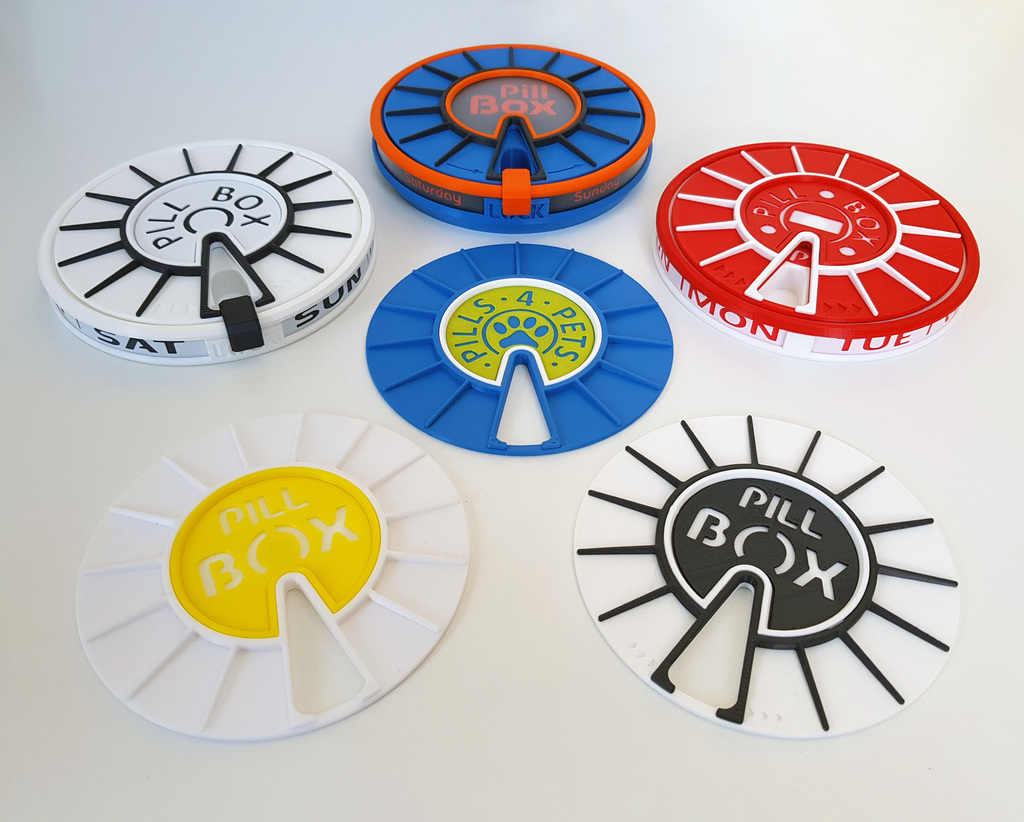
<p>Pill Box with AM PM Apertures V4 - It's More Personal!</p><p>There is a variation to this thing here: <a href="https://www.printables.com/model/169219-pill-box-v5-large-apertures-days-only">Pill Box V5 - Large Apertures - Days Only by boothyboothy | Download free STL model | Printables.com</a></p><p>The main focus of this remix was to address some annoying little details and improve some tolerances. I have also included additional decals to offer a larger range of customisation. Please refer to V3 for more information.</p><p>Link to V3: <a href="https://www.printables.com/model/169240-pill-box-with-am-pm-apertures-v3-its-personal">Pill Box with AM PM Apertures V3 - It's Personal! by boothyboothy | Download free STL model | Printables.com</a></p><p>1.I have revised and simplified the support for the base components, it is now faster and more stable to print.</p><p>2.Applied chamfers to the Day Insert Trim rather than rads so the part can be printed inverted without support.</p><p>3.Included Directional Arrows to Lid</p><p>4.Improved tolerances.</p><p>5.Introduced additional decals.In addition to the stencil decals I have included some solid versions which can be used with a slicer pause method to create dual colour prints on a single extruder. The Day decals and Top Decal should have a change of colour at 0.3 mm. The lid at a change of colour at 3mm. There are plenty of videos on Youtube available to explain this process I would recommend for Cura the video by CHEP - Filament Friday and Fugatech for a tutorial using Simplyfy 3D. I have also included blank decal plates for individual customisation.</p><p>Assembly Notes</p><p>Although I have included a 3D printed decals for the AM-PM apertures it can be hard to achieve a satisfactory print at this level of detail and would recommend using a 2D printed decal and glue or use double sided tape to adhere within the provided recess in the top of the base\body. This option will provide a much more clean and professional looking result.</p><p>Please see the exploded render for a guide to the general assembly of the components.</p><p>Please note all threads are left-handed (Day Decal Clip and the fixing bolt threads).</p><p>The Day Decal threaded trim works fine but due to it being a 150mm 3D printed thread there is a tendency to bind a little on first application. I would suggest using a little vaseline on the inside of the trim thread to help to thread the first time. After the thread is naturally cut by its opposite counterpart the assembly is much easier.</p><p>To reduce the play in the lid and ratchet the tolerance between the Fixing Bolt Base and Ratchet Collar has to be quite tight. Therefore I have included various ribs and tabs that can be sanded or shaved if there is any larger variation in printer tolerances.</p><p>In some of the example images, I have used a gloss photo paper and inserted a transparent binder cover in front to protect the artwork\decals. I basically taped the acrylic to the back of the gloss paper and carefully cut both of them out at the same time with a scalpel.</p><p>Important - The Ratchet Collar can be positioned in 2 ways but has an odd number of teeth.Therefore it is important to align the ratchet with the ratchet cog correctly.</p><p>Print\Slicer Settings</p><p>Where required I have included custom supports which break away after printing to provide a better finish (Body, Clasp & Fixing Bolt. Therefore you do not need to select\click support in your slicing software.</p><p>I printed the Fixing Bolt, Nut, Clasp, Ratchet Collar and Ratchet in PETG to provide greater resilience. Although the components perform fine in PLA I also found that the PETG Ratchet Prong flexed much better than in PLA which was much more rigid. I also printed these components with 4 perimeters and 30% infill. In my tests the PLA version appeared to work fine so PETG may only be required for extra longevity.</p><p>The 3D printed decals were printed at 0.1 resolution @100% infill to provide some visual density in a fairly thin component.</p><p>All other comps were printed at 0.2 resolution @15% infill. I did however partially print the lid with 0.1 resolution on the angled finger grips to reduce any terracing effect.</p><p>Update 19\03\20</p><p>Inserts de jour téléchargés dans Français Stencil</p><p>Update 17\03\20</p><p>Inserts de jour téléchargés dans Français</p><p>Update 17\03\20</p><p>Uploaded bolt without support structure.</p><p>Update 09\06\19</p><p>Included clasp with no supports for anyone having slicer problems with the clasp with integral supports.</p><p>Update 23\02\19</p><p>Uploaded Ratchet Cog and Bolt with slot to fix\set cog orientation. Please note, bolt will need to be inserted after lid is in position with base.</p><p>Update 11\04\19</p><p>Uploaded Standard and XL base parts without integral support</p><p>Base_XL_No_Support_V4</p><p>Base_standard_No_Support_V4</p><p>Update 06\06\21</p><p>Uploaded Both Base Units with sacrificial layers so they can be printed without supports by using just bridging. The bridge is 55 mm wide so therefore requires quite good part cooling. I have therefore also included a bridging test piece to check bridging ability prior to printing the full base part (see uploaded image). The sacrificial layers are 0.4 mm thick therefore a layer thickness of 0.2 mm will achieve the best bridging results.</p><p>Bridging Test Base_V4_2.stl 563 kb</p><p>Base_V4_EX_2 Bridging.stl 2 mb</p><p>Base_V4_2 Bridging.st</p><p>Update:10\01\22 Uploaded Blank Day insert step file for regional customisation.</p><p>Category: Organization</p>
With this file you will be able to print Pill Box with AM PM Apertures V4 - It's More Personal! with your 3D printer. Click on the button and save the file on your computer to work, edit or customize your design. You can also find more 3D designs for printers on Pill Box with AM PM Apertures V4 - It's More Personal!.