Piggy Bank 4 Color
prusaprinters
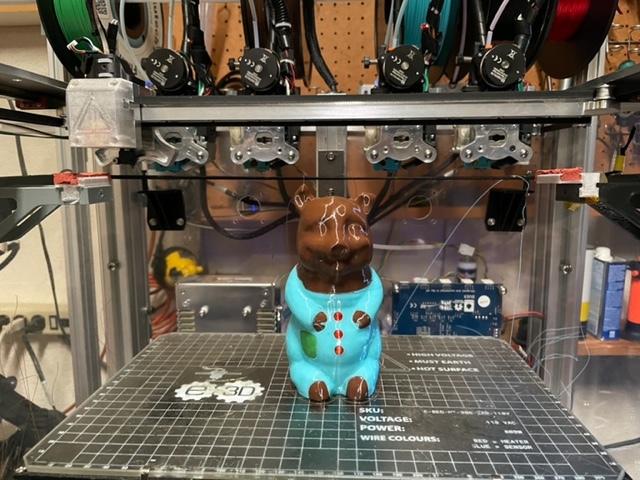
<p>This is a split up version of a piggy bank I scanned using the Einscan-S. I chopped up the parts using 3D-Coat and Netfab. He prints as a hollow object. I printed it using the Mosaic Palette+ on my CloneR1.</p> <p>Update: Prints way faster and way finer on my E3D Toolchanger.</p> <p>For all in-depth discussion and details of this and many other 3D Printing focused subjects check out the 3D Printing Today Podcast; threedprintingtoday.libsyn.com. It's free! No ads! Check it out. We do it for 3D Printing wonks like YOU!</p> <h3>Print Settings</h3> <p><strong>Printer:</strong></p> <p>CloneR1</p> <p class="detail-setting rafts"><strong>Rafts: </strong> <div><p>No</p></div> <p><strong>Supports:</strong></p> <p>No</p> <p class="detail-setting resolution"><strong>Resolution: </strong> <div><p>.2mm layer height</p></div> <p><strong>Infill:</strong></p> <p>10%</p> <p><br/> <p class="detail-setting notes"><strong>Notes: </strong></p> </p><div><p>I printed the parts in Simplify3D as Batch/sequential with the max height set to .4mm per sequence. This shaved off 50% of the transitions on the tower. Be sure to turn on Verticle lifting to match your max height (aka Z hop). Note the colors go all the way through the walls of the piggy. This also cuts way back on the number of transitions.</p></div> </p></p> Category: Sculptures
With this file you will be able to print Piggy Bank 4 Color with your 3D printer. Click on the button and save the file on your computer to work, edit or customize your design. You can also find more 3D designs for printers on Piggy Bank 4 Color.