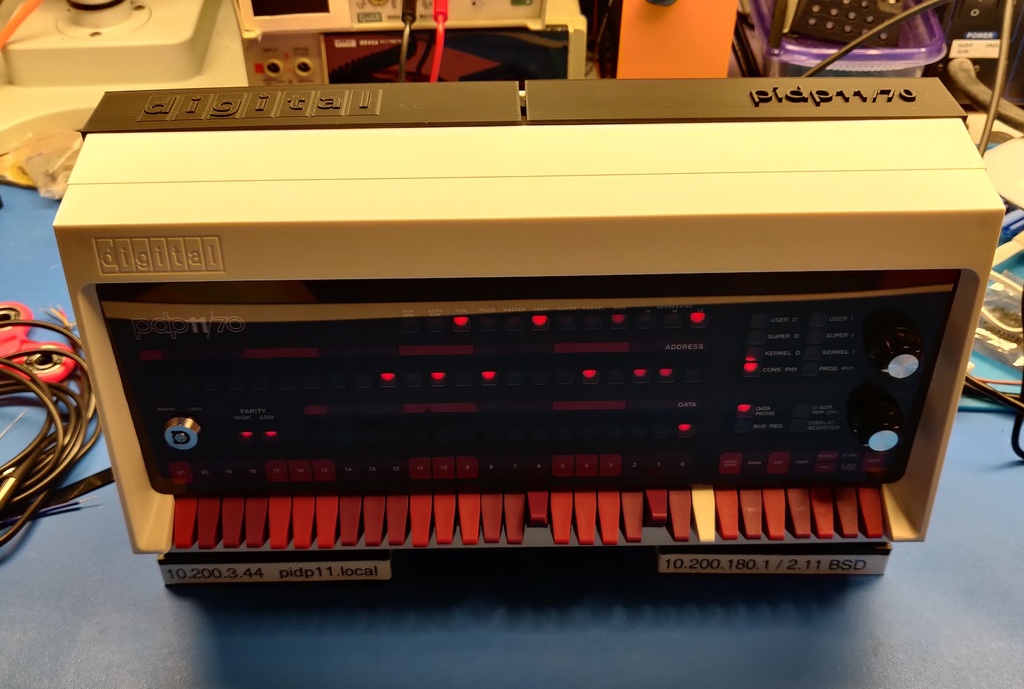
PiDP-11 case extension
prusaprinters
<p>Do you have a PiDP-11? Well,<em>OF COURSE YOU DO!</em> Because it brings the joy of computers and blinkenlights into the 21st century for all to enjoy.</p> <p>When you’ve built your PiDP-11, you found that there’s not quite enough space between the back panel and the insides to handle those nifty extension cables. You tried to nibble away at the strain reliefs on those USB, HDMI and Ethernet connectors on the back panel, but it’s still not quite enough. So sad..</p> <p>There was a case extension here on Thingiverse, but when I print it, it’s just a bit too narrow for all the bits to fit comfortably together. It also didn’t have screw holes present.</p> <p>Using that basic design as inspiration, I designed my version using OpenSCAD. It differs primarily in having holes cut through for the 4 mounting screws. It also assumes that you will super-glue together the two halves using the tab on each half. (The other version uses a screw through a tab. I wanted to avoid having a screw out the bottom of the case holding the two halves together, and super-glue works really good on PLA to hold the two halves together.</p> <p>There are STL files for the left and right halves. You can select which half is produced by changing one line in the OpenSCAD file. If you have a large enough print bed, you can have it generate one single piece.</p> <p>In the photos, you’ll see a some “feet” pictured which I printed from <a href="https://www.thingiverse.com/thing:4207135">https://www.thingiverse.com/thing:4207135</a> - the holes probably should be offset just a little bit more, but it can be made to work with this case.</p> <p><strong>UPDATE 28 August 2021</strong></p> <p>I've added a third STL file which is the case extension in a one-piece, full size version. I recently built a 350mm x 350mm Voron 2.4 3D printer, and the print bed is large enough to hold the entire extension. If you have a bed with a large enough print area, this might be of interest to you.</p> <p>Note that you can generate this yourself by making a small change to a parameter in the OpenSCAD file to select right side, left side, or full size alternative.</p> <h3>Print Settings</h3> <p><strong>Printer Brand:</strong></p> <p>Creality</p> <p class="detail-setting printer"><strong>Printer: </strong> <div><p>Ender 3</p></div> <p><strong>Rafts:</strong></p> <p>No</p> <p class="detail-setting supports"><strong>Supports: </strong> <div><p>Yes</p></div> <p><strong>Resolution:</strong></p> <p>0.2</p> <p class="detail-setting infill"><strong>Infill: </strong> <div><p>20%</p></div> <p><strong>Filament:</strong> Overture PLA Black</p> <p><br/> <p class="detail-setting notes"><strong>Notes: </strong></p> </p><div><p>When printing this, you'll only want supports under the two corners where the back panel will eventually be mounted. The rest of the part can print without any supports.</p> You should probably print this with 3 walls; this will prevent the infill pattern from showing through the wall. The 0.2mm layer height looks very much nicer than the draft versions I printed with 0.28mm layer height. <p>I make no claim that the OpenSCAD file is a “good” example of how to use that tool. It was a great learning experience to design this part with OpenSCAD.</p> <h3>Post-Printing</h3> <p><strong>Before glueing it together..</strong></p> <p>..assemble the two pieces on the back of the PiDP-11 and then screw in the back panel. You'll need longer screws, of course, than you used originally. Get some masking tape/blue tape, and tape the two pieces together, possibly also to the PiDP-11 case.</p> <p>Then carefully take out the screws, remove the back cover and add<em>just a touch</em> of super-glue on the top of each of the tabs. Ideally, try to clamp the pieces together and wait a bit for the glue to set. Ideally, have the clamp on the outside of the case land on the tape to avoid marring the PLA.</p> </div></p></p></p> Category: Electronics
With this file you will be able to print PiDP-11 case extension with your 3D printer. Click on the button and save the file on your computer to work, edit or customize your design. You can also find more 3D designs for printers on PiDP-11 case extension.
