Picture Hanger
thingiverse
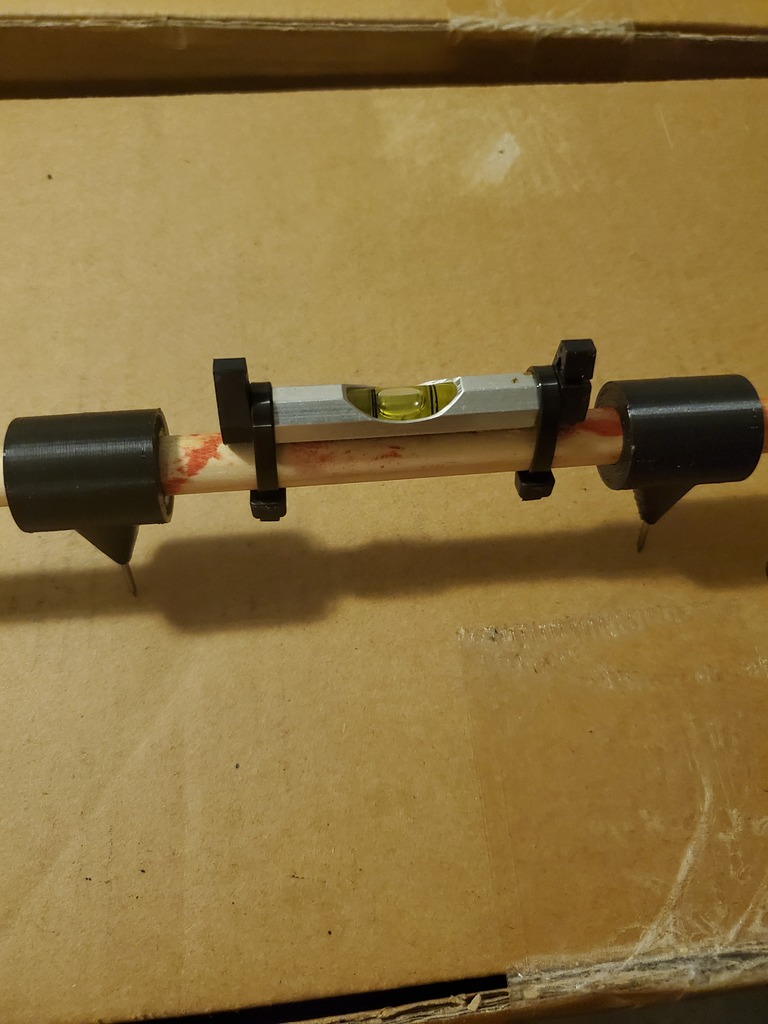
I decided to create my own tool for hanging pictures easily and perfectly level after discovering several commercial options. To build this project, I needed: - A 1/2" dowel, which costs around $1.50 at local Home Depot stores - Two 4d nails with their heads cut off to serve as guides for measuring picture hangers' distance in the bracket holes; you can drill bigger holes if necessary - A line level to ensure everything is perfectly level - Two zip ties to secure the dowel and brackets together I printed two of these custom-made brackets, then slid them onto the dowel using the nails as a guide to set the correct distance between the brackets. You may want to test print first to get the perfect fit for your dowel if your printer's settings are different from mine; the fit should be snug so that the brackets stay in place when you slide them on. Once I had the distance right with the nails as my guide, I held one bracket against the wall and rotated it until both brackets were aligned and touching the wall without changing their distance. This ensured that the nails would point perfectly level. After aligning the brackets, I pushed a nail into the wall to make an indent, then used the level to get it perfectly level before pushing in the second side to create two indents where my permanent nail for hanging the picture will go.
With this file you will be able to print Picture Hanger with your 3D printer. Click on the button and save the file on your computer to work, edit or customize your design. You can also find more 3D designs for printers on Picture Hanger.