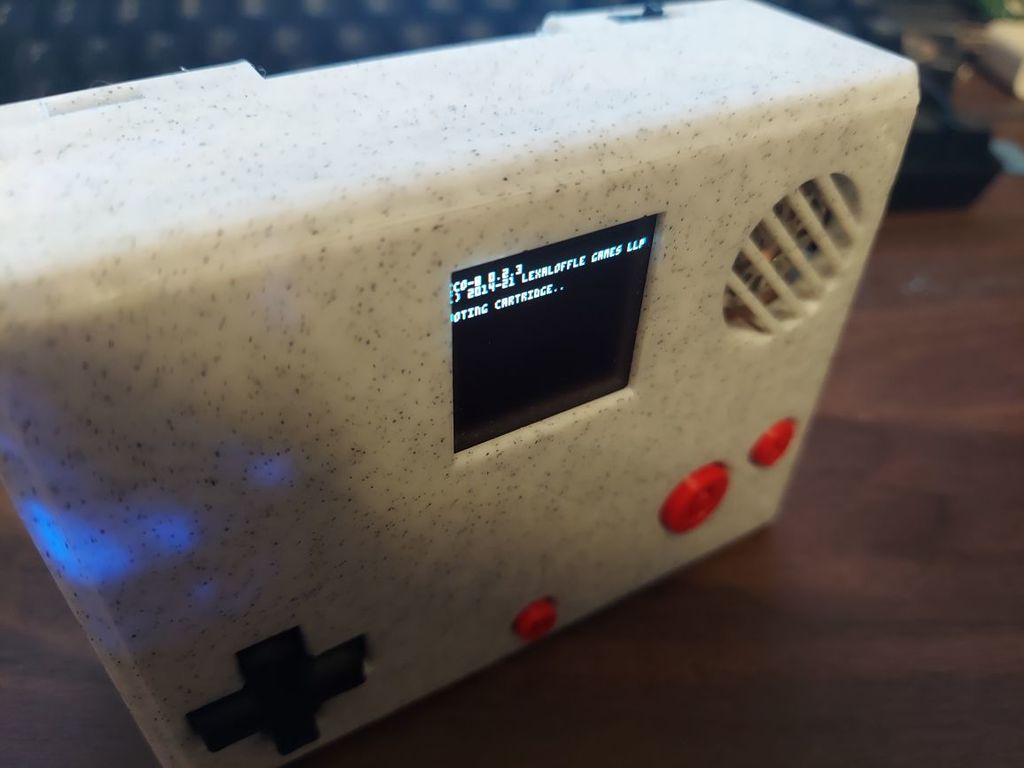
Pico 8 fanmade handheld
thingiverse
==========Project updates========== Update 3.0.2_test: One of the biggest issues with my handheld is that the left action button will get stuck, so I came up with a possible solution. I have not tested these yet, but I made large action button 2mm longer. The issue is that the left action button will sometimes get stuck on the side which isn't good. Having to press only on the left side of the button to prevent it from getting stuck isn't a good thing. I have included a zip file at the bottom with the new buttons. I will test these out soon on my handheld. Update 3.0.1: I made the back plate 1mm thicker so it wont flex and bulge. Update 3.0: I have added a cartridge slot in the back and it works great. Which parts will you need? You will need a back-plate as the design has changed. You will also need to print the front shell and you have the choice between 4 sets of action buttons. You can have the layout be X and O; or O and X. If you don't want lettering, you can opt in for blank buttons and key-less blank buttons if you want them to freely rotate. Also, you will need a SD card reader for this project for the SD card based cartridges. If you want to 3d print a older version of my handheld, the files are still available. Update 1.2: The 2 button version has a larger O button, but you have the choice of a keyed version with, or without text, and a key-less version. This version is optional as it is pretty much the same as the 1.01 2 button version, but a larger action button. Update: I'm working on a 2.0 version that will use cartridges and that version and future versions will only use 2 action buttons. I'm discontinuing the 4 button version, but will keep the files in case someone wants to use them for their own projects. ==========Project updates========== This is a Pico 8 inspired, fan-made handheld, using the Raspberry Pi Zero W. You are free to do anything you want with the included files. Everything can be printed without supports. The handheld dimensions are small enough to fit on the Monoprice Select Mini V2. This version has keyed buttons so the buttons will now not rotate 360 degrees. Also, I replaced the AA battery holder with a rechargeable lithium-ion battery. You are free to modify the included cad files and do whatever you want with this project. There are no Pico 8 logos, but you are free to add one yourself. The pictures shown are from a slightly earlier version, but I changed some last-minute things. There are files for a 4 button setup or 2 button configuration. The tutorial can be found on my personal blog: https://librefreedom.com/how-to-make-your-own-pico-8-handheld/ What you will need to print for a complete handheld: 1x front half of the shell (either 2, or 4 button configuration) 1x backplate 1x dpad 1x pause button 2x blank action buttons (if you want a 4 button configuration) 1x X button 1x O button Note: You can print the blank action buttons that are keyed in or without, it is up to you, but I opted in printing without them being keyed as blank buttons have no text on them and I don't care if those two buttons rotate or not. This project will take roughly 7 hours to print at 20% infill (more or less depending on your printer and settings) Edit: I made some last-minute changes. Hopefully, this will fix any leftover issues. I also am working on a magnifier clip similar to the 3rd party ones for the original Gameboy. This will use a simple magnifying card, the rough dimensions of a credit card. This will 'fix' the screen being too small without actually replacing the screen.
With this file you will be able to print Pico 8 fanmade handheld with your 3D printer. Click on the button and save the file on your computer to work, edit or customize your design. You can also find more 3D designs for printers on Pico 8 fanmade handheld.
