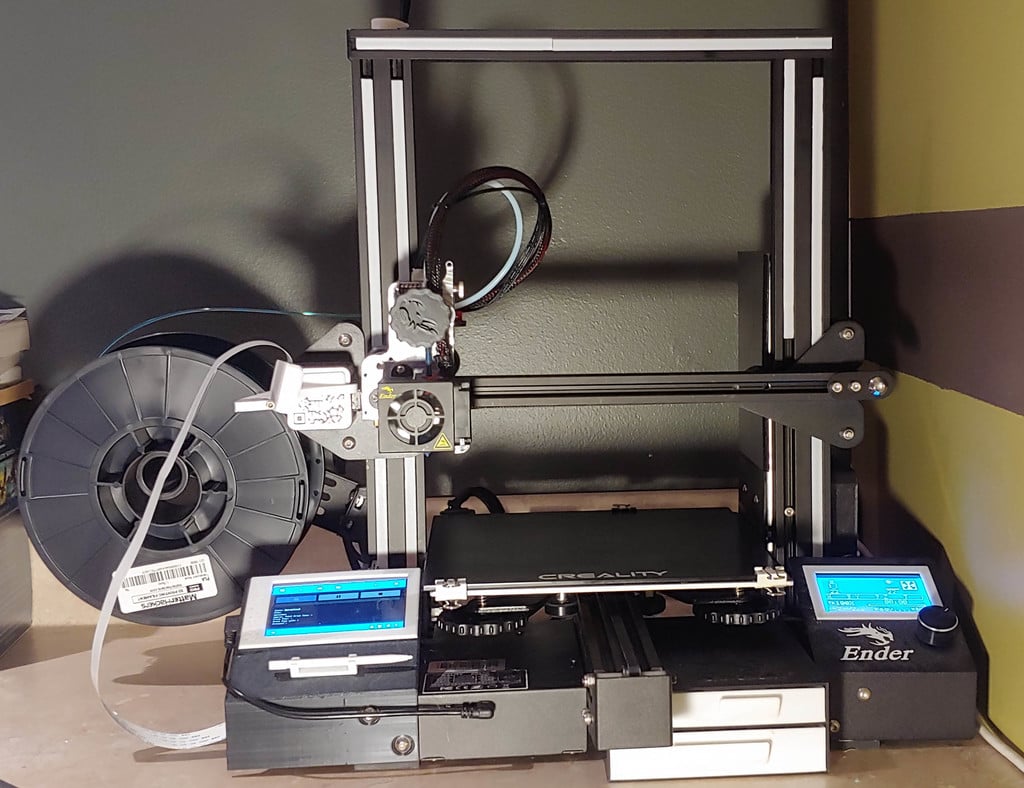
PI4 Ender 3 Touchscreen Case & Holder for Raspberry Pi 4 (4" HDMI)
thingiverse
Important!!! READ ME!!! This is a remix of Tronnics Ender 3 Touchscreen Case & Holder for Raspberry Pi, made compatible with the Raspberry Pi 4 and its 4" HDMI LCD screen. The original was designed for the Raspberry Pi 3 (with a 3.5" screen) and other possible models. To accommodate the PI4's beefier power supply, I significantly modified the existing power supply enclosure to fit the new power supply under the existing one while maintaining the stock look. When using the PI4, especially with a Touchscreen, you need a power supply capable of producing at least 3.5 amps! The popular LM2596 will not work as it only outputs 1 amp. You'll need the S-25-5 120v-5v 5amp PSU ($10), available on Amazon (link below). You also can't use the Type-C power supply to power the Pi because the connector gets in the way of the Z-axis switch coming out of the Pi. I had to relocate the plug to the back of the printer and raise the psu to fit the new power supply under the existing one, then neatly wrapped everything up. I even covered the existing power supply so you don't see its metal finish. Check out the pictures! I've also included a wiring diagram for you and added a relay that can turn the printer off remotely in case of emergencies with the raspberry pi (also usable to turn on/off LED lights, but wired differently). Ask if you need help. It may seem like a lot of work, but it wasn't bad at all and was well worth the effort. If you have issues and are using the relay, check the hi/low jumpers on the module! Any other questions feel free to message me. Some included STL files don't show up in the pictures list on Thingiverse, but they're included in the files when downloaded. The Touchscreen: https://www.amazon.com/Miuzei-Raspberry-Full-Angle-Heatsinks-Raspbian/dp/B07XBVF1C9/ref=sr_1_1?dchild=1&keywords=raspberry+pi+4+screen&qid=1606096180&sr=8-1 The PSU: https://www.amazon.com/Pasow-Switching-Supply-Transformer-Converter/dp/B015C5HVOA/ref=sr_1_15?dchild=1&keywords=120v+to+5v&qid=1605568957&sr=8-15 The relay module: (any 5v relay module w/ an optocoupler should be fine) https://www.amazon.com/Channel-Module-Trigger-Optocoupler-Arduino/dp/B079FJSYGY/ref=sr_1_7?dchild=1&keywords=15v+0+amp+relay+board&qid=1605576313&sr=8-7 Banggood.com may also sell these parts for much cheaper, but shipping is much longer. Remix editing steps: I had to stretch the sleeve out a bit to make the 4" screen fit and changed some of the cutouts around. I made it a little thicker on the face so the letters ("OctoPi-TouchUI") are cut a little deeper, making them look more defined. I also squared off the corners (instead of rounded) to match many of the other bezels for the stock controller screen. I printed about 5 of the sleeves to get the lettering just right and included the gcode so you can get the best quality settings without trial and error. Included are 2 different back covers: one solid and one cut for a 40mm fan (shown in red setup in my pictures). I also cut out a bit more on the sleeve so you can access the SD card a bit easier. Howchoo wrote a great tutorial to get TouchUI working with OctoPi. Be sure to check it out at: https://www.thingiverse.com/make:707262 Tronnics page: https://www.thingiverse.com/thing:3030160 The camera enclosure was done extremely well by ModMike, and it's not my design or a remix of the included camera case sketch.
With this file you will be able to print PI4 Ender 3 Touchscreen Case & Holder for Raspberry Pi 4 (4" HDMI) with your 3D printer. Click on the button and save the file on your computer to work, edit or customize your design. You can also find more 3D designs for printers on PI4 Ender 3 Touchscreen Case & Holder for Raspberry Pi 4 (4" HDMI).
