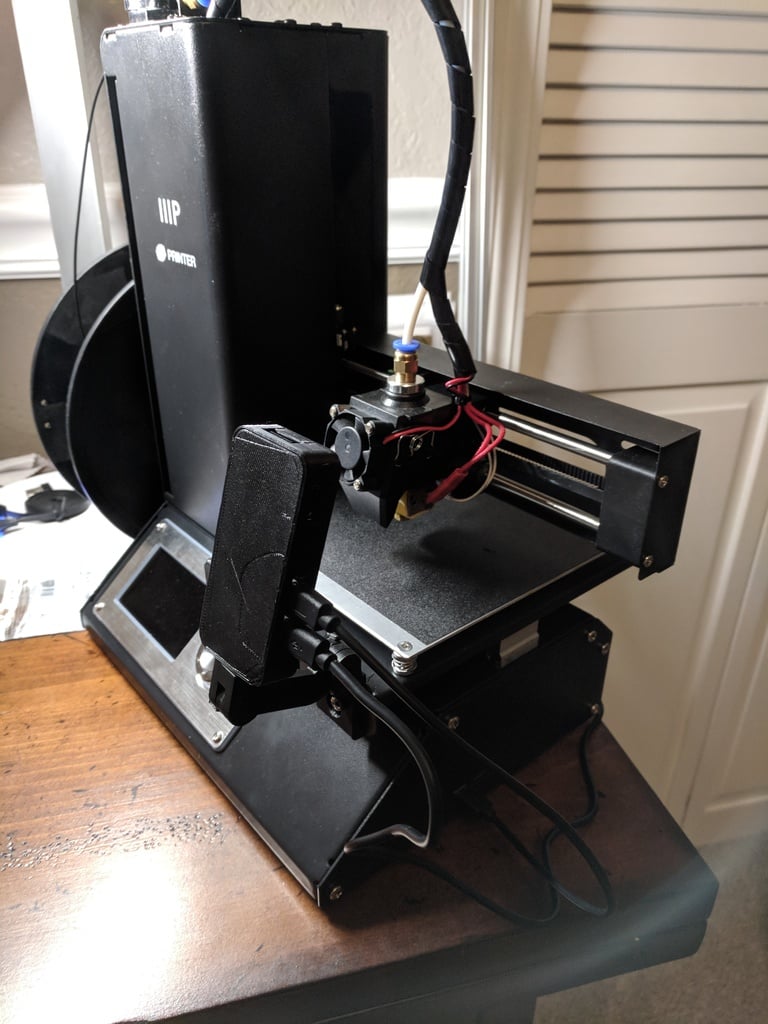
Pi Zero Print Server/Camera Combo
thingiverse
<b>NOTE: Lid v3.stl is an update to the initial Lid.stl in order ensure that the lid remains snapped to the Pi Zero Case</b> This setup provides a Mount for Raspberry Pi Zero W with camera and case for Octoprint server. The configuration can be universal, but I developed this mount specifically for use with the Monoprice Select Mini. To complete this project, you will need to print thing: 2684992 <a href="https://www.thingiverse.com/thing:2684992"> Link to thing here... </a> This design offers three options for arms: a straight arm, a 45-degree curved arm and a 90-degree curved arm. For my setup, the 90-degree curved arm is the most suitable and allows me to fold the Pi down onto the print bed for transportation. Approximate Project Cost - ~$35USD To complete this project, you will need: -Raspberry Pi Zero W - https://www.adafruit.com/product/3400 -Spy Camera for Pi Zero - https://www.adafruit.com/product/3508 -10" Micro USB to Micro USB - https://www.adafruit.com/product/3610 -Micro SD Card - Suggested 4GB or more -Printed Parts from this page -Printed Part from Thing 2684992 - https://www.thingiverse.com/thing:2684992 -Suggest Thing 2730462 - https://www.thingiverse.com/thing:2730462 -Octoprint software and install utilities - https://octoprint.org/ If you haven't set up Octoprint before, here's a quick guide: 1. Download the Octoprint image from https://octoprint.org/download/ 2. Use an unzipping utility to unzip the folder downloaded from octoprint 3. Download Etcher to write the Octoprint image to your micro sd card - https://etcher.io/ (NOTE: This is the utility recommended by raspberrypi.org) 4. In etcher, select the image, it's the *.img file in the folder you unzipped in step 2 5. In etcher, select the micro sd driver 6. Push "Flash!" 7. Wait patiently until it is done 8. Open octopi-network.txt from the SD Card 9. Go down till you see your wifi security configuration - mine network uses WPA security 10. Remove the "#" from the beginning of the three relevant lines starting at the "if statement." 11. Change the text in the quotation marks to reflect your network SSID (ie. the network name you see when trying to connect to wifi) and the password 12. When done, save and eject drive. plug into raspberry pi and power on. 13. Visit your router configuration page in your web browser to see where your print server is. typically "192.168.0.0", "192.168.0.1", "192.168.1.0", or "192.168.1.1" 14. there should be a way to see what is connected to your network, one should be octoprint. go to the corresponding ip address to view your print server (ie. 192.168.1.130 or something like that. the last number will likely be something different)
With this file you will be able to print Pi Zero Print Server/Camera Combo with your 3D printer. Click on the button and save the file on your computer to work, edit or customize your design. You can also find more 3D designs for printers on Pi Zero Print Server/Camera Combo.
