Pi Camera Soldering Scope
thingiverse
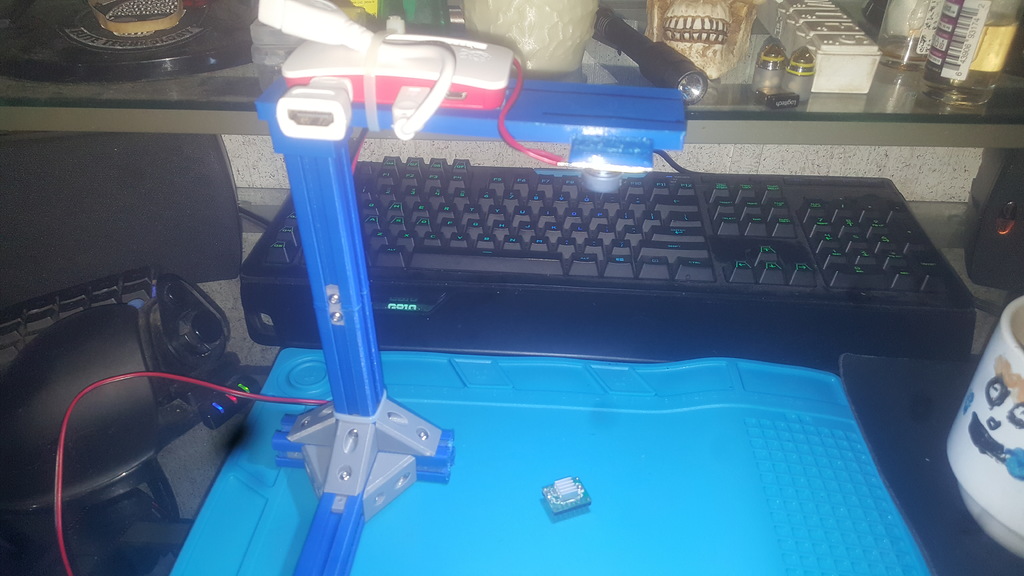
I required something to enlarge a circuit board when soldering SMC's, so I found a guide on how to use a Pi camera as a magnification device. Following this guide, I created the device you see now. The original creator deserves all the credit for coming up with it; all I did was build a mount and replace the type of camera used. This is the Camera I used from Amazon: https://www.amazon.com/gp/product/B00JM94WCW/ref=oh_aui_detailpage_o01_s00?ie=UTF8&psc=1. You'll also need a different cable to connect it to the Pi zero: https://www.amazon.com/gp/product/B01M6XSBQC/ref=oh_aui_detailpage_o00_s00?ie=UTF8&psc=1. I used 2020 extrusions from a failed print, which were approximately 95mm long. I recommend that the base legs be 100 to 125mm long because with the cables hanging from the Pi, it becomes top-heavy. Additionally, I added a small COB LED to the outer tab - it's a 12v LED running off a power supply: https://www.amazon.com/gp/product/B00J23EA2U/ref=oh_aui_detailpage_o07_s00?ie=UTF8&psc=1. The guide I followed was very comprehensive, but I didn't go into the additional features it offered because I didn't need them. Here's a link to the original project: https://www.instructables.com/id/Raspberry-Pi-Zero-HDMIWiFi-Soldering-Microscope/. As stated in the guide, magnification increases as you get closer to your object; that's why I chose a camera with adjustable focus. The camera has a screw that locks down the aperture - remove it and it becomes difficult to turn, but once it breaks free, it's easy to adjust.
With this file you will be able to print Pi Camera Soldering Scope with your 3D printer. Click on the button and save the file on your computer to work, edit or customize your design. You can also find more 3D designs for printers on Pi Camera Soldering Scope.