Photoreactor
thingiverse
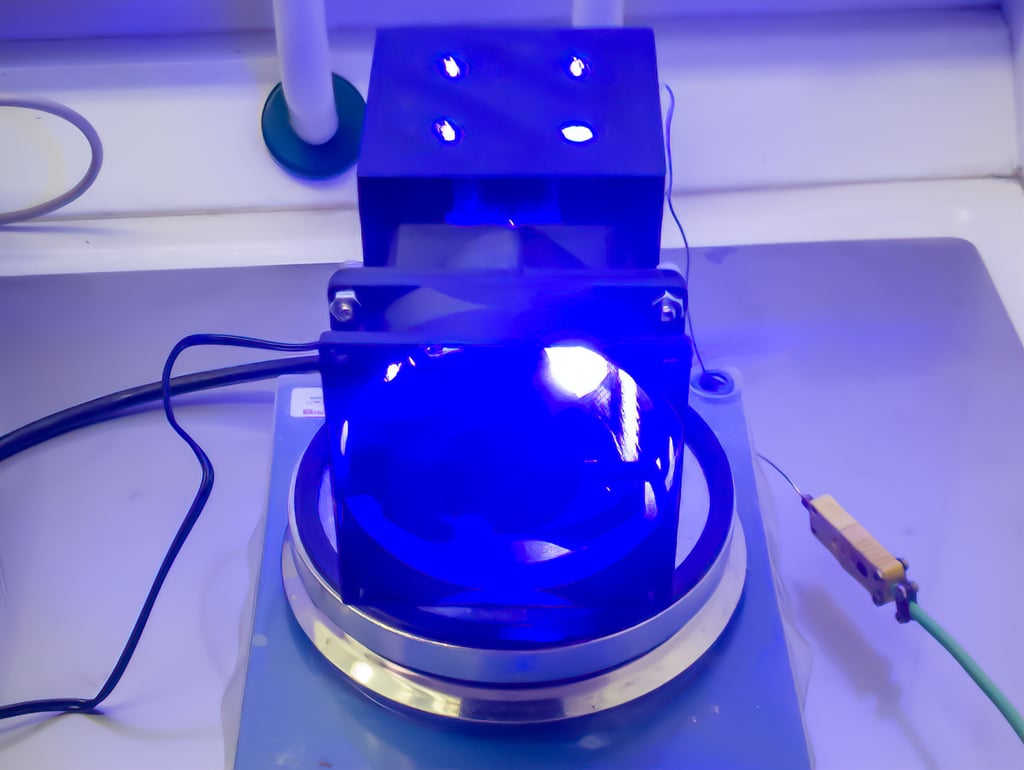
This is a photoreactor equipped with four high power LEDs designed specifically for visible light applications, particularly photoredox chemistry. It is compatible with standard magnetic stirplates and can accommodate up to four 20 mL screw neck vials simultaneously. To keep costs low, ease of assembly and use readily available components, it can be built from a total cost of EUR 100 or less. *Update March 10, 2020* The lid has been updated with thicker clips that are less prone to breaking. Additionally, I used Labsolute ND24 vials (57 x 27.5 mm) with screw caps and septa in designing this photoreactor. I printed and tested it with four 10 W blue LEDs (450 nm wavelength), but other types and wavelengths can also be used. Using the 10 W LEDs shown here, an 80 mm fan must be mounted to avoid heating the reaction vials above 30 degrees C. If lower power LEDs are employed, it may be possible to use a 60 mm fan directly attached to the photoreactor without the fan duct. However, with the 10 W LEDs used, a 60 mm fan led to temperatures above 40 degrees C in the reaction vials. **CAUTION!** These LEDs emit extremely bright light and significant stray light from vents and fans can cause eye damage. An opaque shield must be placed around the reactor when the light is on. I strongly advise against using this design with invisible ultraviolet light! This device is intended for use in a chemistry laboratory by trained personnel only. Eye damage and even blindness can result from improper use. This is not a toy. *Bill of materials* 4 high power LEDs (up to 10 W each) [link](https://www.ebay.com/itm/372736627306) 4 power resistors, 2.2 Ohm, 5 W [link](https://www.elextra.dk/details/H13309/effektmodstand-5w-22-ohm-5) 1 fan, 70 x 70 x 15 mm (12 V) [link](https://elektronik-lavpris.dk/p136159/de07015b12u-ventilator-70x70x15mm-12vdc/) 1 heatsink, 68 x 68 x 9 mm [link](https://elektronik-lavpris.dk/p125304/ick-pga-27x27-heatsink-68x68x9mm/) 4 M4 x 40 mm pan head machine screws 1 power supply, 12 V minimum, 60 W or 5 A [link](https://www.harald-nyborg.dk/produkt/stroemforsyning-12v-60w-led) 1 DC connector to fit power supply, typically 5.5 x 2.1 mm [link](https://www.elextra.dk/details/H20612/dc-fatning-55-x-21mm-til-kabinet-loddeflige) Wiring, solder and thermal glue as needed *If using a 80 mm fan (recommended):* 1 fan, 80 x 80 x 25 mm (12 V) [link](https://elektronik-lavpris.dk/p111860/n-cmp-fan22-ventilator-60x60x15mm-3-wire-sensor/) 12 M4 nuts 8 M4 nuts *If using a 60 mm fan (not recommended for 10 W LEDs):* 1 fan, 60 x 60 x 15 mm (12 V) [link](https://elektronik-lavpris.dk/p111860/n-cmp-fan22-ventilator-60x60x15mm-3-wire-sensor/) 4 M4 x 25 mm pan head machine screws 8 M4 nuts *Electronics* LEDs require a constant current supply, which is solved here by using a constant voltage 12 V power supply and a series resistor for each LED. The value of the resistor must be selected to achieve the desired current. Using LEDs with a 10 V forward voltage drop and a maximum forward current of 1050 mA, Ohm's law tells us that the current will be (12 - 10)/2.2 = 0.909 A = 909 mA. This leaves a bit of safety margin to accommodate minor variations in the supply voltage and the LED forward voltage. The power rating of the resistors is also important. Assuming 0.909 A current and 2 V drop over the resistor, it will need to dissipate 2 x 0.909 = 1.818 W. I selected a 5 W resistor here to give a big safety margin, and I mounted the resistors in the airflow from the cooling fan for extra cooling. If you want to use LEDs with other specifications, you will need to select suitable resistors according to the calculations above.
With this file you will be able to print Photoreactor with your 3D printer. Click on the button and save the file on your computer to work, edit or customize your design. You can also find more 3D designs for printers on Photoreactor.