Photo Studio In A Box (PSIAB)
prusaprinters
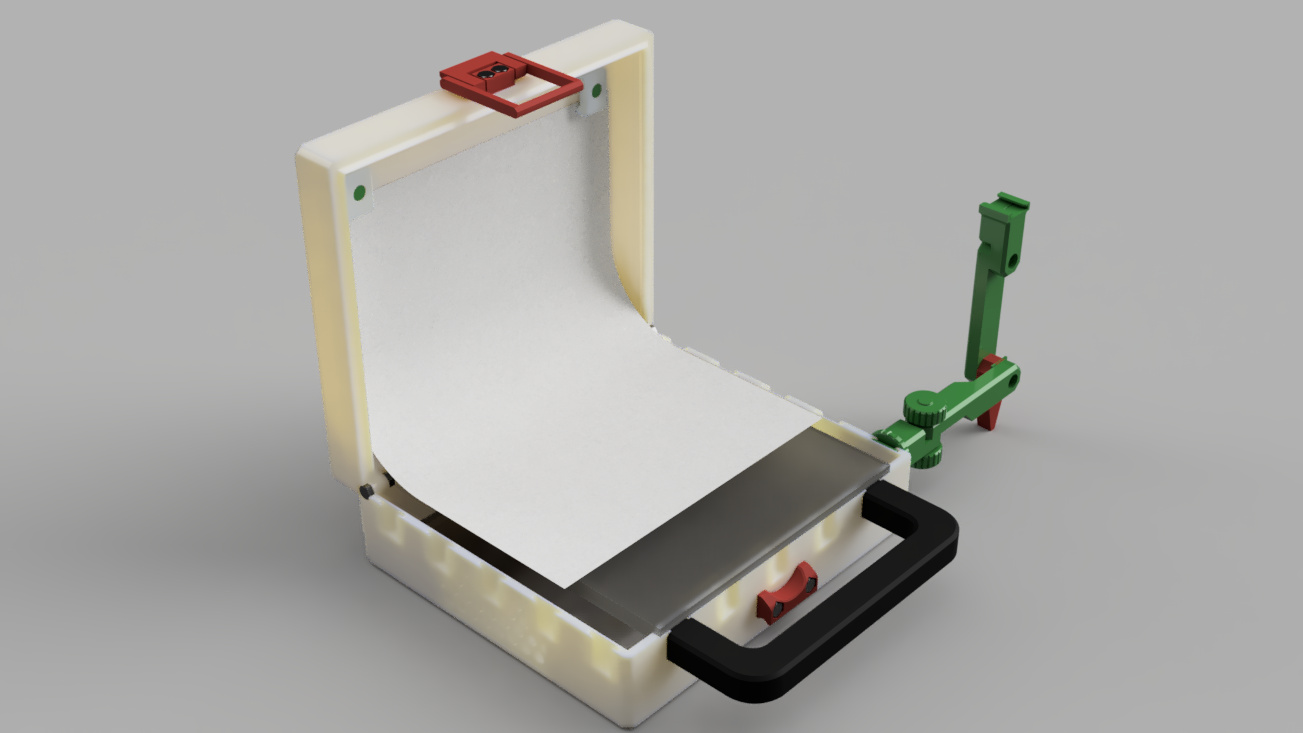
<p>The <strong>PhotoStudioInABox </strong>(PSIAB for short) is supposed to be an easy way to start making photo's for a webshop or ... whatever you want to make photo's for ...</p><p>The trick (for some webshops) is repeatability ... even if photo's are made years apart, they should look largely the same (with exception of the product of course).</p><p>This small scale studio is designed to make good looking pictures of (small) products in a repeatable way. Every part that plays a role in the setup can be fixed to the box and attached in a repeatable way.</p><p>Just mark or note down the exact setup and camera (lighting) settings and next time you can make the exact same photo. Whenever and wherever you setup the studio.</p><p>This studio can be used with a "professional" setup (strobes and a DSLR camera)</p><figure class="image image_resized" style="width:50%;"><img src="https://media.prusaprinters.org/media/prints/56940/rich_content/d7f88824-35c2-4396-a653-42e23ef253cc/psiab-camera-setup-001.jpg#%7B%22uuid%22%3A%221c3ffece-b3f8-45e3-9c9a-64853eaa0126%22%2C%22w%22%3A3926%2C%22h%22%3A2667%7D"></figure><figure class="image image_resized" style="width:50%;"><img src="https://media.prusaprinters.org/media/prints/56940/rich_content/9b1026a2-723c-46e5-ac14-dbaebe9997d8/psiab-camera-setup-002.jpg#%7B%22uuid%22%3A%229c6105b8-cfe2-4d91-8dfb-b67d4f2f9af6%22%2C%22w%22%3A6240%2C%22h%22%3A4160%7D"></figure><figure class="image image_resized" style="width:50%;"><img src="https://media.prusaprinters.org/media/prints/56940/rich_content/5042e236-a72a-49cf-8f83-3068d3a57d4d/psiab-camera-setup-003.jpg#%7B%22uuid%22%3A%222adcdd86-b0c0-471e-a205-48beb296d3b5%22%2C%22w%22%3A4845%2C%22h%22%3A3230%7D"></figure><p>just as well as with a smartphone and some lamps bought at IKEA ...</p><figure class="image image_resized" style="width:75%;"><img src="https://media.prusaprinters.org/media/prints/56940/rich_content/a2f27fe0-fda4-4bbf-ab09-b7a18dff53a9/psiab-phone-setup-001.jpg#%7B%22uuid%22%3A%221094189f-110d-4317-a6b1-50d143b8f8cb%22%2C%22w%22%3A6240%2C%22h%22%3A4160%7D"></figure><figure class="image image_resized" style="width:50%;"><img src="https://media.prusaprinters.org/media/prints/56940/rich_content/e838898b-17bf-41a0-a1ad-02c74263b783/psiab-phone-setup-003.jpg#%7B%22uuid%22%3A%2240ca53d0-c674-4e5b-af0d-7cba4e65e09f%22%2C%22w%22%3A1887%2C%22h%22%3A1258%7D"></figure><p>It was designed with portability and ease-of-use in mind.</p><p>Every part should be printable on my printer (a Prusa i3 MK3s), it should only use extra hardware that is widely available (6 x M5-15 bolts and nuts, an A4 plain paper, IKEA LAGRA lamps ... or any other lighting, ...) and it should be transportable. Any user should be able to use it anywhere on earth (as long as they can use it on a dry spot ;-) ).</p><p>I am working on a larger version (where not every part is printed) but this is only version 1 ...</p><h3>Print instructions</h3><p>The box itself is best printed in a <strong>white</strong> material that can withstand some use (I printed mine in PETG) the other parts should be printed in a strong material as there might be some forces applied to them. Especially the printed bolts should be stronger. I printed some in PLA and force applied while fastening them could just break them. PETG did not have this problem.<br>I printed my product-plate in a transparent PLA ... no forces applied there and the transparency allows for ligting to be applied from the bottom (when done right this takes care of shadows falling on the background). As I also use an A4 white paper as background, the "yellowish" color of the transparent PLA doesn't matter much. A set of at least 2 plates can be accommodated inside the box (one in the lid and one at the bottom).<br>My prints were all at 0.20 mm layers and with a nozzle of 0.4 mm. Some of the STL's have built in support where needed ... if there is no STL with support or a sacrificial layer there should be no support needed.</p><p>I also made an extra part for use with the <a href="https://www.prusaprinters.org/prints/25969-tripod-mobile-phone-clamp-v2">Tripod Mobile Phone Clamp V2</a> and for the IKEA LAGRA lamps. Other parts can be added later as the connectors are all screw-on (mostly 10 mm threads) or a standard Camera Cold Shoe (CCS) ... you know, like the hot/cold shoe connector between a flash/strobe and a camera.</p><p>The only assembly I could not get around is the PSIAB-Start-Single together with the PSIAB-Flat Nut and the PSIAB-CCS-connector. I made an instruction pamphlet. A single drop of (super)glue is needed.</p><figure class="image image_resized image-style-align-center" style="width:75%;"><img src="https://media.prusaprinters.org/media/prints/56940/rich_content/a6d3155e-e772-4a0a-b8ef-9b104a052bb4/psiab-start-assembly2.png#%7B%22uuid%22%3A%22bef4b4cf-6ce2-4deb-ae45-6ec8f7249456%22%2C%22w%22%3A1240%2C%22h%22%3A1754%7D"></figure><p>Any questions, remarks or requests are always welcomed (just do so politely, I do not respond well to rudeness ;-) ).</p>
With this file you will be able to print Photo Studio In A Box (PSIAB) with your 3D printer. Click on the button and save the file on your computer to work, edit or customize your design. You can also find more 3D designs for printers on Photo Studio In A Box (PSIAB).