Pfaff Sewing Machine Lever
thingiverse
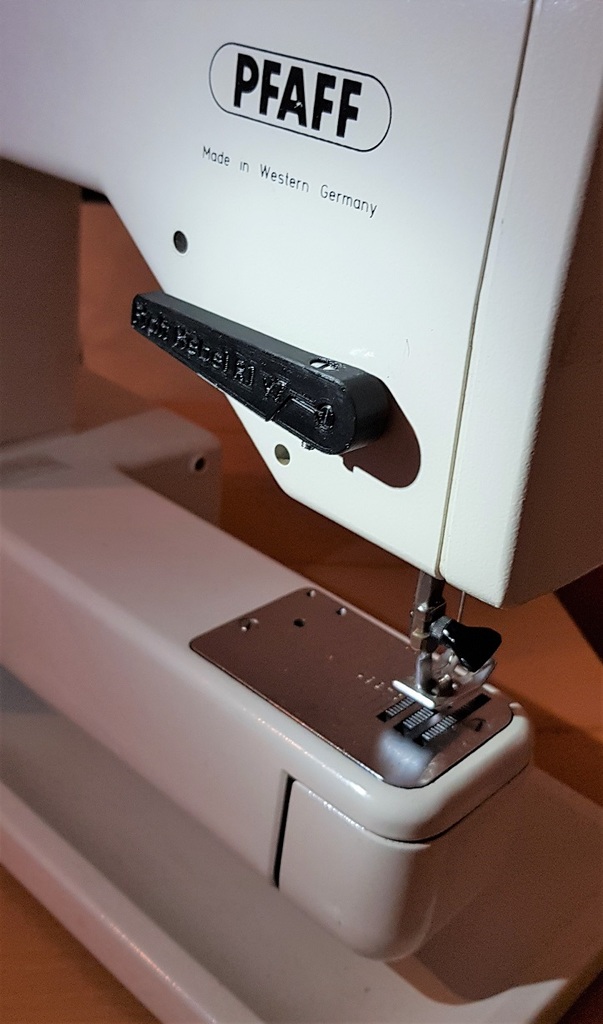
Hello all, This time, my mother-(soon to be)-in-law brought out an ancient if not prehistoric sewing machine called "Pfaff Type 1199". She claimed that the machine would work well, but the lever that elevates the stamp to hold down the fabric while sewing is broken. The stamp can still be moved, but using pliers is no fun, she mentioned with jokingly daring eyes. Assuming the machine might be a mere 3-4 decades old, the old lever has done its deed and disintegrated at its most vulnerable point: The axle socket. Unfortunately, previous repair attempts using tesa tape failed (I won't say who tried that). The replacement needs to be sturdy enough to form a tight grip around the short and worn axle. This is important in order to lever the cam up that lifts the spring-loaded cam follower inside the sewing machine. Since the cam follower has a heavy spring, I decided to go with a split-grip design that uses an additional M3 screw to clamp the axle tight. The diameter of the sewing machine's axle is at 5.1-5.2 mm. The screw needed to tighten the clamp is a M3x14mm plus an M3 lock nut. To attach the replacement lever, you need to remove the top and front cover. Remove the lamp's frame to get access to the cam. The cam is secured with a small setscrew (see picture with red circle). Loosen the setscrew and carefully remove the cam from the axle. Slide the axle off the sewing machine. Be careful not to unhinge any of the rods inside since removing the cam unlocks them! Then press the new lever onto the axle (using calipers as shown in one of the pictures), slide it into the machine, and see if the lever is horizontally aligned when the stamp is in the up position. If that's not the case, remove the axle/lever and re-adjust it. If the adjustment is properly set, insert the screw as well as the lock nut and tighten them firmly. Reassemble everything and make sure there is no slip when moving the lever to lift up the stamp. The lever is designed kind of bulky. This way, it's also possible to print it using PETG - my first attempts to get the dimensions right used PETG - would've been suitable too, however, the child in me wanted to try the new ASA spool anyway :). And here comes a big word of warning. Do not forget to apply a thin layer of glue-stick on your build plate. Otherwise (if you're using a PEI covered build plate), the part will stick very VERY well. Another, even bigger word of advice: do not forget to apply glue-stick on that area where the printer does the purge line at the beginning! Wait until the heated build plate has cooled down to room temperature before removing the part to prevent any harm to the build plate. Happy printing/ sewing, Hannes
With this file you will be able to print Pfaff Sewing Machine Lever with your 3D printer. Click on the button and save the file on your computer to work, edit or customize your design. You can also find more 3D designs for printers on Pfaff Sewing Machine Lever.