Pet vacuum brush
thingiverse
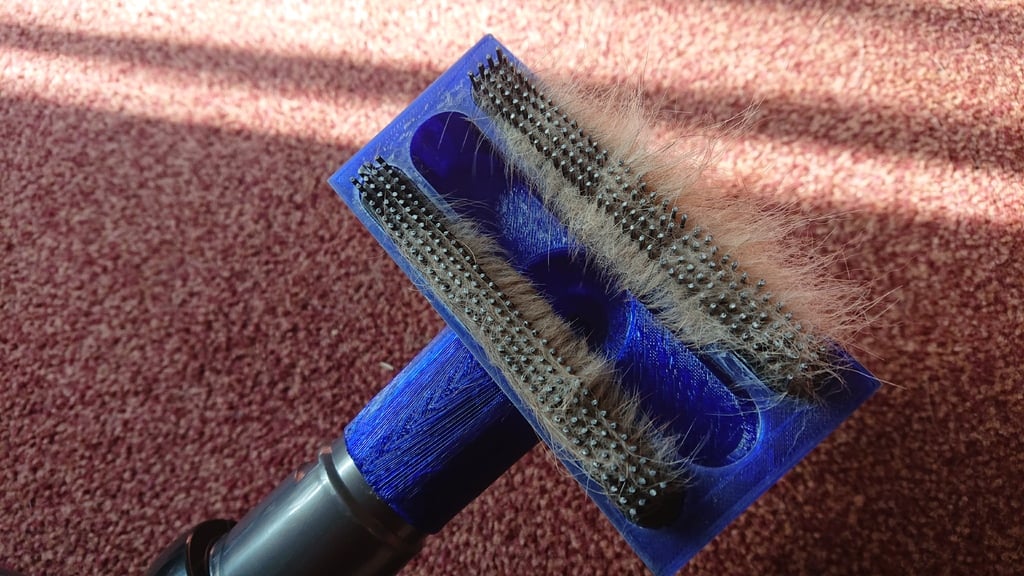
First, make sure you're interested in reading on because these brushes are designed to be printed in flex filament. Each strand is 1.2mm in diameter, so PLA/ABS/PET might be too stiff and could hurt your pet. Also, flex filament is slightly rubbery, which helps grip and remove loose hairs. Most modern Vacuums are very powerful, I'd highly recommend using the vacuum on a low setting if you have the option or at least opening the bleed air valve to reduce suction (usually a little collar or slider near the handle), most vacuums have these. It fits a 34-35mm wand (as found on shark vacuums) but can easily be molded using a hair dryer to fit slightly larger or smaller diameters. Alternatively, a remix by sticking on a different size tube should be fairly easy. For those of you who have decided to read on, here's the basic idea behind it, how to print and put it together. The attachment isn't designed to suck the hairs off your pet. The brushes do most of the work in removing and trapping loose hair just like a normal brush. The vacuum bit is there to capture/prevent the cloud of hairs that normally go flying everywhere whilst grooming. It also offers an easy and convenient disposal method when removing hair from the brush. Settings for the brush I printed, none are particularly critical so change as you require. Main attachment: Material: PLA Layer height: 0.3mm Infill: 10% Support: yes Print time: 4 hours and 30 minutes Brushes: I found the base of my brushes was a little too long and a little too wide, but I'm not sure if this was just my printer. The base of the brush was roughly 1mm too long and 0.5 mm too wide to fit in the cutouts. I used scissors to cut it down, but you could easily amend this when slicing. Material: generic flex filament Layer height: 0.2mm Infill: 100% Support: no Print time: 1 hour. Putting it together is easy. Initially mine didn't fit on the hoover wand so I gently heated the fitting tube on the attachment with a hair dryer until it was "moldable" then pushed it on the hoover and let it cool down. It now fits perfectly. Cut away the sacrificial wall (the squared off one) and glue the brushes into the attachment, and you're done!
With this file you will be able to print Pet vacuum brush with your 3D printer. Click on the button and save the file on your computer to work, edit or customize your design. You can also find more 3D designs for printers on Pet vacuum brush.