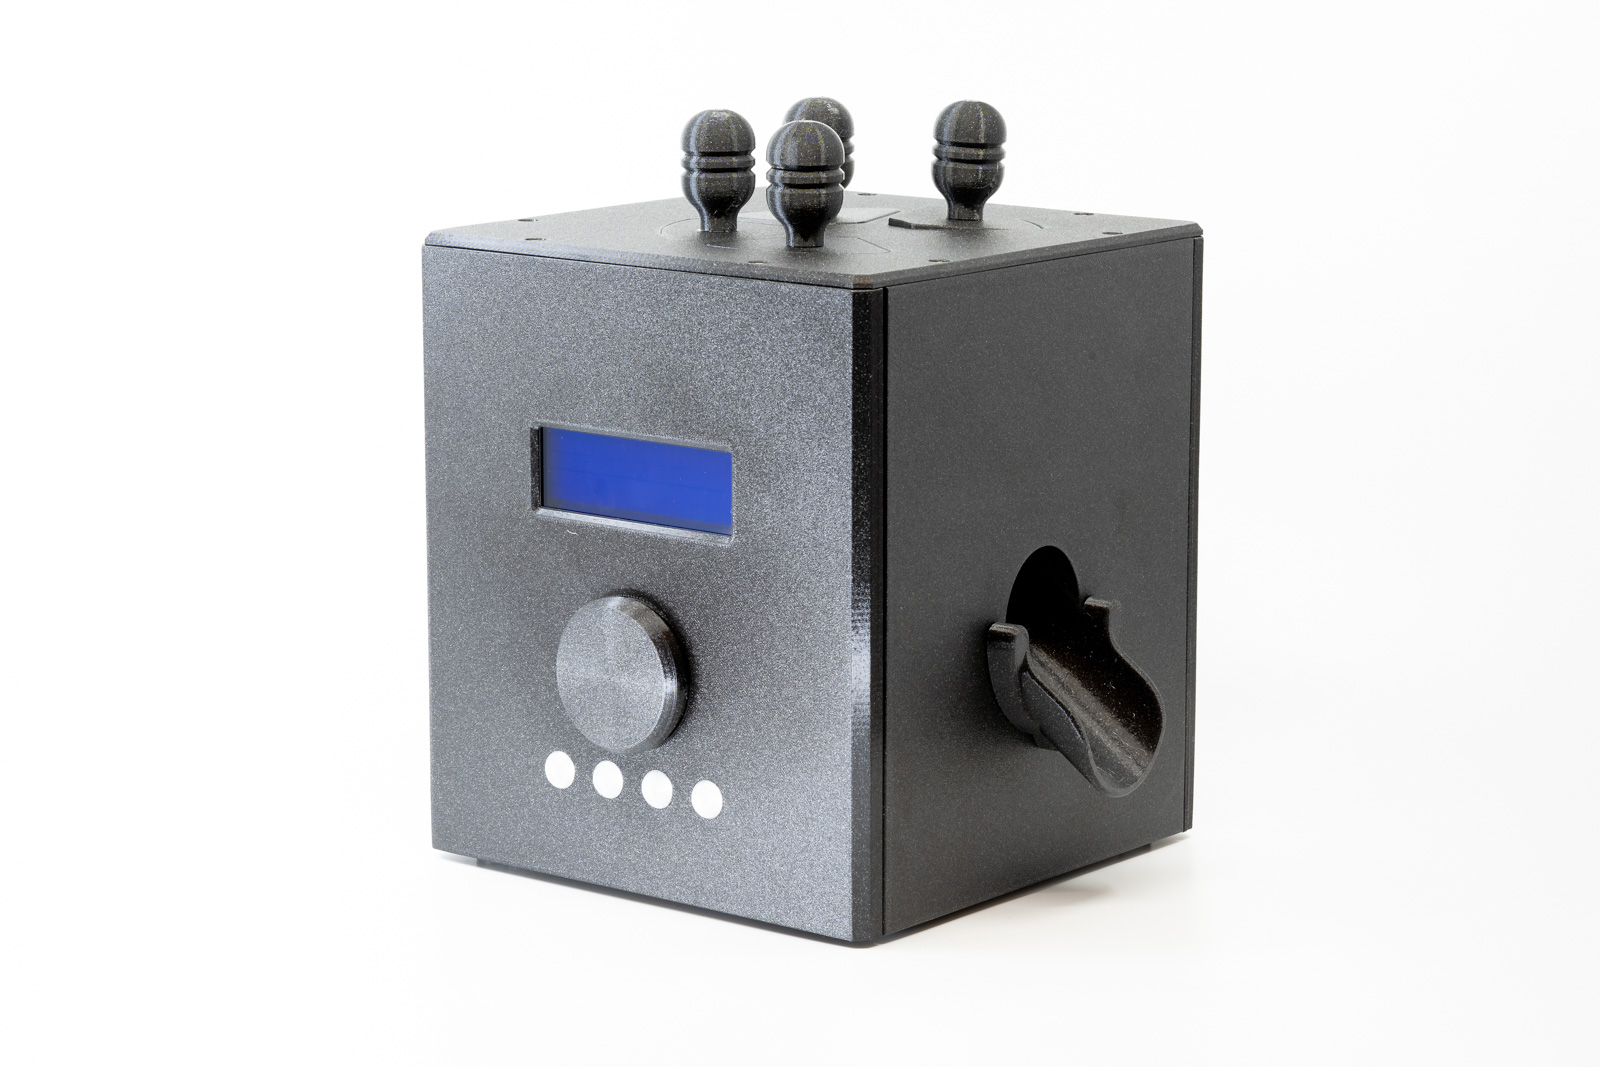
Pet Feeding Device – Mechanical Parts
prusaprinters
<p>Are you in search of an advanced project, with large printed parts, gears and electronics? So, why not print your own pet/cat feeding device? I created detailed instructions on how to print and build the shown device - just leave you the task of building the controller.</p><ul><li><a href="https://luckyresistor.me/2021/01/02/cat-pet-feeding-device-part-1/">Part 1 – Print the gearbox and base plate</a></li><li><a href="https://luckyresistor.me/2021/01/05/cat-pet-feeding-device-part-2/">Part 2 – Assemble the gearbox</a></li><li><a href="https://luckyresistor.me/2021/01/13/cat-pet-feeding-device-part-3/">Part 3 – Enclosure parts and rotary table platform</a></li><li><a href="https://luckyresistor.me/2021/01/24/cat-pet-feeding-device-part-4/">Part 4 – Lids and front panel</a></li><li><a href="https://luckyresistor.me/2021/01/30/cat-pet-feeding-device-part-5/">Part 5 – Turntable and back panel</a></li><li><a href="https://luckyresistor.me/2021/02/18/cat-pet-feeding-device-part-6/">Part 6 – The input panel board and the knob</a></li><li><a href="https://luckyresistor.me/2021/04/03/lets-print-a-cat-pet-feeding-device-part-7/">Part 7 – The sensor board</a></li></ul><p>The series focuses on the mechanical design, but also contains detailed information on how to build and create the <i>display and sensor board </i>for the device. <strong>Yet, there are no instructions on how to build the actual controller. </strong>This last part I left intentionally open, as there is no single and simple solution that fits everyone's needs.</p><p><i><strong>Be warned:</strong> This is an advanced project for experienced makers! My instructions will provide all that you need to create your own working device, yet you may want to customize parts to adapt the design to your own needs.</i></p><h3>Mode of Operation</h3><p>The working principle is very simple. You fill dry food or treats into the compartments, at a specified time, the turntable rotates and the food falls through the output funnel into the bowl.</p><p>My design uses sensors in each compartment to program the device, just by putting food into them. Imagine this implementation:</p><ul><li>The first compartment is defined for the food while you are at work. If you fill it, the food gets dispensed at 2 pm.</li><li>The second compartment is for food if you work late and gets dispensed at 8 pm.</li></ul><p>Without the sensor, the device would just rotate the turntable at 2 pm and 8 pm. This could irritate your pet, because, if it hears the sound of the rotating turntable, it expects a treat or food. Using the sensors, filling the compartments will “program” the device. So if you fill just the second compartment, the turntable will only rotate at 8 pm, even if you fill it in the morning.</p><p><i>This is just an <strong>example</strong> of how you could implement your controller. It is your choice if you add all these sensors or just the position sensor.</i></p><h3>Additional Requirements</h3><h4>Required Mechanical Parts</h4><ul><li>M3 screws with flat heads in various sizes (8mm, 12mm)</li><li>M3×5mm grub screws.</li><li><a href="https://www.rampa.com/ca/en/softwood/273-inserts-type-a.html#/6-technical_approval-_/7-100_control-_/14-drive-with_slot_with_thread/15-material_coating-steel_zinc_plated/17-type-type_a/2626-hole_spacing-_/2627-head_diameter-_/2628-wrench_size-_/2629-usable_thread-_/2630-socket_length-_/2631-shank_mount-_/2632-version-_/2633-torque_range-_/2634-speed_range-_/2635-coverage-_/26-diameter-6/27-length-8/28-thread-m3">Rampa M3 × 8 × AD6mm insets</a> or compatible.</li><li>Long M3 screw (>40mm) to insert the insets.</li><li>2 × ball bearing 6200 10×30×9 mm</li><li>2 × ball bearing 16004 20×42×8 mm</li><li>NEMA 17 stepper motor with 5mm diameter D-shaft (almost any variant will work).</li></ul><h4>3D Printer Requirements</h4><ul><li>The largest parts are 180 × 196 mm, you need a printer bed matching this size.</li><li>0.4mm nozzle.</li><li>You can print PETG and PLA.</li></ul><p>I recommend printing most of the parts using PETG, except a few parts which need to be printed with PLA, because of the stiffness. I assume you have enough 3D printing experience to replace the materials with matching ones if you like.</p><h4>Recommendations</h4><ul><li>Use a <a href="https://shop.prusa3d.com/en/3d-printers/180-original-prusa-i3-mk3s-kit.html#">Prusa i3 MK3s printer</a>.</li><li>Use Prusament PETG:<ul><li>“Galaxy Black” or “Signal White” for the outer case.</li><li>“Urban Grey” for the gearbox.</li></ul></li><li>Use Prusament PLA:<ul><li>“Galaxy Black” for the axes and the platform.</li></ul></li></ul><h3>Detailed Print and Assembly Instructions</h3><p>You find detailed print and assembly instructions in my multi-part guide. Each print and assembly step is described in detail, with required layer heights and materials.</p><p><a href="https://luckyresistor.me/projects/lets-print-a-cat-pet-feeding-device/">Let's Print a Pet/Cat Feeding Device</a></p><p> </p><p>Happy Printing!</p><p> </p>
With this file you will be able to print Pet Feeding Device – Mechanical Parts with your 3D printer. Click on the button and save the file on your computer to work, edit or customize your design. You can also find more 3D designs for printers on Pet Feeding Device – Mechanical Parts.
