PET BOTTLE GIFT BOX KIT
prusaprinters
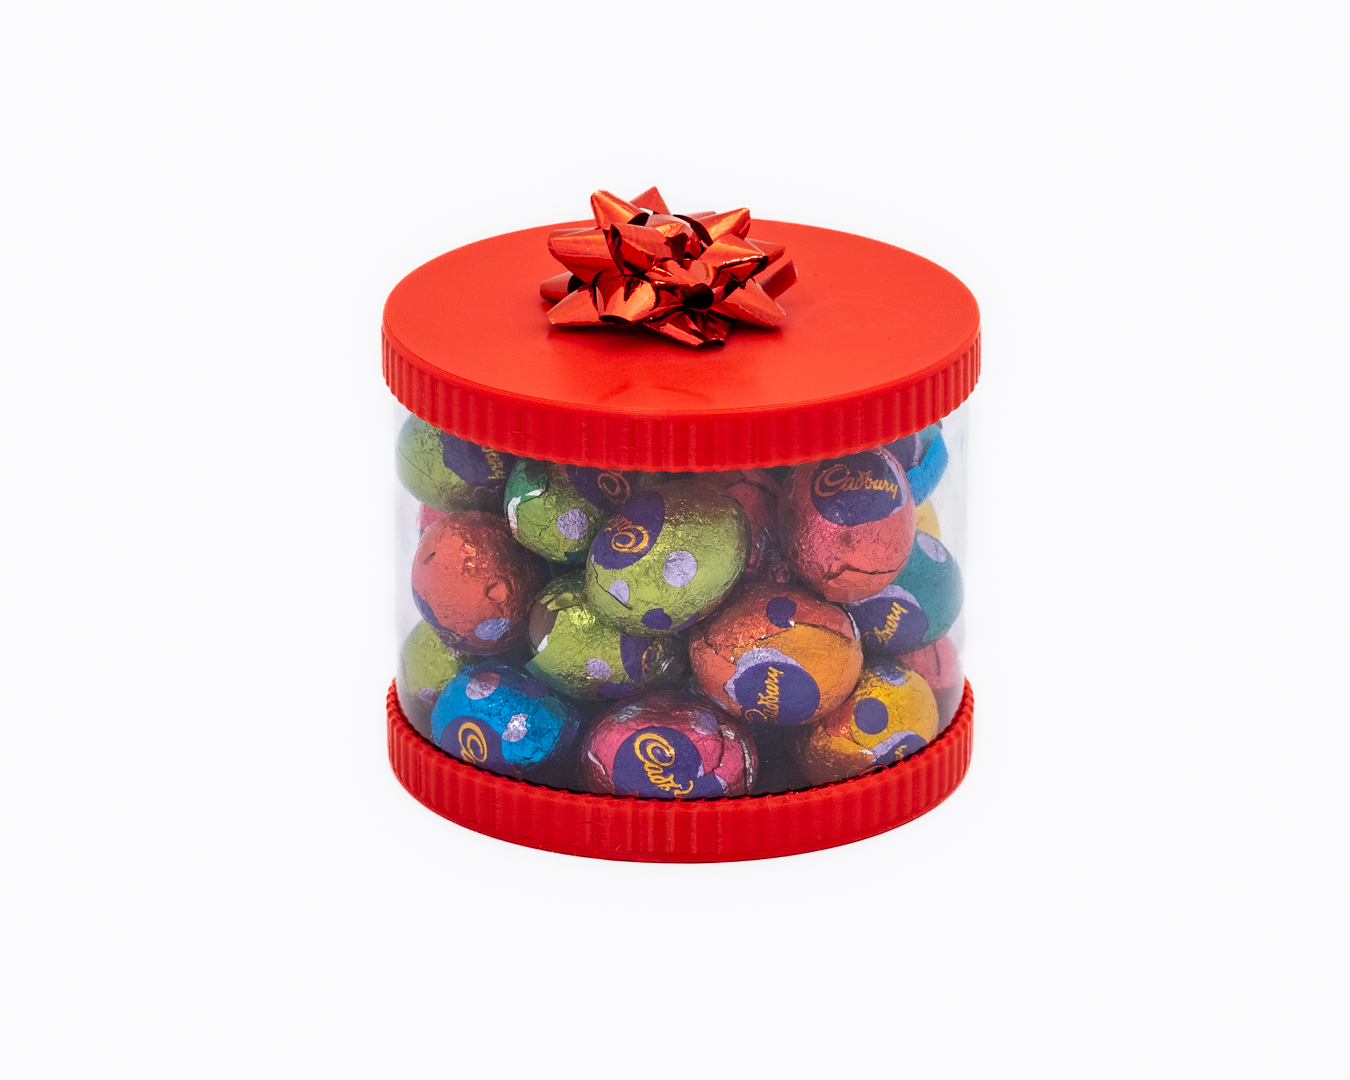
<p>This is one of three projects designed to reuse most of a discarded PET bottle. The others may be found at the following links:<br><br><a href="https://www.prusaprinters.org/prints/153251-pet-bottle-tiny-funnel-adapters">TINY FUNNEL ADAPTERS</a></p><p><a href="https://www.prusaprinters.org/prints/152680-pet-bottle-canister-kit">CANISTER KIT</a></p><p><img src="https://media.prusaprinters.org/media/prints/153175/rich_content/19f95433-07ea-4b8a-beea-1b1f498dce78/22-03-21-at-16-49-59.jpg#%7B%22uuid%22%3A%22866cd6de-222f-44d0-96eb-ba35a8fb5397%22%2C%22w%22%3A1350%2C%22h%22%3A1080%7D"><br> </p><p><strong>GIFT BOX KIT DESCRIPTION</strong></p><p>This kit comprises a “base” and lid to turn almost any shape of PET bottle into a delightful yet quite robust gift box. The “base” section has a recess which is intended to hold the PET bottle snugly in place but a drop or two of CA glue wouldn't hurt to locate it permanently.</p><p>I printed a second “base” section as a lid to create a very robust package, but this is not practical if the lid is required to be removed on a regular basis.</p><p>The “lid” component has no inner flange and simply fits over the outside of the bottle. It could also serve as a base if you don't want to fiddle to get the fit “just right”. <br><br>It can be really fiddly to get it right too, so be warned! </p><p>Assembly is quite straight forward, and a little bit of patience in getting the size right will be rewarded with a very neat finish.<br><br><strong>SELECTING THE BOTTLE</strong><br><br>Any bottle will do, as long as it has a section with parallel sides that can be cut to fit the grooves in the parts. I've used a 750mm soda bottle in this example because I'd already used the lower third. All of the places marked with tape would be suitable places to cut, and many other bottle shapes are available to provide a seemingly infinite variety of box.</p><figure class="image image_resized" style="width:535.5147094726562px;"><img src="https://media.prusaprinters.org/media/prints/152680/rich_content/3a7bd8dd-148a-4c8a-97a4-5dea4db95b07/thumbs/cover/800x640/jpg/22-03-20-at-11-20-17.jpg"></figure><p><strong>MARKING THE CUT</strong><br><br>The more care you take with the cut, the easier it will be to make a nicely fitting product. Wrap some masking tape around roughly where you want to make the cut - this will make it easier to mark, and will help to keep the edge a little stiffer when you are cutting it.<br><br>Find an object that's about the height of where you want to cut, and use a felt pen to mark the cut line. Cut carefully using scissors for a nice neat finish. <br><br> </p><figure class="image image-style-align-center image_resized" style="width:535.5147094726562px;"><img src="https://media.prusaprinters.org/media/prints/152680/rich_content/7dc0a9ad-5df2-4386-bb86-213b9dbee47e/thumbs/cover/800x640/jpg/22-03-20-at-11-26-00.jpg"></figure><p><br><strong>SIZING THE BASE</strong><br><br>As mentioned above, you are going to need a little patience with this as rigidity of the end product depends on a very accurate fit. Of course a little drop of superglue will fix a little sloppiness, but it's very satisfying when it fits properly. </p><p>Of course the lid will also make a perfectly adequate base with a little CA glue to hold things together with a little more leeway in dimensional accuracy.</p><p><br>Because of all the flex in the material, the easiest way to find the diameter is to carefully measure the circumference at the cut line BEFORE you slice the bottle. I've found the most accurate way of doing that is to use a strip of paper, mark the overlap and then measure it on the flat.<br><br>You can then easily calculate the diameter<a href="https://www.calculator.net/circle-calculator.html?radius=&diameter=&circumference=150&area=100&ctype=1&x=0&y=0"> using this online calculator.</a><br><br>For reference, the diameter of the base and lid in the attached files are: 78.5mm <br><br>Now you can go to the attached file <i>(in the link in the fine print on the downloads page)</i> and change the #BOTTLE_DIAMETER dimension to create your own file, (see note below) OR if you wish you can scale it to suit yourself in your slicer. Note if you choose to scale it, the tolerances are very fine and it may not work on a smaller dimension - a larger one will be fine, you'll probably have to rely on glue to keep it in place.</p><p><strong>TEST FIRST</strong></p><p>I have included a test model to enable you to check the fit and adjust to the final fit before printing the final model. (I did mention this was fiddly!) Printing the test ring at .3mm DRAFT mode will save some time.<br><br><strong>PRINTING </strong></p><p>I have printed these in PLA but PETG will work just as well. No supports are necessary printed with standard Prusa Slicer Settings .2mm QUALITY and a 0.4mm nozzle.<br><br><strong>USING ONSHAPE.</strong><br><br>Using Onshape is easy - open the attached link, and double-click on the #BOTTLE_DIAMETER parameter to change it. “Enter” once only to save your change on all three drawings .<br><br>Right click on the part name in the bottom left of the screen to bring up the menu - choose “Export” and you are pretty much ready to download your personal STL.<br><br><img src="https://media.prusaprinters.org/media/prints/153175/rich_content/a81ec423-5985-443d-a66c-835ced2bc453/screen-shot-2022-03-21-at-83819-pm.png#%7B%22uuid%22%3A%2274878b94-b5d2-4d9e-89fd-4b942c0fd6fd%22%2C%22w%22%3A2558%2C%22h%22%3A1914%7D"></p><p><br> </p>
With this file you will be able to print PET BOTTLE GIFT BOX KIT with your 3D printer. Click on the button and save the file on your computer to work, edit or customize your design. You can also find more 3D designs for printers on PET BOTTLE GIFT BOX KIT.