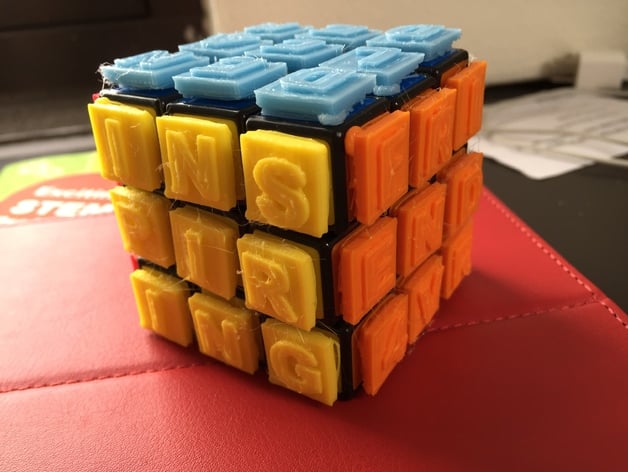
Personalized Rubik's Cube
thingiverse
This lesson is an introduction to Tinkercad, 3D printing, and building classroom community through the creation of a personalized classroom rubik’s cube. Print Settings Printer Brand: Printer: Cube Rafts: No Supports: No Overview and Background Objectives Students will be working in teams to generate a unique 9-letter word or combination of symbols that represents their chosen topic. Students will work collaboratively in Tinkercad using a pre-made base to add the letters of their chosen word. Standards Building classroom community and social-emotional learning through which learners acquire and effectively apply knowledge, attitudes, and skills necessary to understand and manage emotions, set and achieve positive goals, feel and show empathy for others, establish and maintain positive relationships, and make responsible decisions. This lesson helps reinforce four of seven strategies for building positive classrooms: Make Learning Relevant Create a Classroom Code of Conduct Teach Positive Actions Reinforce Positive Behaviors Lesson Plan and Activity Lesson - Part 1: Brainstorm and Share Out Duration: Approximately 30 Minutes Share an example of the final product (image) so that students understand what they are designing to represent their classroom or selected topic. Divide students into six random groups. As a team, students will have 10-15 minutes to generate as many nine-letter words or combinations with symbols that represent the topic on chart paper or a collaborative document. The goal is to avoid repeating words, which is why group share-outs are crucial. Highlight the repeated words and then have each group select a word they want to create. Lesson - Part 2: Importing an Image into Tinkercad Duration: Approximately 10-15 Minutes Tinkercad allows importing either an .svg or .stl file. An .svg file can be converted from a .jpg or .png file using the .svg converter at picsvg.com. An .stl file is any file created for 3D printing. This import ability enables designers to import any 3D design and rework it or build upon it. Lesson - Part 3: Creating with Tinkercad Duration: Varies by level This is the step where differentiation occurs based on the teacher's knowledge of their students. For younger students or those who have never used Tinkercad: Using the attached generic .stl file, students can import the basic foundation of the project into Tinkercad and drag-and-drop the letters of the word onto tiles. Tinkercad is not a collaborative application, but for this part, each student or pair of students could do the word to be introduced to how Tinkercad works. For older students or those who have used Tinkercad: Students can measure the squares of the Rubik’s cube and design from scratch. Tinkercad is not a collaborative application, but for this part, each student or pair of students could do the word to be introduced to how Tinkercad works. For an even more advanced level using Tinkercad: Students can use one image instead of individual letters that cover a full 9-block section. (See attached images provided by Drew Lentz) Finished Example Advanced Design Lesson - Part 4: Exporting and Printing the Design Duration: 45 minutes per 9-piece side Students will need to export the design for 3D printing from Tinkercad as an .stl file and share it with the teacher for final printing. Printing will take approximately 45 minutes per 9-letter section. Rafts: no Supports: no Resolution: 0.2 mm Infill: 10% Lesson - Part 5: Adding the Design to the Rubik's Cube Duration: Approximately 15 minutes to apply and an hour to dry Use Gorilla Glue to apply each piece to the Rubik’s Cube by moistening the two sides that will be adhering together. Use very little glue as it expands. It will take about an hour per side for the glue to dry and adhere permanently. Do not speed up this process as it will result in pieces moving and sliding. Materials Needed Chart Paper and markers or Collaborative Google Doc for each group Computers for Tinkercad .STL file Standard Rubik’s cube (six sides with 9 squares on each side) Gorilla glue 6 filament colors (preference of red, blue, green, yellow, orange, and white) Skills Learned Collaboration Teamwork 3D Printing 3D Design Rubric and Assessment The assessment should occur before sending the word to be printed.
With this file you will be able to print Personalized Rubik's Cube with your 3D printer. Click on the button and save the file on your computer to work, edit or customize your design. You can also find more 3D designs for printers on Personalized Rubik's Cube.
