Peristaltic pump
thingiverse
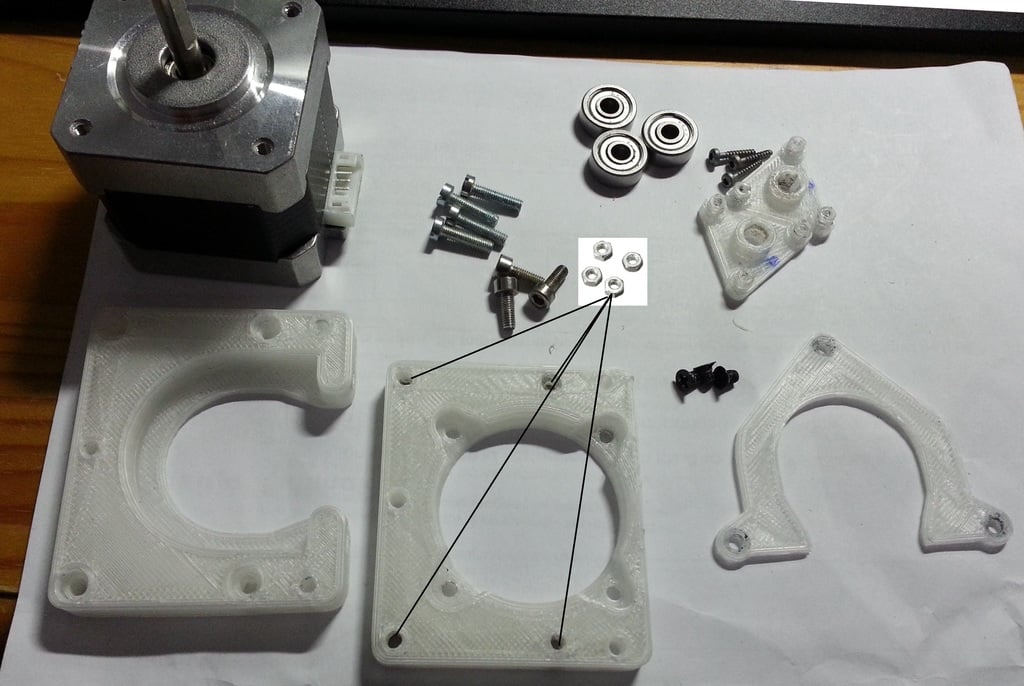
I needed a water pump for various projects, and after researching different options, I decided that a peristaltic pump was the best choice due to its precision dosing capabilities. It can be used for continuous pumping, and the liquid is isolated from other components by tubing, making it safe for use in food processing and other applications where cleanliness is crucial. The capacity of this pump is approximately 160ml per minute, as seen in the video. However, I intentionally limited the flow rate to avoid damaging the tubing. The assembly process is straightforward, but I've included step-by-step pictures for reference. I started working on this project last year by creating a user interface using an Arduino Mega 2560 with a TFT screen. As I added more features and options to control the pump, the code became increasingly complex. Despite this, I plan to soon release the schematics for testing the pump using basic electronics without the need for an Arduino. Here's what you'll need: - 4 M3 nuts - 3 x M1.85x10 screws - 3 x M3x3 screws - 4 x M3x8 screws - 4 x M3x11 screws - 3 bearings (624ZZ ball, 4x13x5 mm) - Optional printable bearing available for download For the electronics, you'll need: - A peristaltic pump controller (OSPC) - A stepper motor driver - Power supply - Jumper wires - Breadboard - Arduino Mega 2560 (optional) If you have any questions or would like to contribute to this project, please feel free to do so. You can find more information and updates on my website: http://karim.lakras.eu/.
With this file you will be able to print Peristaltic pump with your 3D printer. Click on the button and save the file on your computer to work, edit or customize your design. You can also find more 3D designs for printers on Peristaltic pump.