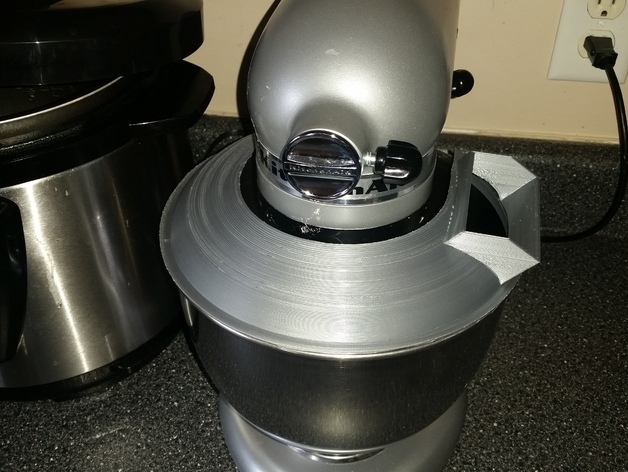
Pergo Kitchen Aid Mixer Top or Cover
thingiverse
By Popular Demand, I designed a "Connector" for small printers to allow slicing the top into two parts and printing on a compact printer. The connector was printed on its side to facilitate understanding in Thingiverse preview. My wife loves the stand mixer I bought her; it performs multiple tasks but only has one lid. She challenged me with a question, "You know that pricey printer you have? Let's see how skilled you are with it." In response, I created this design and received a warm hug! Maybe your wife will be impressed too. If so, please share the "make pics" – not the "Make out pics"! Print at 100% infill to achieve optimal results. Note that supports are required due to the object's geometry; specifically, it needs to touch the build plate. The ideal layer height is .3mm, and I recommend using PLA since this item won't reach high temperatures, making it a suitable choice for printing. However, if you plan to subject the item to dishwasher temperatures (170°F or 76°C), consider using ABS or PETG instead. To ensure food safety, spray the ridged areas with a silicone coating like MG Chemicals Silicone Conformal Coating (available on Amazon) and allow it to dry thoroughly – at least one day is recommended for safety. To clean up the print, remove supports by breaking them away. For interior supports, use a Dremel small wire wheel at medium speed with minimal pressure while moving back and forth. Print Settings: Printer Brand: Robo 3D Printer Model: R1 ABS + PLA Model Rafts: No Supports: Yes Resolution: .3mm Infill: 100%
With this file you will be able to print Pergo Kitchen Aid Mixer Top or Cover with your 3D printer. Click on the button and save the file on your computer to work, edit or customize your design. You can also find more 3D designs for printers on Pergo Kitchen Aid Mixer Top or Cover.
