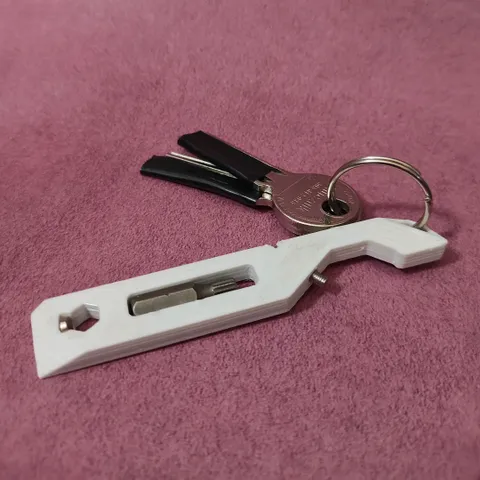
PEREUKA Keychain Multitool - Customizable
prusaprinters
OverviewHi, I'm proud to present Pereuka, a keychain multitool inspired by these small fancy titanium prybars made by some EDC oriented brands. It has a few neat tricks up its sleeve. It's open source, meaning anyone can customize it right in the browser using OnShape. Alternatively you can download and modify the included STEP file. FeaturesKeychain loop - it's technically a featureBottle opener - it uses an M3 bolt (14mm in length by default, but different can be used) as a way to prevent wearing out and distribute the force evenly. It's not the best bottle opener, but it does the job reliably on first try after you've opened 1-2 bottles and gotten used to it.Pokey stabby bit - not a blade, but it's enough to get through some tape or plastic wrap and it won't stab your booty.Hex bit socket - PLA may not be able to withstand too much torque, but it should be enough to tighten or loosen an unruly bolt. I wasn't able to break the tool when I tried tightening a bolt fairly hard, but keep in mind I'm not exactly a bodybuilder. Additionally it has a space for a magnet to keep the bit in place in case the socket wears out. And what use would a bit socket be without a…Bit holder - it fits a standard bit snugly, but just in case it wears out with repeated use, it also has space for two magnets that should keep the bit in place.MORE MAGNETS - extra four holes for magnets that can be used to stick your Pereuka to a fridge or something. It can support itself and 2 of my keys no problem, probably can do more. Absolutely not mandatory, but I'll do anything to stretch this list.CustomizationYou can setup a free OnShape account (refer to a TeachingTech tutorial on YT if you have trouble with it) to access the source file and modify it. If you don't want to dive too deep, then you can just change some of the basic variables that drive the rest of the design, such as the bolt length, magnet diameter and thickness or the hex bit socket size if you'd like to adjust the fit. You can of course do whatever you want, modify sketches etc. or just use the STEP file if you don't fancy using OnShape. It's Open Source baby!Printing I printed mine with a 0.6 mm nozzle, 0.2 mm layer height (0.4 worked well before, but I wanted it to look more like a finished product in the end). When it comes to perimeters, I used 5, which would be equivalent to about 7-8 for a 0.4 mm nozzle. For top/bottom layers I chose 6 and 30% infill. These settings may seem a bit overkill and maybe they are, I didn't conduct a complete analysis for every possible parameter combination. I just know that these settings worked for me. Remember that you want it to be fairly rigid and durable.AssemblyAt the very least, you should have an M3 bolt to screw into the provided hole. It should cut its own thread (if it doesn't, you can change the ScrewDiameter variable). Default length is 14 mm, but it can be changed using the ScrewLength variable in the OnShape file. The practical max is 16 mm, minimum is theoretically anything over 3.7 mm since that how far the screw should protrude, but I would imagine something around 8-10 mm is the minimal sensible option.The only other steps in the assembly consist of pushing the magnets into their places, but they are not really mandatory. Of course the size of the magnets can be changed by modifying variables. In my case all the 5x2 mm magnets fit snugly into their places.ThanksI hope you like my design and if you do, don't hesitate to print it, share your makes, post it wherever you want to and like the design! It was a fun experience and drunk way too much sodas and beers trying to perfect the bottle opener.
With this file you will be able to print PEREUKA Keychain Multitool - Customizable with your 3D printer. Click on the button and save the file on your computer to work, edit or customize your design. You can also find more 3D designs for printers on PEREUKA Keychain Multitool - Customizable.
