Penrose Ceiling Lamp Shade
prusaprinters
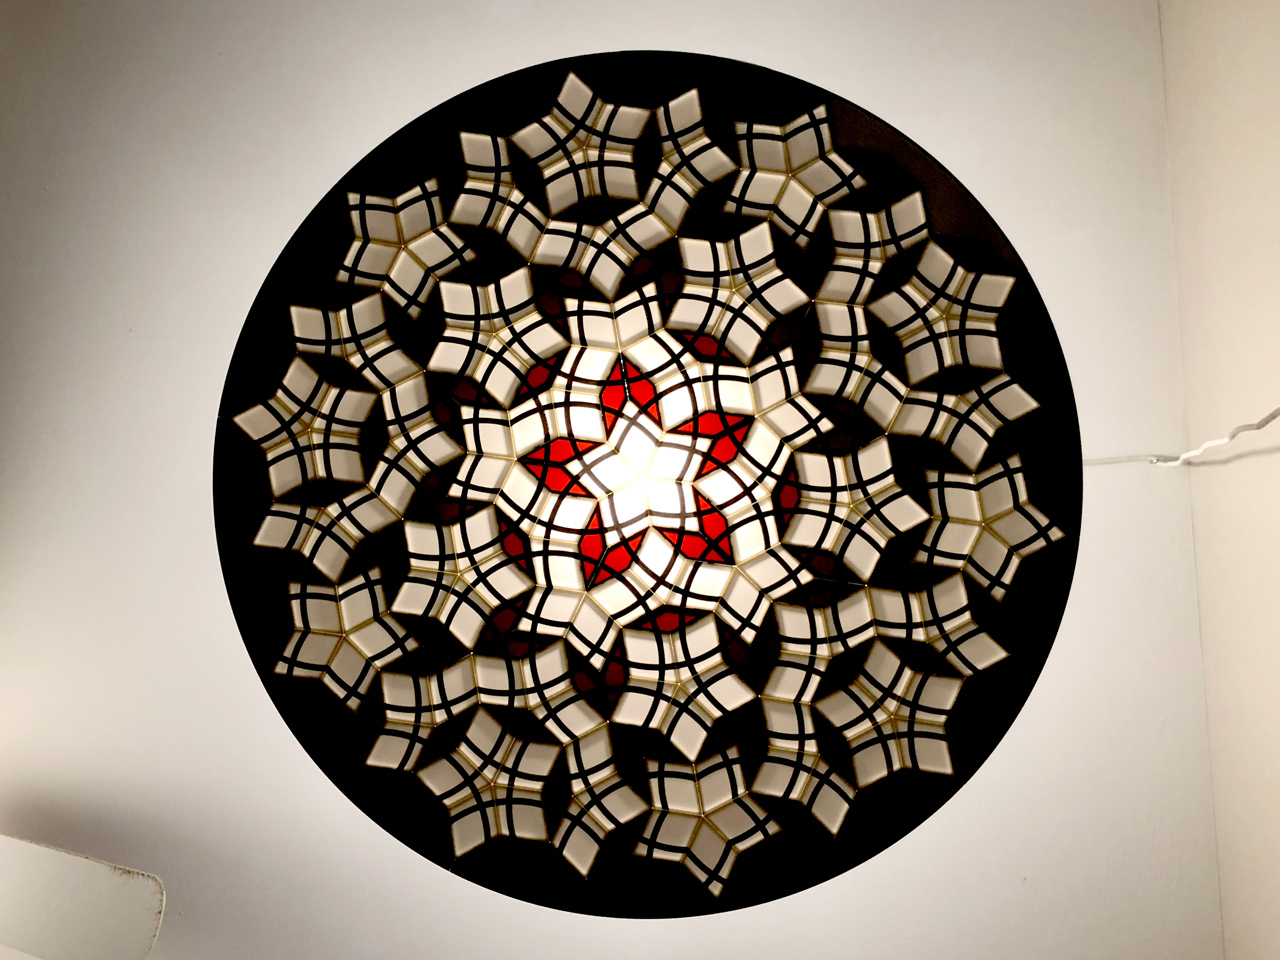
<p><strong>EDIT: 6-OCT-2020: Congratulations to Roger Penrose on his Nobel Prize relating to his work on black holes.</strong></p> <p>I've always been fascinated by <a href="https://en.wikipedia.org/wiki/Penrose_tiling">Penrose Tiling</a> and I decided to utilize their principles to create a gorgeous ornament to shade a ceiling lamp for the top of our stairwell. It is based on the <a href="https://www.ikea.com/us/en/p/hemma-cord-set-white-50386580/">IKEA Hemma</a> lamp.</p> <p>One of the interesting things about Penrose tiling is that an infinite surface can be tiled with them in a manner that will never "translationally" repeat. It has 5-fold symmetry about the pattern's center. In order to ensure that the 2 rhombi are assembled correctly, there are 2 different tabs built into the edges of my models. This ensures that they'll only ever be joined correctly! Also, the strips make it visually clear how to assemble them.</p> <p>I found a <a href="https://craftdesignonline.com/penrose/">nifty online tool</a> for designing one of many possible layouts. I chose the one you see pictured because I think it's gorgeous (especially with the in-built stripes) and "concludes" well enough, just inside of a meter diameter.</p> <p>This design has 150 "fat" rhombi and 100 "thin" rhombi. These combined with the "stem" that connects it to the Hemma require about 1.2 kgs of filament and about 110 hours of non-stop printing.</p> <h3>Print instructions</h3><p>Even though this is an MMU2 print, there were exactly zero issues for me because all the tool-changing happens on the first 2 layers. All the rhombi print at 0.2mm layer height.</p> <p>The "stem" is printed at 0.15mm layer height so that the threads on the "sleeve" are nice and smooth and fit nicely with the nuts.</p> <p>To assemble, you take the Hemma apart (see <a href="https://www.youtube.com/watch?v=FObEuLBg6Kg">this video</a> for help) so that you can run the Hemma's cord into the top of the assembled sleeve. Then reassemble the Hemma. The sleeve will rest perfect on top of the Hemma's socket.</p> <p><strong>Parts printed at 0.20mm layer-height</strong></p> <ul> <li>140x - Fat Rhombi</li> <li>10x - Fat Rhombi w/Loop</li> <li>100x - Thin Rhombi</li> </ul> <p><strong>Note:</strong> I've provided GCODE and 3MF files that have 1, 5, 9 or 10 of these objects so you can print several at a time.</p> <p><strong>Parts printed at 0.15mm layer-height</strong></p> <ul> <li>1x - Threaded Sleeve</li> <li>1x - Top Hanger</li> <li>1x - Idle Hanger</li> <li>2x - Sleeve Nuts</li> </ul> <p><strong>Note:</strong> All of this can be printed in one print with the provided GCODE/3MF files.</p> <p>You will also need:</p> <ul> <li>1x <a href="https://www.ikea.com/us/en/p/hemma-cord-set-white-50386580/">IKEA Hemma</a></li> <li>1x LED bulb for the Hemma</li> <li>Some chain (I used this: <a href="https://www.amazon.com/gp/product/B019Z3HD4I/">https://www.amazon.com/gp/product/B019Z3HD4I/</a>).</li> </ul> <p><strong>Assembly</strong></p> <p><strong>Assembling the stem</strong></p> <p>Refer to the provided image showing the completed <strong>stem</strong> assembly.</p> <p><strong>Adding the stem to the Hemma</strong></p> <p>Take apart the Hemma light fixture from the lamp socket end. Our goal is to position the <strong>stem</strong> on top of the socket piece with the lamp cord running through the <strong>stem</strong>.</p> <p>Review this video for instructions on disassembling the Hemma: <a href="https://www.youtube.com/watch?v=FObEuLBg6Kg">https://www.youtube.com/watch?v=FObEuLBg6Kg</a>. Keep track of the original position of the wires before you remove them and make sure they go back to the same places.</p> <p>Now, run the lamp's cord through the <strong>stem</strong> from the top-down. So, the first part that will go onto the cord is the <strong>top hanger</strong>, followed by the <strong>idle hanger</strong> then the 2 <strong>sleeve nuts</strong> then the <strong>threaded sleeve</strong>. Please refer to the provide image labeling the parts.</p> <p>Now with the stem assembly on the cord, re-assemble the Hemma paying attention to the original wiring.</p> <p>If you position the shade so that the lamp is within 6 inches/15 cms then <em>do not use an incandescent lamp in the Hemma</em>! Seriously, there's just no reason to not use an LED lamp these days anyway.</p> <p><strong>Assembling the Shade</strong></p> <p>This is the fun part! Print a number of the Penrose tiles and start connecting them to form the pattern shown on the provided line-drawing. Start from the "star" in the middle and work your way out to the edges. They should snap together firmly.</p> <p>As your pattern grows, you'll need to make sure you place in the <strong>fat rhombs with loops</strong> these are where the chains will attach. Review the photo with the red and yellow highlighted areas for where to place them.</p> <p>Finally, add your perimeter pieces to make it a perfect circle and to hide the tabs on the edges of the outer-most Penrose tiles. This is a little tricky as the tabs will sort of work against one another, but with a little creative flexing of the surrounding tiles, they'll fit in perfectly.</p> <p>No glue is required! If you decide to use a new pattern later, go for it! Disassemble it and reassemble as you wish (the perimeter pieces probably won't work for other patterns though).</p> <p><strong>Final Assembly</strong></p> <p>Next take 5 equal length chains and connect the <strong>idle hanger</strong> on the sleeve with the 5 <strong>fat rhombi with loops</strong> that are nearest the center of the assembled shade. Choose chain lengths such that the lamp will be the distance you desire to the shade, when the "idle hanger" is about 1/2 the way up the sleeve.</p> <p>Next choose 5 equal length chains such that they will connect the 5 outer-most <strong>fat rhombi with loops</strong> to the <strong>top hanger</strong> and that result in an approximately flat shade.</p> <p>Use the top <strong>sleeve nut</strong> to adjust the <strong>idle hangers</strong> height on the <strong>threaded sleeve</strong> so that you can get the shade as flat as possible. Next, tighten the lower <strong>sleeve nut</strong> against the top <strong>sleeve nut</strong> to ensure it doesn't move.</p> <p>You're done! Just attach it to your ceiling and enjoy your new ceiling lamp shade!</p>
With this file you will be able to print Penrose Ceiling Lamp Shade with your 3D printer. Click on the button and save the file on your computer to work, edit or customize your design. You can also find more 3D designs for printers on Penrose Ceiling Lamp Shade.