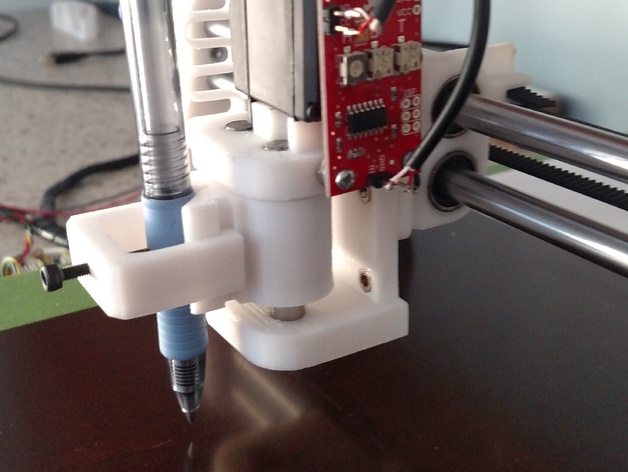
Pen Plotter Mechanism
thingiverse
This is an optional 3D pen plotter attachment for the 3DPBurner. The 3DPBurner was created by Villamany. Check out its official website at http://3dpburner.blogspot.com/p/main.html, join their Facebook group at https://www.facebook.com/groups/1687028311623740/, or watch them on YouTube at https://www.youtube.com/watch?v=WUFH7A565E0. For the servo trigger, you'll need a SparkFun Servo Trigger (https://www.sparkfun.com/products/13118). Follow their hookup guide at https://learn.sparkfun.com/tutorials/servo-trigger-hookup-guide?_ga=1.202370065.1860070289.1473222212. You'll also need an 4N36 Octocoupler, available from Digi-Key (http://www.digikey.com/product-detail/en/vishay-semiconductor-opto-division/4N36/4N36VS-ND/1738523). Print Settings: Printer: Anet A8 Prusai3 Rafts: No Supports: No Resolution: See notes Infill: See notes Notes: All parts printed in PLA. Frame: Orientation: Print with largest flat surface facing down. Nozzle Size: 0.4mm Layer Height: 0.2mm Infil: 70% Speed: 40mm/sec Pen Cart and Clamp: Orientation: Print in the same orientation it will be used. Nozzle Size: 0.4mm Layer Height: 0.2mm Infil: 70% Speed: 40mm/sec Spring: Orientation: Flat edge of spring facing down. Nozzle Size: 0.4mm Layer Height: 0.2mm Infil: 50% Speed: 20mm/sec Post-Printing Putting it together Other Parts: -LM8UU Linear bearing, 2 ea. -8mm Linear rod, 49mm long, 2 ea. -M3 screw, 20mm long, 1 ea. -M3 nut, 7 ea. -Hobby Servo, I used a Dynam B2232 -Sparkfun servo trigger, 1 ea. -4N36 Optocoupler, 1ea. Assembly To recess the M3 nuts into the plastic: Thread a M3 nut a few turns onto the end of a 20 mm screw. Heat the nut for a few seconds with a torch / lighter. While holding 20 mm screw press into the hex holes. ** Once at desired depth quickly cool plastic with water. Press in the LM8UU linear bearings into the pen cart. Use an 8 mm drill bit to correctly size the linear rod holes. Set the pen cart inside the frame. Press the linear rods through the bottom of the frame through the linear bearings then back into the frame. For the remaining parts: (Use small drillbit to pre-drill, use small screws to attach components) Mount your servo inside the top of the frame with the shaft facing left. Mount the servo trigger wherever you choose. You may choose to mount it remotely and run servo wires to pen attachment. Use the knob of your choice with the printed spring to connect to the pen cart. ** I recommend connecting the spring linkage only after powering up the servo trigger and setting the servo positions. How I Designed This I designed this in Sketchup
With this file you will be able to print Pen Plotter Mechanism with your 3D printer. Click on the button and save the file on your computer to work, edit or customize your design. You can also find more 3D designs for printers on Pen Plotter Mechanism.
