Pegboard Screwdriver Holder - Modular Screw and Rail
prusaprinters
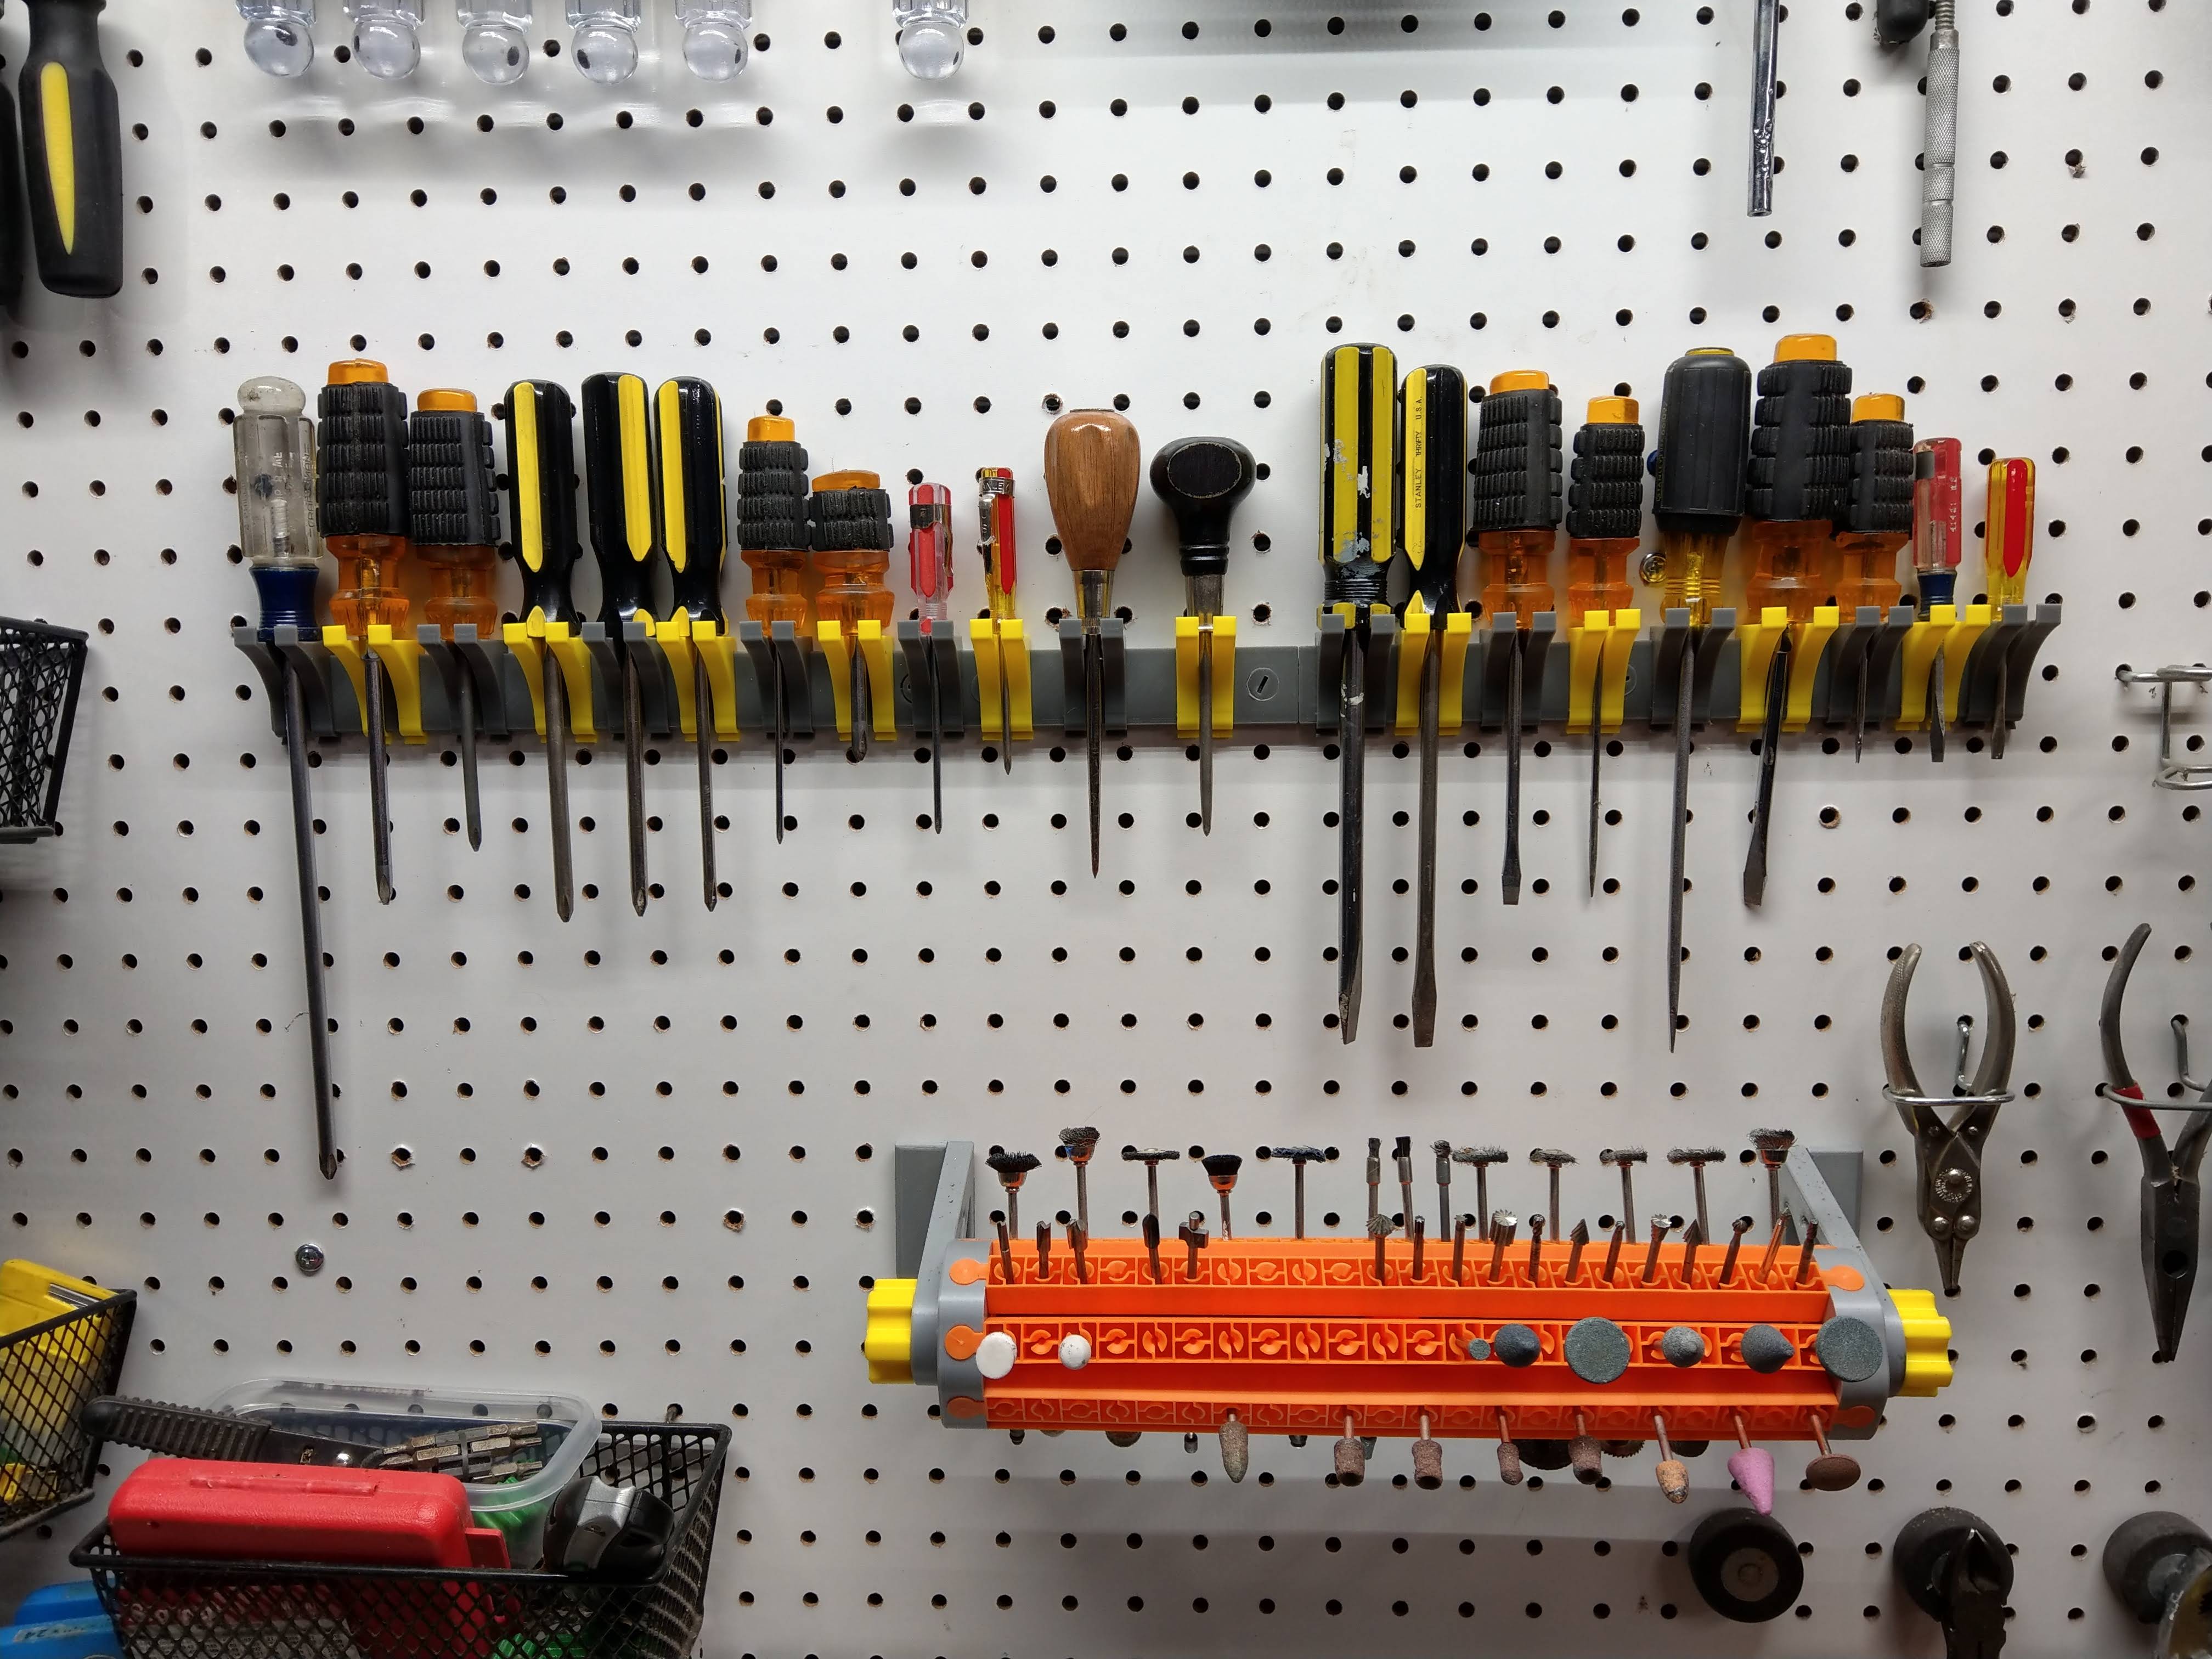
<p>This is a new approach (for me at least) to pegboard holders : pegboard screws. They are intended to be used with a “rail” for use on pegboard with hole spacing of either 25mm or 1 inch. These particular holders replace the screwdriver holders I was previously using on my pegboard (see photo of double-circle hook). The old screwdriver holders were problematic in two ways:</p><ul><li>They were not a good fit for the largest and smallest screwdrivers</li><li>They required “clearance” above the hook to pull out a long screwdriver, wasting space on the pegboard</li></ul><p>I have tested the pegboard screws on my fiberboard pegboard and they work well. I do not know it they will work on other types of pegboard (for example, plastic or metal).</p><p>Each holder consists of several pieces :</p><ul><li>A “rail” which is either 5inches or 125mm long</li><li>Two “pegboard screws” to fasten the rail to the pegboard</li><li>“Hangers” (used in pairs), which clip onto the rail</li></ul><p>The rails will fit together linearly on the pegboard, so as many rails and hooks can be used together as needed.</p><p>Additional note on this design : I experimented with single-piece hangers, but I found that printing the hangers in two pieces has the advantage that the space between the hanger pieces can be easily adjusted to fit screwdrivers of varying diameters. In addition, the two-piece design makes it possible to print the hangers in the ideal orientation with minimal filament usage (and corresponding reduced print time). </p><p>The OnShape 3D CAD files for this are here:</p><p><a href="https://cad.onshape.com/documents/990d81c88c100032631c048b/w/141696e95f8a6020e6b54088/e/b2f5bd6140b4c8787d118432">https://cad.onshape.com/documents/990d81c88c100032631c048b/w/141696e95f8a6020e6b54088/e/b2f5bd6140b4c8787d118432</a></p><p> </p><h4>How to Use</h4><p> </p><p>To assemble the holder, use two pegboard screws to fasten the rail to the pegboard. Clip two hangers onto the rail for each screwdriver, spacing them as desired. Position the rails with the curved edge down. If you plan to use multiple rails, make sure they are positions so that existing pegboard supports behind the board do not interfere with the pegboard screw locations.</p><p>Note : When using the screws, you may need to push a bit hard at first to get the threads to “bite” into the pegboard. The screws can be screwed in fairly tightly, but do not over-torque the screws or the heads may snap off.</p><p>Note : When using the screws, you may need to push a bit hard at first to get the threads to “bite” into the pegboard. The screws can be screwed in fairly tightly, but do not over-torque the screws or the heads may snap off.</p><p>I like to clip two hangers on and then, with a screwdriver in place, slide the hangers on the rail for best position. If necessary, hangers can be easily removed by using the small tab at the bottom to “un-clip.”</p><p> </p><h4>Print Instructions</h4><p>Print in PLA using the 3mf files provided.</p><ul><li>Print the hangers lying on their sides</li><li>Print the rails with the countersink on the bottom</li><li>Print the screws head down</li></ul><p>Choose the rail style (metric or inch) to match your pegboard. The hangers work with either metric or inch rails.</p><p>I recommend printing the hanger pieces in two different colors, and alternating pairs of hooks in each color; this makes it easier to identify each “set” of hangers when multiple screwdrivers have been removed.</p><p> </p>
With this file you will be able to print Pegboard Screwdriver Holder - Modular Screw and Rail with your 3D printer. Click on the button and save the file on your computer to work, edit or customize your design. You can also find more 3D designs for printers on Pegboard Screwdriver Holder - Modular Screw and Rail.