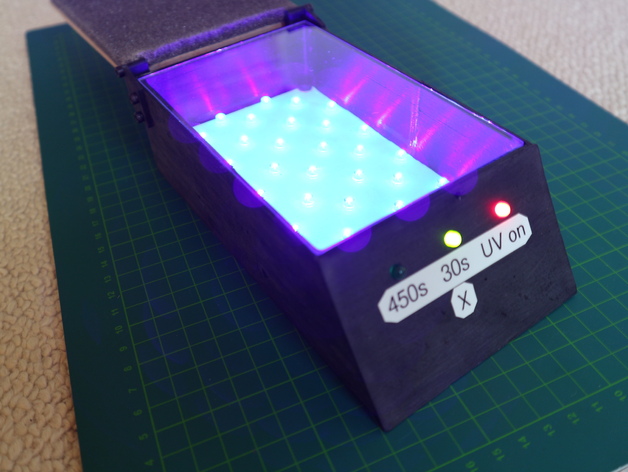
PCB UV Exposure Unit
thingiverse
A UV Exposure Box is a Must-Have for Making PCBs. I've Been Searching High and Low for One That Meets My Needs, but Most are Too Big and Too Expensive. All of the Devices I Found Require an External Power Source, Which is a Major Drawback. So, I Decided to Take Matters into My Own Hands and Build One from Scratch. My Requirements Were Clear: I Wanted a Box that Could Fit in a Small Space, Charge Via USB, Run for a Long Time on a Single Battery, and Have No Buttons or Knobs to Complicate Things. I Built a Box That Can Handle Up to 184 PCBs on a Single Charge - It's a Game-Changer! To Get Started, You'll Need to Solder Some Parts Together, Drill a PCB, Print Out the Files, Program an Arduino or ATTiny, and Then Screw Everything in Place. Detailed Instructions are Available Online at Instructables: http://www.instructables.com/id/PCB-UV-Exposure-Unit/ How I Designed This Masterpiece I Used Google SketchUp to Design All of the Parts - It Was a Great Guide to Have. Having All of the Components and Especially the Glass Sheet Handy was a Huge Help. The Main Body Part Had to Be Cut in Half Because My Printer Has a Plate with Limited Space (150 x 150mm). Next, I Exported the STL Files, Sliced Them Up, and Printed Them Out Using My Printer. Here's What the Finished Unit Looks Like - With the Cover Closed and Open.
With this file you will be able to print PCB UV Exposure Unit with your 3D printer. Click on the button and save the file on your computer to work, edit or customize your design. You can also find more 3D designs for printers on PCB UV Exposure Unit.
