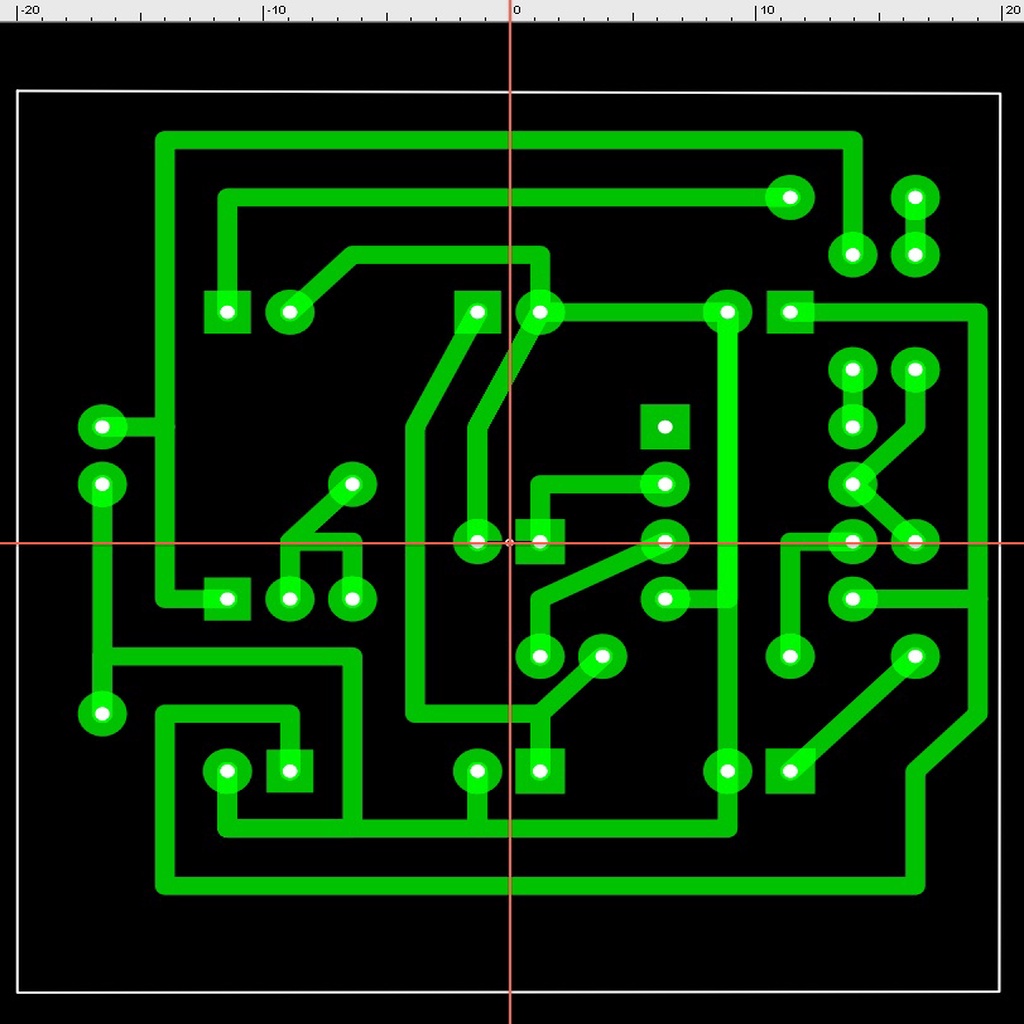
PCB & Schematics for Heliox LED dice
thingiverse
Next Up: New and Exciting Things! Why settle for just six options when we can have nine? Let's shake things up a bit and make it happen! New PCB (BETA) Files: Get ready to explore two possible outlines: * 38x38mm * 40x40mm Check out the pics to get a better look. Proposal (BETA): It's time to take our LED dice game to the next level with these exciting features: * 3x3 LED front face PCB layout * 3x3 LED electronics circuit * Some 3D redesign work needed on the top part But wait, there's more! We'll need to make some changes to get everything working smoothly: * Requires changes in firmware for all LEDs * Needs changes to the front panel to accommodate nine LEDs * Mounting parts on the copper side is a must See my first PCB with ATTiny soldered onto the copper side. Don't forget to flip or not flip the layout when printing using toner transfer method, and make sure the DIP8 package is oriented correctly (pin1) from the copper side. The electronically made copy of the blue print picture (pdf). Here it is! This exact high-resolution copy was recreated electronically using a clever technique called the Chinese Copy Cat Method. I had no idea how easy it was to create perfect copies with minimal effort! I drew every line and dot by hand, carefully positioning the frame in the center. Exported at 1200 dpi, the picture size including empty white area is 60x60mm. No more Kiwi PCB files! See below for the new version of the old PCB V2, ready to print. I didn't produce it myself, but it can be done later on. The preview shows it perfectly centered, and for those who want a close-up look, there are no red lines made by the picture editor – just a clean layout design! The files: * A picture of my remix of the PCB seen in Heliox dice videos * The Schematics, improved for better reading, provided by KiwiGrinder (thanks!) * New old PCB V2 size 2*19.6mm on each side – do the math yourself! One layout picture has an extra-wide brim for users using toner transfer method, and it comes with a fat trace surrounding the outer shape lines of the design. I know from experience that this is important, especially for those using clothing irons. Not everyone has access to high-tech equipment, you know! For software development, I've flipped the board to have the ATTiny on top for easy removal. The Snake still needs to run! Removed Kiwi design files since they might work with lithography but not with my CNC mill and toner printing on PCBs. Thin traces between pins and thin solder pads are a no-go. THE END
With this file you will be able to print PCB & Schematics for Heliox LED dice with your 3D printer. Click on the button and save the file on your computer to work, edit or customize your design. You can also find more 3D designs for printers on PCB & Schematics for Heliox LED dice.
