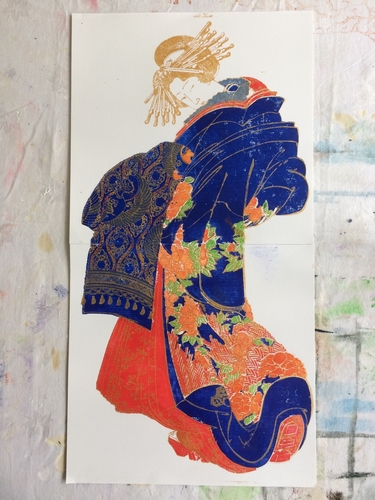
Part 2 of 3 - Geisha by Katsushika Hokusai
pinshape
I have to break up the 14 x 3D prints due to the 100mb limit on Pinshape. Part 1 has four prints, Part 2 has four prints and Part 3 has six prints. https://pinshape.com/items/45856-3d-printed-part-1-of-3-geisha-by-katsushika-hokusai https://pinshape.com/items/45857-3d-printed-part-3-of-3-geisha-by-katsushika-hokusai There are 14 plates in total, with two plates needing to be taped together to make a full plate. This results in seven full-sized plates and seven different colours. You can refer to the finished image for a colour reference, but feel free to choose your own. The plates will last for many prints and using acrylic, which dries quickly, means you don't have to wash off old paint. In fact, the surface gets better after old paint has dried on it. The files are named with the suffix 'top' and 'bottom' to help you figure out which ones to tape together. I recommend using gaffer or duct tape. Instructions about which plates need to be used first and last have also been included, so you can avoid getting layers of colour hiding the layer beneath. I use a 0.6mm nozzle and a 0.2mm layer height. Use your normal settings for printing 100% solids. I don't recommend using high infill to achieve this; instead, increase the top and bottom layers count to above four, and it will make a solid if your layer height is indeed 0.2mm. The reason for not using a high percentage infill setting to get a solid print is to avoid long stretches of printer vibrations while trying to do a very fine honeycomb structure. Alternatively, you could use a rectilinear pattern infill which is less vibey if you really want to avoid making 100% solid prints. After printing each plate, use a sanding block and 120 grit sandpaper to make the top surface flat so it holds paint evenly. This doesn't take long if you have used PLA plastic, which is quite soft. The solid strip of plastic is where you should attach your paper, making sure the paper is attached at the same place each plate so the colours align well. More information can be found at https://bramtan.weebly.com/developing-3d-printed-ukiyo-e.html. More designs are coming! Enjoy!
With this file you will be able to print Part 2 of 3 - Geisha by Katsushika Hokusai with your 3D printer. Click on the button and save the file on your computer to work, edit or customize your design. You can also find more 3D designs for printers on Part 2 of 3 - Geisha by Katsushika Hokusai.