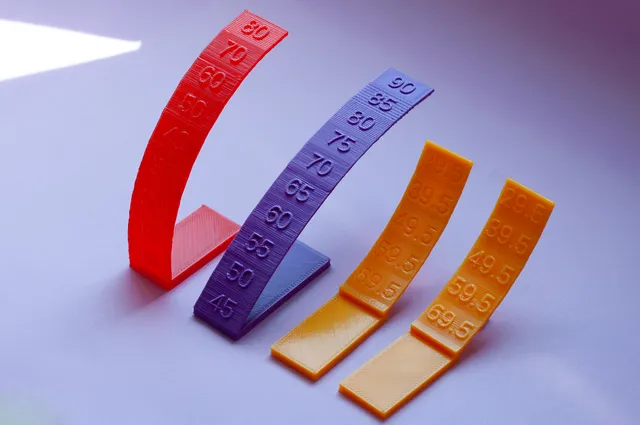
Parametric overhang test
prusaprinters
What is thisThe main .scad file allows you to create an overhang test (and its modifiers for support enforcers, and modifier for the base) so you can set the size, step, start, end... as you like. If you're new to OpenSCAD, don't worry: not only it's really easy to use, I've added a tutorial on using OpenSCAD customizer, and OpenSCAD is free and lightweight! Anyway, I've included the STL files used to make the examples in the pictures.The parameters in the file are quite self-descriptive (and have a short explanation anyways); feel free to experiment and see what it looks like. You can change pretty much everything: start and end angles, angle change rate, panel sizes, base size and alignment… Feel free to ask in the comments anything you're not sure about.Use the panel modifiers as support enforcers, or the base modifier to add a 100% infill for a heavier, balancing base. If the starting angle is greater than the end angle, you'll get the "scorpion tail" shape; otherwise, you'll get the classical "arc" shape. The purpose of this test is not only checking when an unsupported overhang will fail, but also the printing quality of both unsupported and supported overhangs.Sometimes, you'll see that the angles displayed in the "back" side are not the same as those in the "front". The ones in "front" will always be those indicated by the parameters; those in the back, though, are automatically generated by the outline function (we're not making a 0-thickness test!) and so they will not always be the same (depending on panel size -esp. thickness-, change rate, etc.). Those in the back are calculated and displayed as they are for accuracy; this is much a real-world situation, where you won't always have a perfectly aligned overhang top and bottom. The recycling symbolThis model includes the option to add a recycling symbol, and for that it uses the Recymbol library. Whilst the OpenSCAD will work fine without it (it will just throw some errors), the library is extremely easy to install, and I use it so often, that is strongly recommended to. To install the library:Download from the Recymbol page at Printables the "library.scad" file.Create a folder named "Recymbol" in your OpenSCAD library folder. (Go to OpenSCAD menu File->Show library folder if you need to check which is it.)Move the file library.scad to that Recymbol folder. That's it, it's installed. No restart, registering, renothing required.As you see in the pictures, the symbol can be embedded in the base without a MMU unit. This is done using the "print on print" technique by Devin Montes from Make Anything channel. You print the symbol first, remove the skirt and purge line, change filament, and print the test on it. The base has a negative symbol with a bit of clearance for clear lines. It's an easy technique, yet very effective. Yet more calibration!You might also be interested in my collection of other parametric calibration models. All of them can be suited to your needs and include a recycling symbol with the Recymbol library, as this one:The extruder multiplier/flow/walls calibration cube The simple temperature tower, with G-Code generator) The advanced temperature tower, with G-Code generator and tests for bridges and two overhangsThe E-Cor tower (waveform for the TMC stepper drivers), with G-Code generator. The parametric ironing calibration matrix, to fine-tune your ironing settings.And, also, the non-parametric-but-modifiable precise Live-Z calibration test.Once you're done testing and calibrating, sample your filaments with the parametric swatches!Happy printing!
With this file you will be able to print Parametric overhang test with your 3D printer. Click on the button and save the file on your computer to work, edit or customize your design. You can also find more 3D designs for printers on Parametric overhang test.
