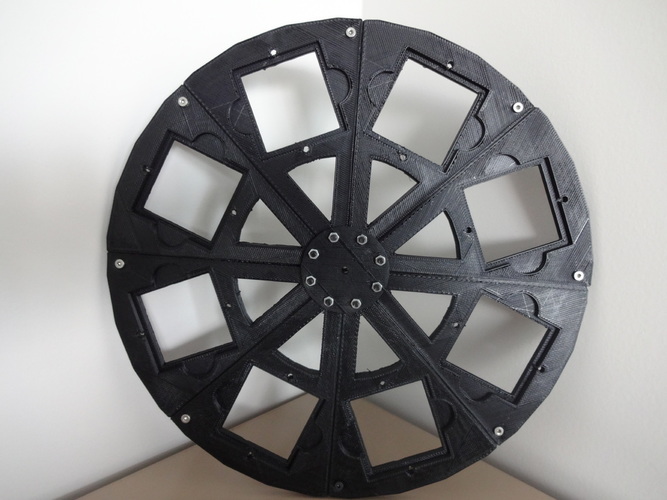
Parametric Automated Filter Wheel Changer
pinshape
Summary This Arduino-controlled, open-source automated filter-wheel changer moves to eight different filter positions, typically used in scientific experiments requiring good optics. Commercial versions cost over $2,500, while this DIY version can be made for under $50, justifying the purchase of an open-source 3D printer. This component is part of the Open-Source Optics project, aiming to significantly reduce the cost of scientific optical hardware by Michigan Tech's Open Sustainability Technology Research Group. For similar projects, see "Open-Source Lab: How to Build Your Own Hardware and Reduce Research Costs." This project was featured in an article and podcast in Science by Joshua M. Pearce (2012). Instructions This filter wheel is designed for 50.8mm x 50.8mm standard filters, with OpenSCAD code provided for customization. Full instructions are available. Bill of Materials: Non-Printed Parts* 28 M3x10 Screws 8 M3x22 Screws 1 M3x10 Set Screw (Grub Screw) 33 M3 Nuts 1 Nema 17 Motor 1 Arduino Uno 1 Motor Shield from Adafruit 1 Optical Switch Printed Parts 7 Filterwheel Segments (pie slice segments) 1 Filter Wheel Final Segment (different from the rest) 1 Motor Hub 1 Motor Mount 8 Filter Brackets 1 Optical Switch Flag Printing Instructions: With your favorite RepRap variant, print preferably in black ABS or PLA to minimize reflected light. Start by printing the Motor hub in ABS or PLA with 35% infill, 2 perimeters, and 2 solid layers. Then, print off 7 Filter wheel Segments in PLA to prevent warping. Drill out all holes after each print using a 1/8" drill bit or a 3mm bit if available. Attach the Segments to the Motor Hub by placing a M3x22 screw through the bottom piece, segment, and top piece, attaching a nut. Do not tighten fully, as this can make alignment more difficult. Once a segment is placed next to it, rotate them so that the tab in one aligns with the slot in the other, place an M3x10 screw through the hole, and tighten with a nut. Some shaving down of edges may be necessary using a file or sandpaper. When printing the final Segment, use a fan to cool it, as it has a longer bridge. Slow print speed for bridges from 60 mm/s to 30mm/s in Slic3r for a nicer bridge. Drill out holes and then take the piece with the slot in it, cut out the small portion of the print at the edge of the bridge. Slide the final segment in, ensuring it fits perfectly; if not, shave down edges until it does. The Optical Switch Flag can be inserted into the slot on any segment, used to block the Optical switch, making any segment with the flag first. Customization: The OpenSCAD file is included for those who want to alter the filter wheel for their experiments. With it, you can change the size of the filter, shape, number of filter holder pie slices, etc. Electronics: Full details are available at http://www.appropedia.org/Parametric_automated_filter_wheel_changer. This project was developed by Michigan Tech's Open Sustainability Technology research group (http://www.mse.mtu.edu/MOST). Thanks to Nick for the OpenSCAD code and Rodrigo for the Arduino code and electronics. This component is part of the Open-Source Optics Library: Zhang C, Anzalone NC, Faria RP, Pearce JM (2013) Open-Source 3D-Printable Optics Equipment. PLoS ONE 8(3): e59840. This project is part of a larger initiative to reduce the cost of scientific equipment using open-source hardware. Read more here.
With this file you will be able to print Parametric Automated Filter Wheel Changer with your 3D printer. Click on the button and save the file on your computer to work, edit or customize your design. You can also find more 3D designs for printers on Parametric Automated Filter Wheel Changer.
