Papercut Stained Glass Lampshade
prusaprinters
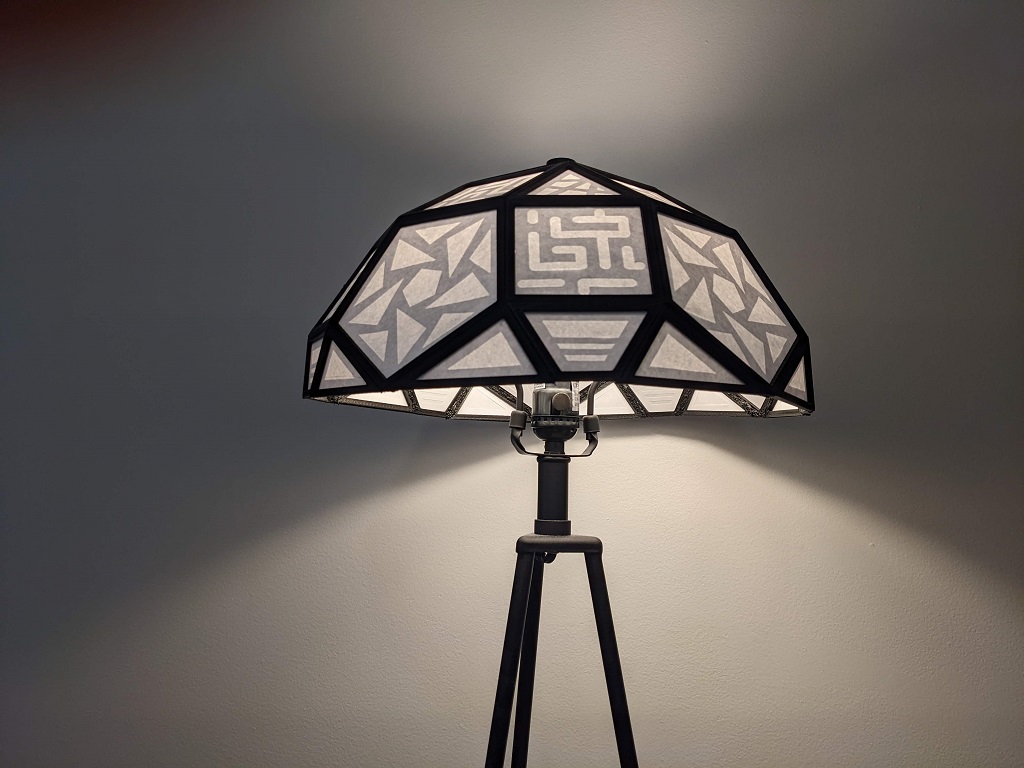
<p>Inspired by Tiffany-style stained glass lamps, I designed my own (budget) version. The "lead" is composed of 3D printed PLA frames, and the "glass" is ordinary office paper. The structure is joined together using a 3D pen on a series of hidden notches on the inside of the lampshade.</p><p><strong>Printing and cutting notes:</strong></p><p>Printed in Black Hatchbox PLA, 20% infill, 0.2 mm layer heights</p><p>Note that all of the 3D printed frames have slightly angled sides to aid with getting the correct angle during assembly, so be sure to print them with the widest face down.</p><p>SVG paper cut patterns should be scaled properly already, but if your paper cutter (like mine) ignores SVG scale, the size of each piece is as follows:</p><p>Pentagon: 4.861w x 4.623h<br>Square: 2.960w x 2.960h<br>Triangle: 2.822w x 2.444h<br>Trapazoid: 2.822w x 1.500h<br>Scalene: 2.672w x 1.644h</p><p>The Bill of Materials is as follows:<br>Pentagon: 6 inner frames, 6 outer frames, 5 outer paper panels, 5 inner paper panels<br>Square: 10 inner frames, 10 outer frames, 10 outer paper panels, 10 inner paper panels<br>Triangle: 5 inner frames, 5 outer frames, 5 outer paper panels, 5 inner paper panels<br>Trapazoid: 5 inner frames, 5 outer frames, 5 outer paper panels, 5 inner paper panels<br>Scalene*: 5 inner frames, 5 inner left frames, 5 outer frames, 5 outer right frames, 10 inner paper panels, 10 outer paper panels<br>Web: 1 3D printed part</p><p>* Yes, I know technically it is a right triangle, not a scalene, but I didn't realize it during the design phase and the name stuck.</p><p><strong>Assembling the frames:</strong></p><p>Each frame should be assembled from 4 pieces: an inner and outer frame, and an inner and outer paper panel. While this can done with only a 3D pen, gluing the two paper panels together first with a glue stick will make the process much easier. A little glue on the edge to hold it in place on the frame during assembly may help as well.</p><p>Assemble a "sandwich", with the panels clamped between the inner and outer printed frames. Ensure that the paper is fully between the frames, and does not extend past the outer edge of the frame, and it completely covers the full inner perimeter of the frame. Hold (or clamp) the frame firmly together, and use a 3d pen to fill in a small dab of plastic in the small notches at the midpoint of each edge.</p><p>Take care to ensure that hot plastic does not contact the paper, as it can potentially wrinkle the paper as it cools.</p><p>When assembling the pentagon frames, assemble one without a paper panel. This will be the top panel of the lamp, and will eventually be connected to the web to hold the lampshade to the lamp.</p><p><strong>Assembling the lampshade:</strong></p><p>Once all the panels are individually assembled, begin to connect the panels to each other, using a 3d pen to first lightly join panels at the corners, following the shape of a small rhombicosidodecahedron (or refer to the photos for the final geometry). Focus on completing vertexes of the shape to ensure that the angles between frames are accurate. Once satisfied with the positioning, the pen can be used more aggressively to fill in the open corners of the shapes, and then along the whole mating edge.</p><p>Note that the angles at the edges of each frame will not print perfectly, and are not exact in the 3D model to begin with, so imperfections will occur during the assembly. I strongly recommend printing a few practice frames to test the assembly process and get a feel for how to flex shapes into position and hold them securely before committing to the whole assembly.</p><p>Take care to keep all the hot 3d pen plastic on the inside of the lampshade during assembly. Once the full lampshade is complete, lay down thick joints of plastic along the inner edges where frames meet, to prevent any light from shining through these gaps; this will also further add rigidity to the structure.</p><p>Ensure during the assembly that the open pentagon frame ends up at the top of the lampshade. The "Web" shape can be glued to this open frame on the inside edge of the lamp, again using a 3D pen. Since lamps may vary, you may need to adjust the height or shape of this piece in order to fit your preferred lamp.<br> </p><p> </p>
With this file you will be able to print Papercut Stained Glass Lampshade with your 3D printer. Click on the button and save the file on your computer to work, edit or customize your design. You can also find more 3D designs for printers on Papercut Stained Glass Lampshade.