Panelmax for Ultimaker
thingiverse
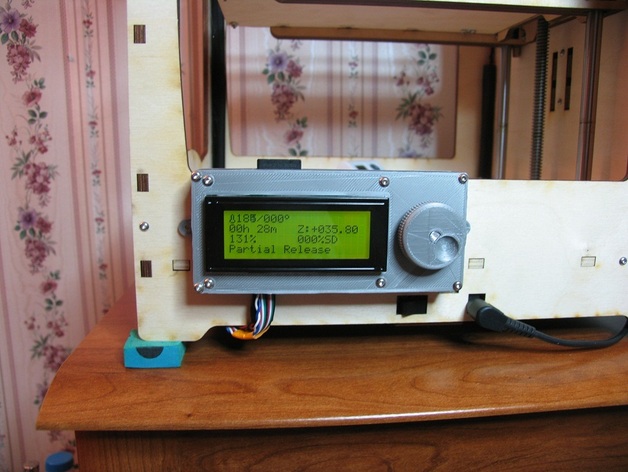
To avoid spending on the expensive official control panel for my Ultimaker 3D printer, I decided to make one myself. The components I used include a 20x4 LCD screen with backlight (http://tinyurl.com/arrztln), an encoder (http://tinyurl.com/afekwq6), and an SD card reader (http://tinyurl.com/bz9mcro). Instead of soldering in the SD card, I used one from a salvaged SD reader dongle. Following instructions from here (http://tinyurl.com/b2nvso4), I matched the pin arrangement from the panelmax tutorial with the Ultimaker's pin layout (http://tinypic.com/view.php?pic=6xuouf&s=6). The case is assembled using M3 screws, and the printer is attached with flanges after drilling holes. Note: I corrected the wrong pin diagram earlier, so apologies for any confusion caused.
With this file you will be able to print Panelmax for Ultimaker with your 3D printer. Click on the button and save the file on your computer to work, edit or customize your design. You can also find more 3D designs for printers on Panelmax for Ultimaker.