PanelDue 5" and Duet 2 Mounts for SeeMeCNC Rostock Max V2
thingiverse
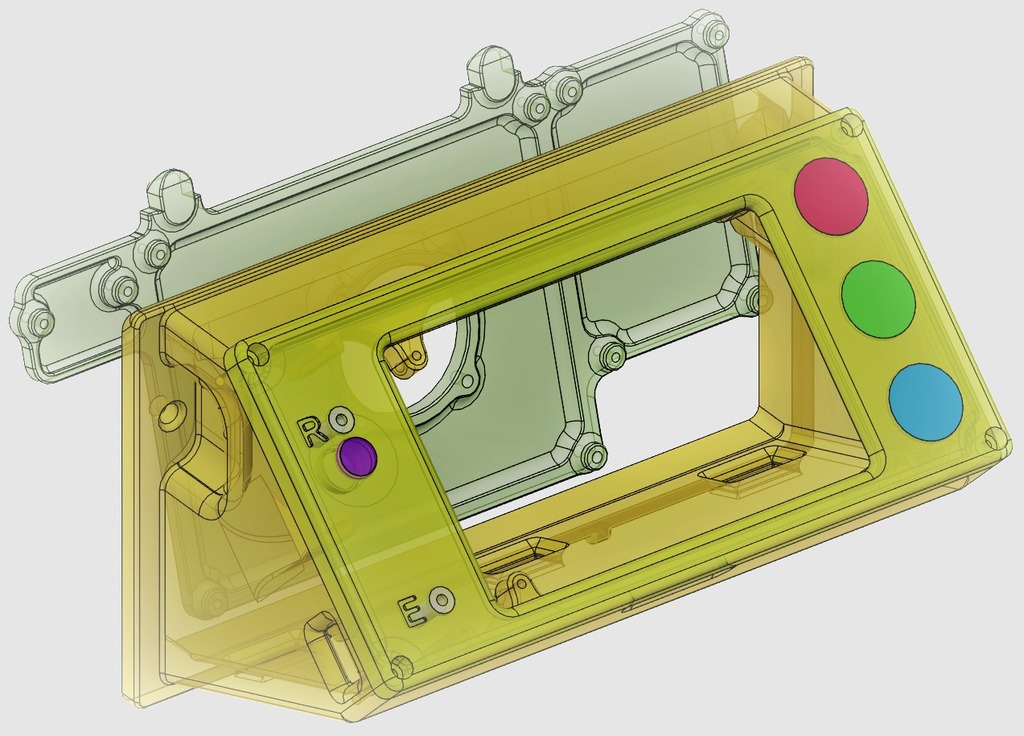
A PanelDue for Your Rostock Max is an absolute must-have! Working with this system is a real treat and delight! This system takes advantage of the original Rambo and LCD controller mounting locations to install a [PanelDue 5"](https://www.duet3d.com/DuetAddons/PanelDue), [Duet 2](https://www.duet3d.com/DuetEthernet) (Wifi/Ethernet), and a [JohnSL FSR Endstop Controller](https://github.com/JohnSL/FSR_Endstop) into a SeeMeCNC Rostock Max V2. There are three versions of the Duet 2 board: Duet only, Duet + JohnSL FSR Controller, and Duet + JohnSL FSR Controller + Power Routing. Power routing may be useful if you wish to run the motors on 24V while keeping the 12V bed and hot end components with fuse protection. Check out [this topic](https://forum.duet3d.com/topic/5446/dual-power-24v-duet-vin-12v-heaters-circuit-sanity-check) on the Duet3D forum for comments about such an arrangement. PanelDue Mount and Bezel incorporate three printable user buttons for actuating proto-board mounted switches and protected recessed access to the PanelDue controller reset and erase buttons. There is also access to the micro USB port, as well as cutouts (12mm x 19mm) for three utility switches. The button STL files ending in _105 are scaled to 105%. See the comment below in the printing section for details. Also included are FSR pads for [mounting an FSR bed a la mhackney](http://www.sublimelayers.com/2017/02/new-fsr-plate-mounting-system.html) and an ear template that locates in holes around the periphery of the Onyx bed. Some tape to hold the bed and template down will be your friend while you outline the bed plate cut out. ### Materials Required * PETG recommended for Board and PanelDue Mounts for strength and ease of tapping. * Support recommended for the PanelDue Mount. * X60 is ideal for the buttons (including the Reset and Erase) but any of the softer TPU or TPE filaments should be suitable. Depending on the type of elastomer used for buttons, you may need to adjust scaling of button STL files in order to get a good fit in the bezel. ### Tools Required * Drills - 1.6mm, 2mm, 2.4mm, 3mm, and 3.3mm for sizing tap holes and finishing. * Taps - M2, M3, and M4. ### Assembly Comments * Note the orientation and routing of PanelDue ribbon cable. Mount cable before installing PanelDue controller. 200mm is more than adequate length for cable. * Note the orientation and location of the switches on the 20x80mm proto board. * The ear template locates in holes around the periphery of the Onyx bed. Some tape to hold the bed and template down will be your friend while you outline the bed plate cut out.
With this file you will be able to print PanelDue 5" and Duet 2 Mounts for SeeMeCNC Rostock Max V2 with your 3D printer. Click on the button and save the file on your computer to work, edit or customize your design. You can also find more 3D designs for printers on PanelDue 5" and Duet 2 Mounts for SeeMeCNC Rostock Max V2.
