PANB+ Nerf Blaster
thingiverse
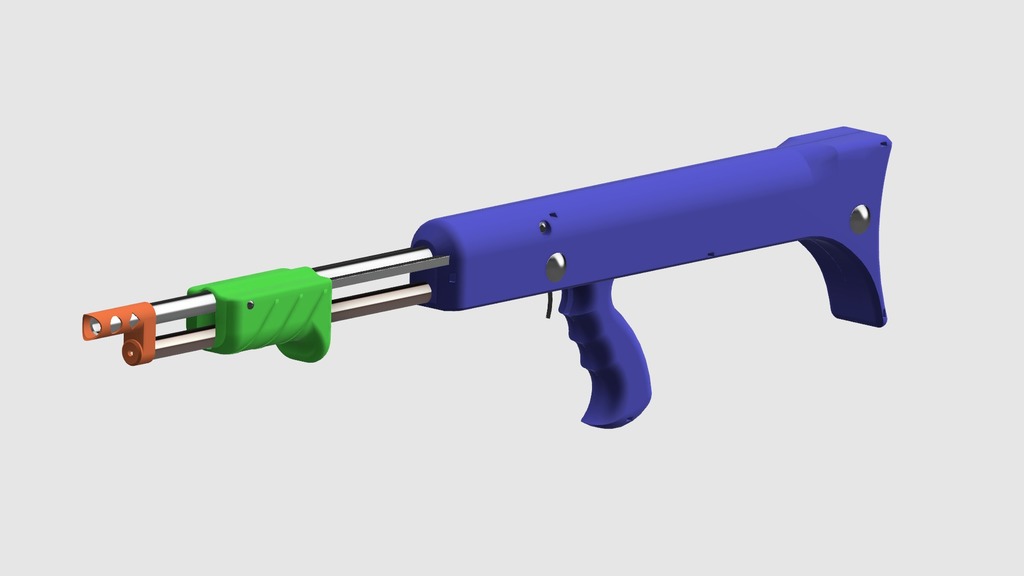
USE THE LATEST VERSION STEP, NOT THE STL. This remake and improvement upon the PANB 870 from Nerfhaven (http://nerfhaven.com/forums/topic/24103-panb-870/) features a larger plunger tube and printable mechanisms and body. Version 3.5 is showcased in the top two images. The decals on one render are due to it being created on the 4th of July. Update to v2: Someone requested screws for easier disassembly, so I added two carriage bolts and wing nuts (and proper holes for them) as an alternative fastening method for the two shell halves. The problem of the breech pivot is also solved by choosing McMaster parts. It still needs a little work, but some electrical tape shimming can take care of it. Update to v3: Don't print this at 5% infill with that crappy but really fast infill pattern that usually looks like diamonds, but upon closer inspection, is really just alternating linear layers. I learned the hard way. Also, don't print version 2 (I took down the file) because the shell doesn't fit together. The mag follower/pusher is now a shelled object so it takes less material, is still plenty strong enough, and leaves more space for compressed spring coils. Additionally, the follower prints without supports. I changed the design of the shell's priming rod channels to be open on the inside so that the channels aren't filled with supports. Quick Release version: is held together by two quick-release pins for easy disassembly. The pump grip is made to a lower profile on the top. Update to v4: Pump grip is a lower profile on the top to reduce filament cost (now about 450g). Pusher head has spikes on it to create vents to prevent vacuum formation on the forward stroke, which would slow the forward stroke, reduce performance if firing in quick succession, and possibly suck the dart into the pusher, causing a major jam. Also, the pusher head now prints in one piece without supports. I finally got the breech pivot design in good working order, it took a while. Update to v5: DO NOT PRINT SHELL OR BREECH EARLIER THAN THIS VERSION. I fixed some crucial fit issues, after noticing I had left much too small of a gap in some areas. Update to v5a: Don't be confused, it does have limited compatibility with version 5. I noticed while building mine (a version 2) that complete disassembly would be impossible or very difficult while keeping reassembly possible, because in order to remove the plunger, you have to take the plunger head off, which in turn requires that you remove the plunger tube assembly, which is impossible if the spring spacer is glued in place. So, I gave the spring spacer's mounting a dovetail of sorts, allowing you to easily get away with not gluing the plunger rod guide/spring spacer in place. Also, I left out the mag tube for some reason, that wasn't supposed to happen. Just use the mag tube from an earlier version, it hasn't changed. Update to v7: Now can hold a full K25 with precompression, and solved a multitude of issues that arose while building my version 2. The breech spring can now be mounted externally to make the build easier. I still recommend putting a flat in that shaft and installing a set screw in the breech. Update to v8: Breech now uses a torsion spring like it should have in the first place. Optional external breech lever is still included, as I recommend put a vibration motor on its end, hooked up to a second trigger to aid the dart along its curved loading path. Update to v9: Put the K25 spring into the model, looks like it fits fine with about 2 whole whopping inches of precompression. Rounded off the corners on the PR guide (which isn't much of a spring spacer anymore) to help the spring go smoothly. After more experiments with my build, I found that the torsion spring I chose is just strong enough to get the blaster to work, without requiring too much force on the return stroke. Update to v10: Tons of minor changes to the shape of the loading mechanism, including shortening the breech. Now feeds much better, but still sensitive to dart length. Update to v11: Now the area around the receiver is chamfered, so that it can handle more offset in the position of the pusher on the bottom side.
With this file you will be able to print PANB+ Nerf Blaster with your 3D printer. Click on the button and save the file on your computer to work, edit or customize your design. You can also find more 3D designs for printers on PANB+ Nerf Blaster.