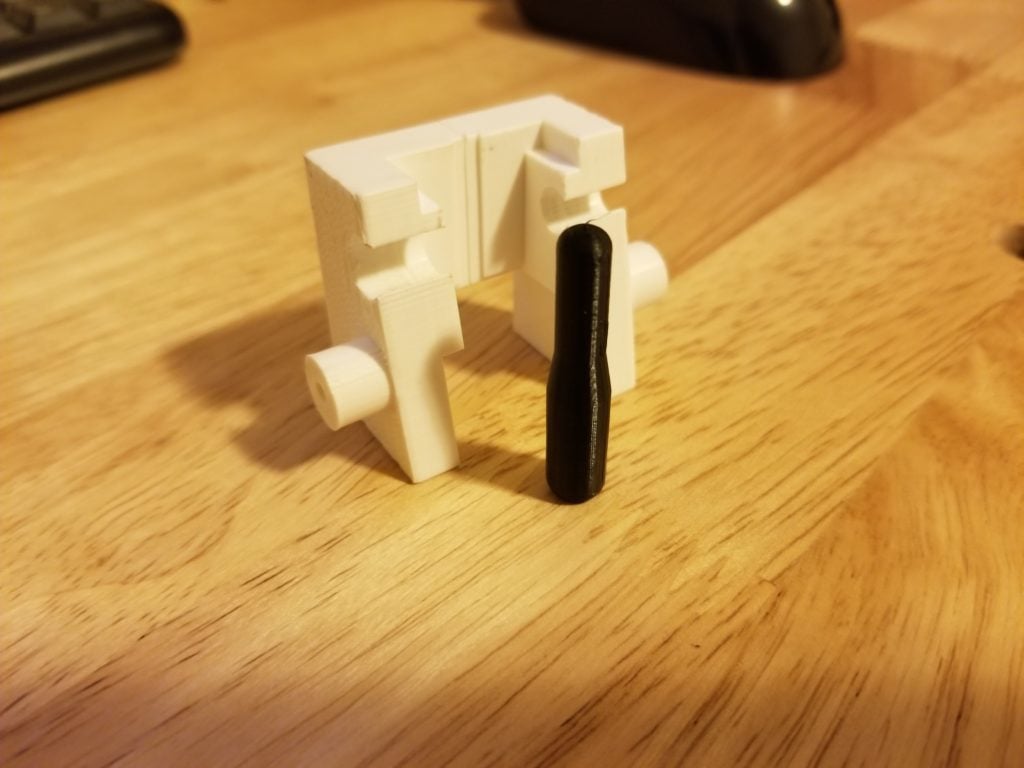
Paddle Drilling Jig For HK 91/PTR 91/C93/HK33/MP5
thingiverse
If you'd like to buy a print of this with metal inserts in the drill holes, please check out my gunbroker page: https://www.gunbroker.com/item/858377600 This is version 1.2 of the C93 paddle release jig I previously released. This updated version includes extra material around the 1/8" (1.651mm) drill hole for increased stability. It also includes extra space between the bottom and first shelf inside the jig to better accommodate installing a new weldment/shelf on a rifle, as well as cutting down on fitment time in rifles that have had their weldments more properly placed. This version also includes an upgraded magazine catch hole rod and the following instructions. Please respond in the comments if you run across any issues with these instructions! Step 1 Pick which side of the jig you want to use to create your hole. With this jig, you can drill from either the right or left-hand side of the rifle. Get whatever 1/8" drill bit, or end mill, you intend to use first. With a hand drill, drill press, or mill, start on the inside of the jig and drive it through under gentle hand pressure in reverse at a low-moderate to moderate speed. Repeat running your bit through in reverse another time or two until it's traveling through the hole with only a moderate amount of resistance while the bit is in motion. This will remove material, so don't worry about seeing some plastic come out on your first and second pass through. Step 2 Carefully, and again by hand, drive your bit through in the proper cutting direction at a low-moderate speed. Do this only one to two times. When done, your bit should pass through while not in motion under moderate hand pressure without any wobble. Step 3 Insert the magazine catch hole rod into the magazine catch holes of the gun. The rod should fit snugly. If the rod does not fit on either side, you can lightly sand it with a high grit sandpaper. Step 4 With the rod inserted into the magazine catch holes, place the left and right-hand sections of the jig and slide them over the rod until the two halves are completely joined. The fitment should be tight and may require some pressure. If you cannot seem to fit the jig, you may need to apply a small amount of a marking compound (dry erase markers work) on the weldment/shelf around the magazine well and then file a small portion of material off of the jig (this is why the jigs are white!). Step 5 Once the jig is firmly in place, check for any free motion. The jig should fit snugly around the rear of the magazine well while making minimal or no direct contact with the weldment/shelf while under forward (toward the muzzle) pressure. Step 6 Be sure to look along the top rear of the magazine well for excessive space! Too much space at the top means that you may have removed too much material from the bottom inside portion of the jig and your hole will be too far forward! Step 7 Secure the jig with a small clamp, or if you're feeling brave, use your hands to push forward on the back of the jig while simultaneously making sure it stays firmly together. Step 8 Remember this is polymer, not steel! Gently and at a moderate speed drive your bit through the jig until it makes contact with the steel of the weldment/shelf. As you pass it through, carefully watch for bending/warping of the jig. If you notice any warping, you may need to repeat steps 1 and 2, better align your drill press/mill, or straighten up your hands a bit. Step 9 Once you have made it through one side, drill partially through the opposite side. Save yourself the trouble of two welds! The hole on the other half of the jig is there for starting on the other side, not for guiding the bit once you've drilled all the way through! Step 10 Disassemble the jig by popping it apart. It may require a little bit of force (which just means we hopefully got a more accurately placed hole). Get your pin in, do some welding, and enjoy your new paddle release!
With this file you will be able to print Paddle Drilling Jig For HK 91/PTR 91/C93/HK33/MP5 with your 3D printer. Click on the button and save the file on your computer to work, edit or customize your design. You can also find more 3D designs for printers on Paddle Drilling Jig For HK 91/PTR 91/C93/HK33/MP5.
