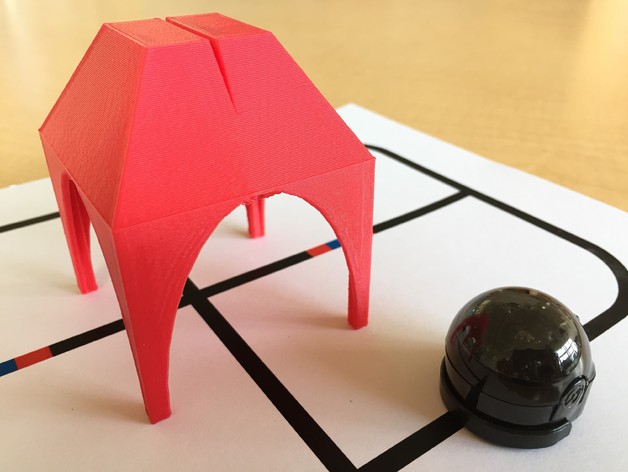
Ozobot Shelters
thingiverse
Ozobots are among the coolest classroom-friendly robots around! They can be programmed with Blockly, a visual programming language that makes it easy for kids to learn coding fundamentals, but also by drawing paths on paper with markers, which creates an amazing fusion of art and technology. I designed this Ozobot shelter using Tinkercad because it's a great program for whipping up models quickly. I highly recommend Tinkercad for working with young students who want to get creative with 3D printing. Project: Ozobot Shelters Overview & Background: Gaming is an awesome way to engage students, and robots are just as exciting! Throw in 3D printing, and you've got a winning combination. This lesson uses the engaging nature of Ozobots to inspire students to create their own shelters with 3D printing for a board game. Objectives: This lesson encourages students to design and build their own Ozobot shelters with 3D printing to be used in a fun board game. Audiences: This lesson is perfect for third-grade students and up. Subjects: Design, vocabulary review, sight word practice, math facts, and more - this lesson covers it all! Skills Learned (Standards): Students will learn design skills, depending on the grade level and topic they choose. I used a similar game board with my kindergarten class for sight word review, which meets CCSS ELA-LITERACY.RF.K.3.C. Lesson/Activity: Show off your Ozobot shelter example to the class, then challenge them to design their own shelters and game boards that support an ongoing academic focus in class. Students can get creative with any number of entrances or exits - it's up to them! In my example, I used a shelter for each pile of quiz cards. When a student draws a card from the corresponding pile, they must read it correctly before the Ozobot enters another shelter. This makes for an engaging and interactive game. After brainstorming their ideas, have teams create their game boards and indicate when shelters will go. Instructor approval is needed once all components are complete. Introduce Tinkercad or your preferred design program, and let students explore and print small items to build their design skills. It's essential for them to experience the iterative design process, so be prepared for redesigns and reprinting as needed. To avoid burning through filament too quickly, limit the size of each shelter - my example is 60 mm wide, 60 mm deep, and 75 mm high. Once every game is complete, host a game day and watch students' learning soar! Want to add an extra challenge? Release two or more Ozobots onto the game board at once! Duration: This lesson spans 5-10 sessions. Preparation: No design preparation is needed for this lesson, but it assumes students are familiar with Ozobots and their basic function. References: For more STEM-oriented lesson ideas involving Ozobots, check out their website (http://ozobot.com/stem-education/stem-lessons). Rubric & Assessment: See the suggested assessment ideas page included in the Thing Files above for more information. Handouts & Assets: The game board I use is included above with the Thing Files.
With this file you will be able to print Ozobot Shelters with your 3D printer. Click on the button and save the file on your computer to work, edit or customize your design. You can also find more 3D designs for printers on Ozobot Shelters.
