Overwatch Lucio Blaster
thingiverse
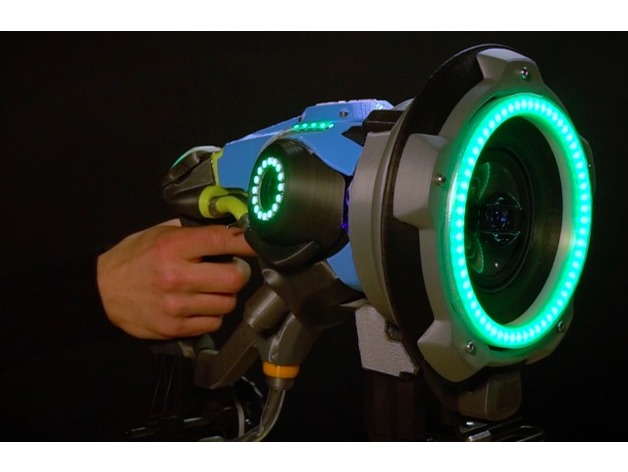
Overwatch Lucio Blaster by Adafruit This is an advanced preview release, more detailed build instructions being developed at this time. Build your own functioning Lucio blaster with background music, sound effects, and lights! https://www.youtube.com/watch?v=x5D7CIrJA88&index=17&list=PLjF7R1fz_OOVvPjQU_KXsLPVB0pG_kdxW This model is part of the Adafruit Learning System, check out these links for more information on how to build your own. https://learn.adafruit.com/overwatch-lucio-gun-pt1/circuit-prototyping?view=all https://learn.adafruit.com/overwatch-lucio-gun-pt-2/blaster-circuit-integration?view=all Post-Printing More detailed instructions being developed for the Adafruit Learning System part 3 guide, but if you're ready to get started: After printing your parts, remove any support material and then dry fit the parts as shown in the exploded drawing. Most parts can be attached with glue -- Goop or A6000 work well, except a few parts that you can screw together using M4 screws and threaded brass heat-set inserts.
With this file you will be able to print Overwatch Lucio Blaster with your 3D printer. Click on the button and save the file on your computer to work, edit or customize your design. You can also find more 3D designs for printers on Overwatch Lucio Blaster.