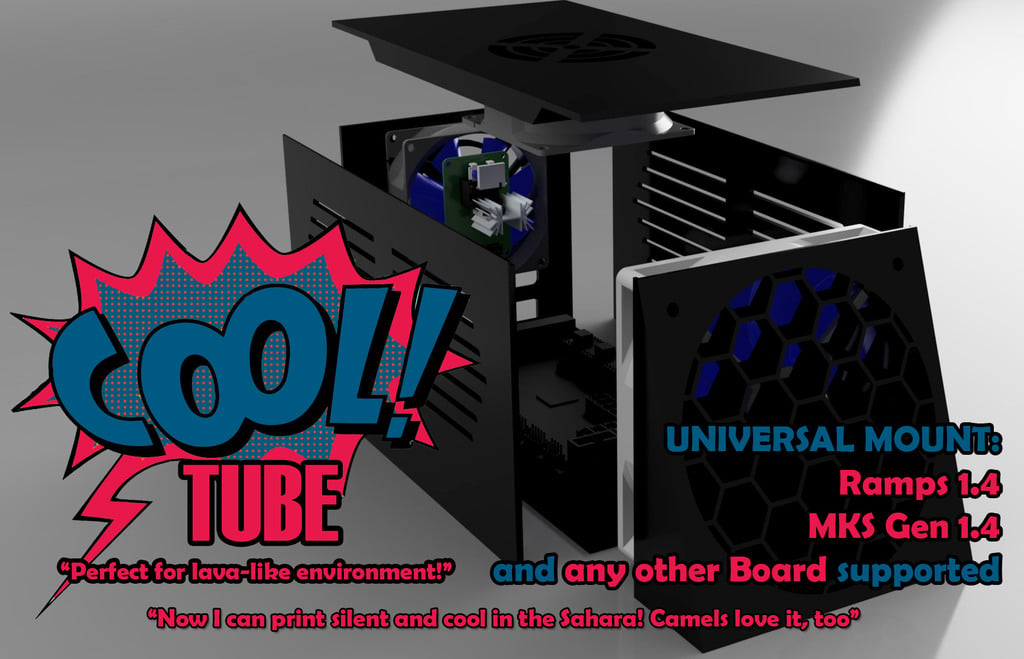
Overpowered Cooltube Board Case Holder Mount (Ramps, MKS Gen 1.4,...) with Octopi-Touch Holder
thingiverse
Silent and cool - no noisy mini fans! Effective airflow is achieved with this case, despite 29°C/84.2°F outside temperatures and 20°C/68°F inside temperatures. The Mosfet is directly mounted to the fan grill, keeping it cool and allowing the blue LED to shine through. A boardmount for MKS Gen/RAMPS 1.4 and a "universal" one for all other boards are included. An opening for the USB port is also provided, as you'll need it for Octoprint-Touch (and can put that ugly LCD oldschool thing in the trash). Included holder for Raspberry Pi and 3.5" HDMI Screen with touchfunction running Octopi/TouchUI. Overpowered - nothing will bring this case to its knees! What other users say: "I hate screws! Overpowered Cooltube revives the modeling feeling of glue back to life! Thanks Overpowered Cooltube!" "WTF - Parts attached outside? Although I have nothing to hide, but I always want my stuff cold, stylish and packed in a box! Thank you Overpowered Cooltube! My next child carries your name!" Fun aside, in times of octoprint and affordable HDMI touch TFTs (in combination with a Raspberry Pi) I personally need nothing else. If mounts for other boards are needed, just let me know in the comments). WHAT YOU NEED: * Industrial glue, * 2 x 80 mm fan (Noctua NF-R8 Redux 1800 recommended, ~ 17 DBA) * 1 x 120mm fan (Noctua NF-S12A FLX recommended, ~ 17 DBA) * 4 x screws for the board-mount INSTRUCTIONS: 1. For MKS GEN 1.4 boards, print BASE_MKS_GEN_1_4.stl and LEFT_MKS_GEN_1_4.stl OR For RAMPS 1.4 boards, print BASE_RAMPS_1_4.stl and LEFT_RAMPS_1_4.stl OR For any other boards print BASE_UNIVERSAL_MOUNT.stl and BASE_UNIVERSAL_MOUNT_SCREWHOLES.stl and place the holes as you need 2. Print FRONT.stl, RIGHT.stl, TOP.stl, BACK.stl and MOSFET_HOLDER.stl 3. (optional) Print "FIXER.STL", number at will 4. Attach the fans to FRONT, BACK and TOP 5. Combine all parts except TOP.stl 6. Mount your board, do the cable-work... 7. Admire your overpowered cooltube! For the ultimate, up-to-date, HDMI with touch solution (you will love it): 1. Buy a Raspberry Pi 3, with a Micro SD Card, Micro USB Power Supply and recommended, a LAN cable (alternatively it is also on the onboard WLAN) 2. Buy a 3.5 "HDMI Touch TFT (eg https://amzn.to/2xXUTe6) 3. Download Octopi https://octoprint.org/download/ and write to Micro SD Card - put it into the Raspberry Pi and start/configure 4. Install Touch UI https://plugins.octoprint.org/plugins/touchui/ 5. Print the "OCTOPRINT_PI3_HDMITOUCH_HOLDER.stl" 6. Just stick the Pi3 into the pins - done! You will never miss that big and ugly old LCD printer screen! Final words: I know this model can be improved even further, the power supply can also be installed inside because there is enough space (the lid only needs to be modified a bit), but I recommend leaving it outside. On an ugly reprap display I also deliberately omitted, since I use octoprint touch (with a osoyoo / kedei 3.5 "HDMI touch TFT https://amzn.to/2IivrUA). In addition, any other board can be installed, only the holes need to be adjusted. Enjoy!
With this file you will be able to print Overpowered Cooltube Board Case Holder Mount (Ramps, MKS Gen 1.4,...) with Octopi-Touch Holder with your 3D printer. Click on the button and save the file on your computer to work, edit or customize your design. You can also find more 3D designs for printers on Overpowered Cooltube Board Case Holder Mount (Ramps, MKS Gen 1.4,...) with Octopi-Touch Holder.
