Oven Door Latch
thingiverse
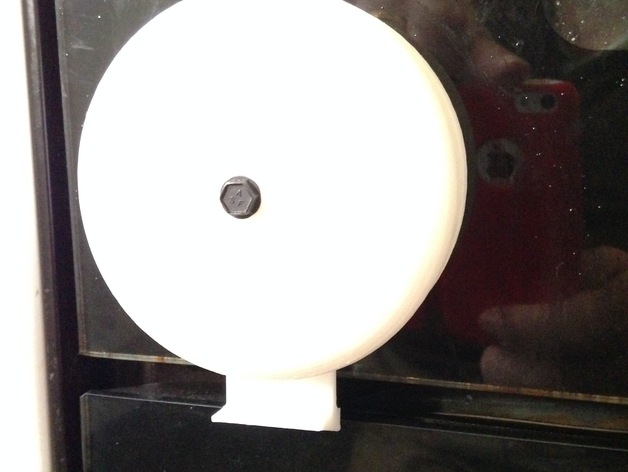
This project was born out of necessity. One day I found my 15-month-old granddaughter opening the oven door, which led to a series of actions designed to prevent accidents. The oven has a split design with two units: a main oven on the bottom and a smaller grill-like oven on top, both integrated into the kitchen base units. The latch that secures the oven door is cleverly located on the lower edge of the top oven door, where it can easily be lifted to release the lock. To open the door, simply rotate the top piece of the latch clockwise; this will lift the slide that holds the door shut and allow you to access the contents of the oven. Closing the door is equally simple - once you've secured the slide in its locked position by rotating the top piece counter-clockwise, the latch ensures that it stays that way. If you find yourself constantly opening and closing the door, there's a feature built into future versions that prevents the child from accessing the lock without first pressing a button on the side. The design includes an additional security feature: a plate attached to the top oven door with strong double-sided tape or even glue to ensure it stays firmly in place. I've had my prototype installed for weeks now, and so far, my granddaughter hasn't been able to dislodge the latch or open the door.\ \ Instructions To create this device, start by printing out the parts required - make sure they are printed at their best quality. Carefully sand each part, especially those that need to fit together smoothly. The slide fits into a slot on the base; attach it carefully and add a spring for extra support. Once dry, place the plate above the slide, making sure it clicks securely into its designated slots (along both sides and through the middle). When attaching this part, take care not to trap any parts or prevent proper function. One notable difference exists between my design and those that came before: instead of fixing the pin within the top, I've had to glue it there using a similar process. Here's how to do it: start by applying glue to the pin, then carefully insert it into place in the base while avoiding direct pressure on the glue itself - let it set completely. Once fully set, you should have around 0.5mm of clearance between the pin and base when they're both properly assembled; be sure not to apply too much force during assembly. Attach a retainer to the underside of the base where it touches the pin. Be cautious with glue application here as well - avoid trapping parts or compromising smooth operation. Install the latch according to the provided images, ensuring all pieces align and fit together as designed
With this file you will be able to print Oven Door Latch with your 3D printer. Click on the button and save the file on your computer to work, edit or customize your design. You can also find more 3D designs for printers on Oven Door Latch.