Otto DIY eXplorer car robot
prusaprinters
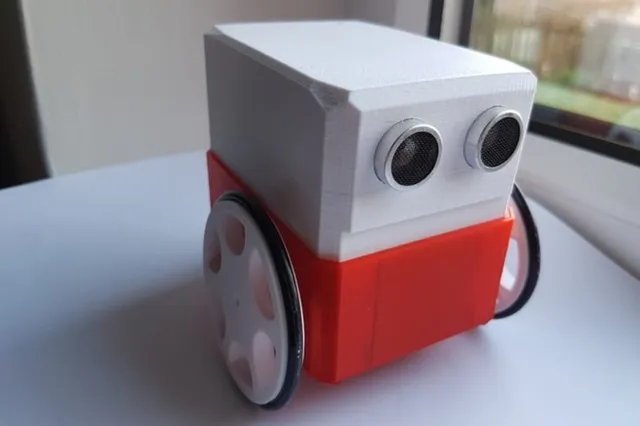
OttoDIY eXplorer robot with 48:1 DC Motors List of parts:I used a 3.7V 1200mAH LIPO and a new DC MOTOR driver NANO SHIELD PCBYou can use a Arduino NANO with I/O shield and a L9110S H-bridge Dual driverSmall female to female jumper wiresBuzzer2 x DAGU 48:1 DC Motors (yellow DC motors with right-angled gearboxes)HC-SR04 Ultrasound sensor moduleMAX 7219 LED matrix module2 x Screws - small self tapping screws to secure PCB in place4 x Screws - 3mm x 15mm screws with 3mm nuts (to secure castor and motor clamp in place)You can use a 3.7V 1200mAH LIPO and a 5 volt DC to DC booster Wiring:The HC-SR04 Ultrasound sensor is connected (TRIG to pin 8 and ECHO to pin 9)The MAX 7219 LED matrix is connected (CLK to pin 11, DIN to pin 12, CS to pin 10)The BUZZER is connected (pin 13),The Left Motor PWM pin is pin 6,The Left Motor DIRECTION pin is pin 2,The Right Motor PWM pin is pin 5,The Right Motor DIRECTION pin is pin 4,Printed with 3 perimeter shells and 2 top and bottom shells to give it some rigidity.You will need to print TWO wheels, they should push onto the motor shaft and can be secured with a very small screw.We invested lots of time and resources to provide open source code, software and hardware, please support this project by just giving us a ❤ Like and share and you are welcome to be a part of this friendly community of robot builders, teachers and makers. Join today our Otto Builder community
With this file you will be able to print Otto DIY eXplorer car robot with your 3D printer. Click on the button and save the file on your computer to work, edit or customize your design. You can also find more 3D designs for printers on Otto DIY eXplorer car robot.